Note: This deployment method is part of our premium offering. To learn more
about leveraging this, please reach out to sales@opal.dev.
- SAML authentication is not supported. Authentication will only be possible via OIDC, and you will need to provide your own OIDC Provider (more details below).
- Opal’s support team will have a slower path to turn features on and off for you. While we normally use LaunchDarkly for this, you will instead have a replacement service called RelayProxy that you may need to manually update to a new image to bring in new flag values.
- Opal’s support team will have less ability to help you debug issues, as we won’t receive any logs or metrics from your instance.
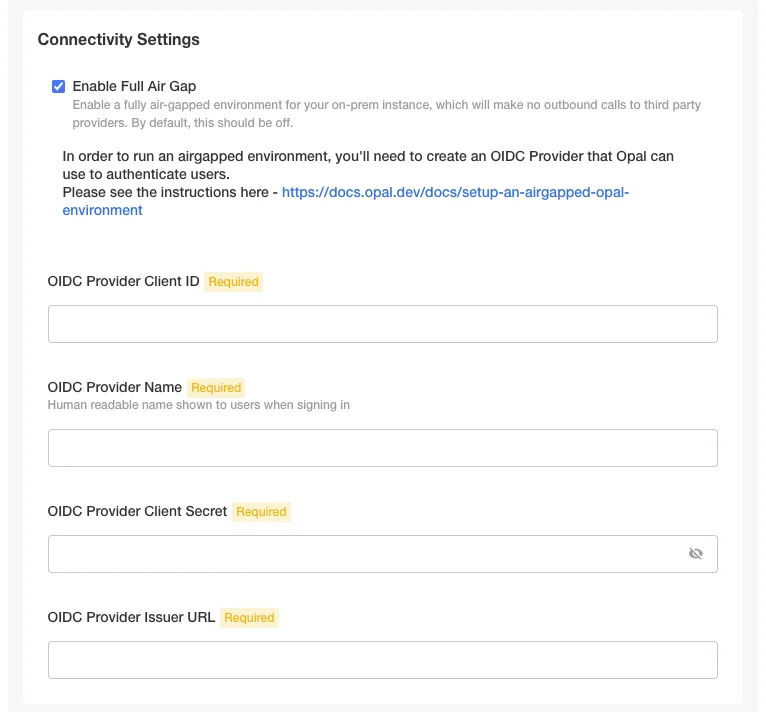
Prerequisite: Set up an OIDC Provider
Opal by default uses an OpenID Connect flow to authenticate users. Normally, we use Auth0 as the auth provider for this; in an airgapped environment, you will need to create your own OIDC provider and integrate it with your instance of Opal. You should create an OIDC Provider in your Identity Provider, or another similar system that your users will be able to authenticate with. We will require the following from your OIDC Provider:- Support for the basic
authorization_codegrant type - Support for the following scope:
openid email profile - The following allowed sign-in redirect URIs:
https://<opal hostname>/callbackhttps://<opal hostname>/callback/oidc
- Your sign-out redirect URI set to
https://<opal hostname>/sign-in
/authorize call made to it.
CLI-Specific OIDC Provider
If you would like to use our CLI, you will need to create a second OIDC provider in the same IDP. For this application, it should:- Support the same
authorization_codegrant type and the sameopenid email profilescope - Support PKCE
- Not require authenticating the client via client secret.
- Allow the sign-in redirect URL
http://127.0.0.1:49152/callback. Our CLI runs a local webserver to implement the the Authorization Code flow, and that flow will require redirecting users to this local port.
Deploying your Airgapped Environment
Before deploying your instance of Opal, you will need to setup infrastructure - see either these instructions for AWS, or these instructions for GCP. Additionally, you will need to create the following image repositories:Airgapped Installation with KOTS
Our distribution platform Replicated uses KOTS to provide an admin portal that simplifies configuring and updating your instance of Opal. This approach will require running several containers provided by Replicated; however, your cluster will still be able to pull images from your own private image repositories. To start, you’ll need to create a few additional image repositories: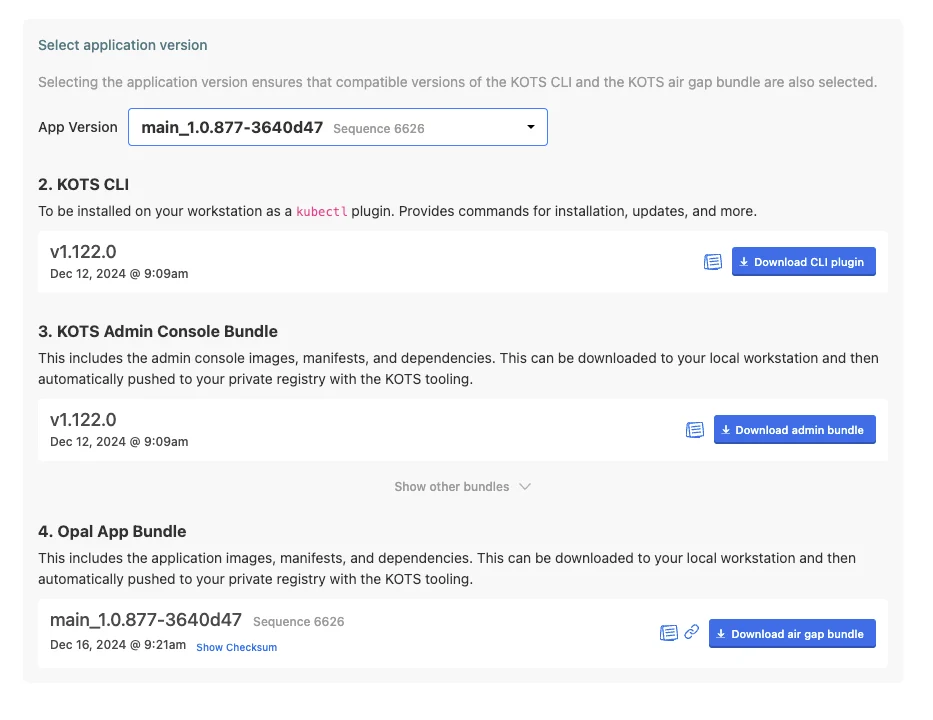
Airgapped Installation with Helm
You can avoid running KOTS and directly install Opal as a helm chart. This will require more work to configure Opal correctly, but will allow greater control over the resources you deploy. Visit your download portal in Replicated and select the “Existing Cluster with Helm” installation option. It’ll look like this: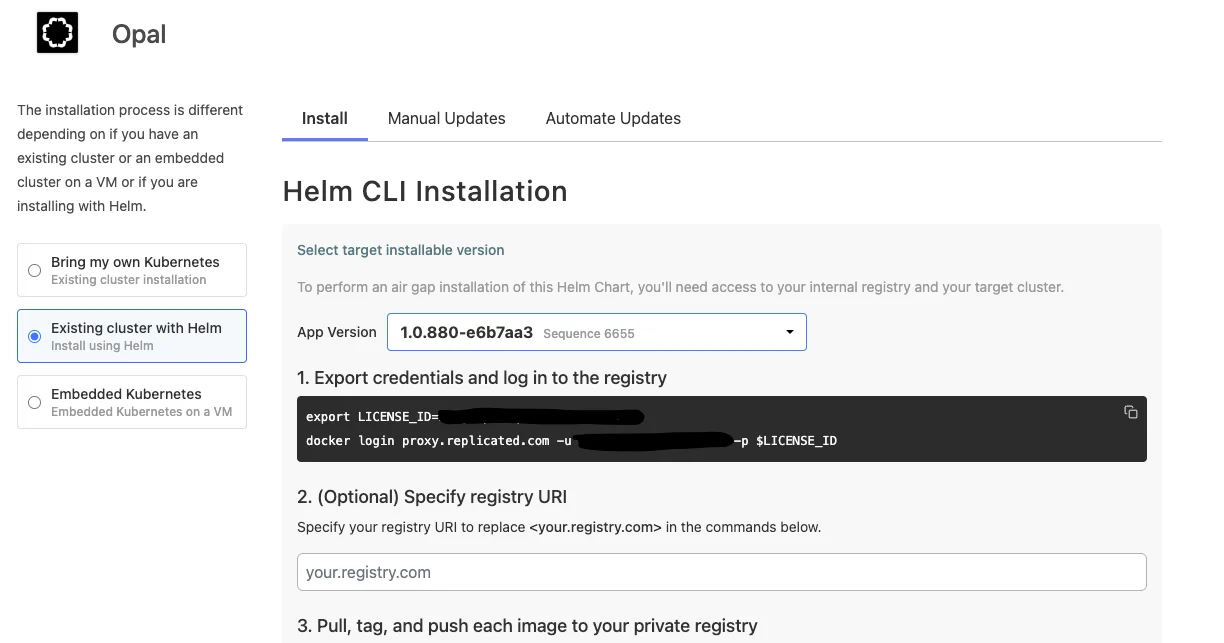
values.yaml file for Opal’s helm chart, refer to the annotated values.yaml below for which fields you need to set, and how to set them. Fill in anything with <angle brackets>