- Infrastructure setup: GKE cluster, Cloud SQL Postgres instance, and TLS certificate
- Deploy Opal admin console: Deployed on the GKE cluster and used to configure your Opal deployment and manage updates
- Configure and deploy Opal: Deployed on the GKE cluster
1. Infrastructure Setup
Deployment checklist
The following is an overview to help plan for the deployment. We expand on each item below.- GKE cluster is provisioned.
- SQL database is provisioned.
- The hostname to reach Opal has to be decided. This cannot be updated later.
- The TLS certificate matching the desired hostname is available in the Load balancing components.
Create a Kubernetes cluster
Opal installs into an existing Kubernetes cluster. This cluster must meet the following requirements:- Intel Processor
- Min nodes: 2
- Min total CPU: 4 cores
- Min total RAM: 30 GB
- Kubernetes version: 1.27+
Provision Cloud SQL database
For production deployments, we strongly recommend that you use an external PostgreSQL database provisioned in Cloud SQL, in order to have automatic backups. Your SQL instance should meet the following requirements:- Minimum PostgreSQL version: 15
- Minimum storage: 50 GB
- Minimum instance size: 2 cores / 8 GB (if more than 1,000 users: 4 cores / 16 GB)
- Recommended: enable multiple zones for high availability
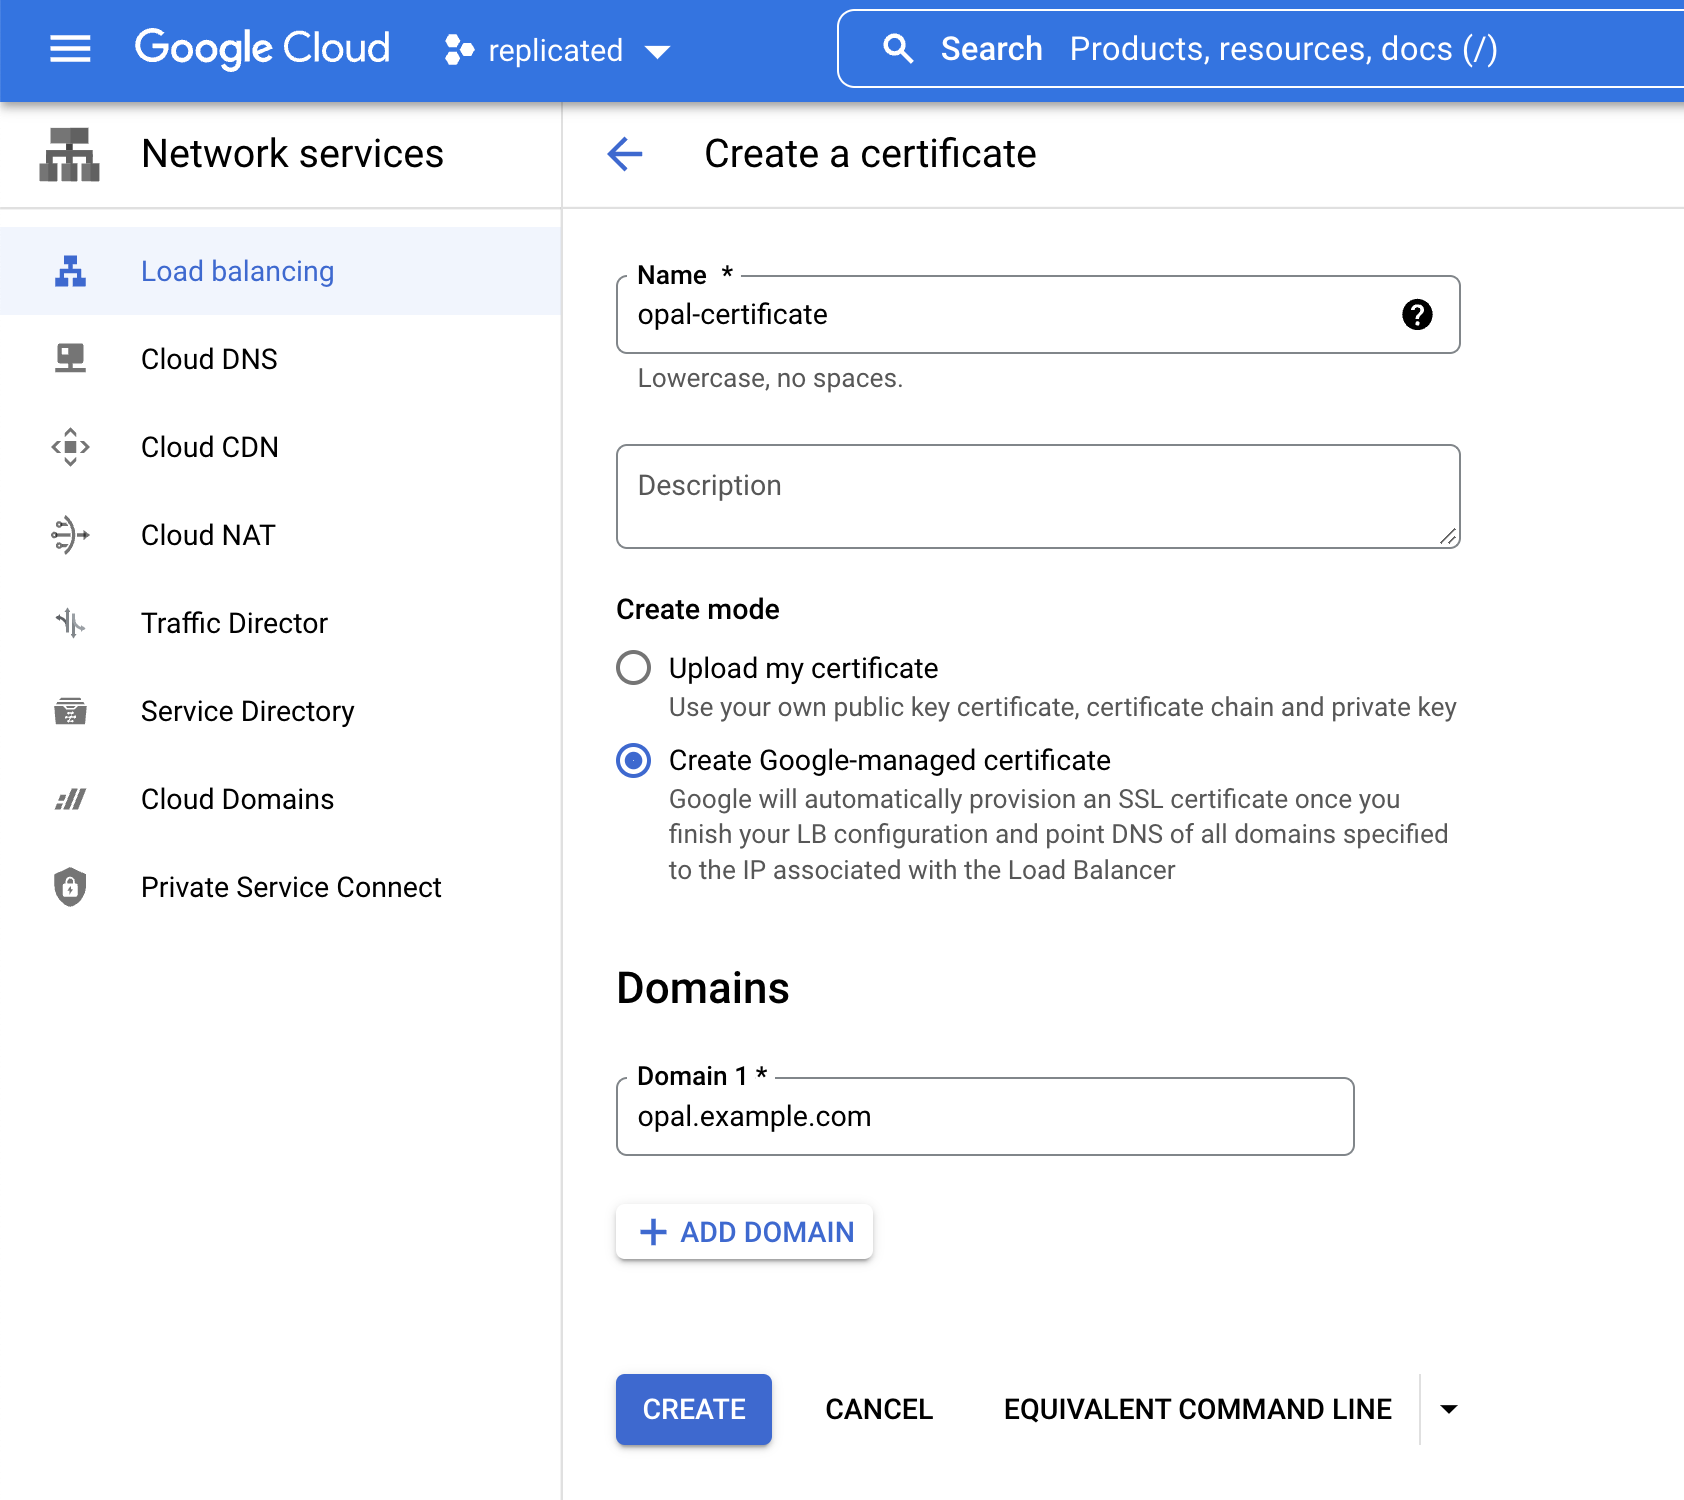
TLS certificate
Opal must be used with TLS. To create a Google-managed certificate, follow the steps below:- Go to Load balancing from the search bar
- Click the load balancing components view
- Click Certificates
- Click Create SSL Certificate, then fill out the form like so and click Create:
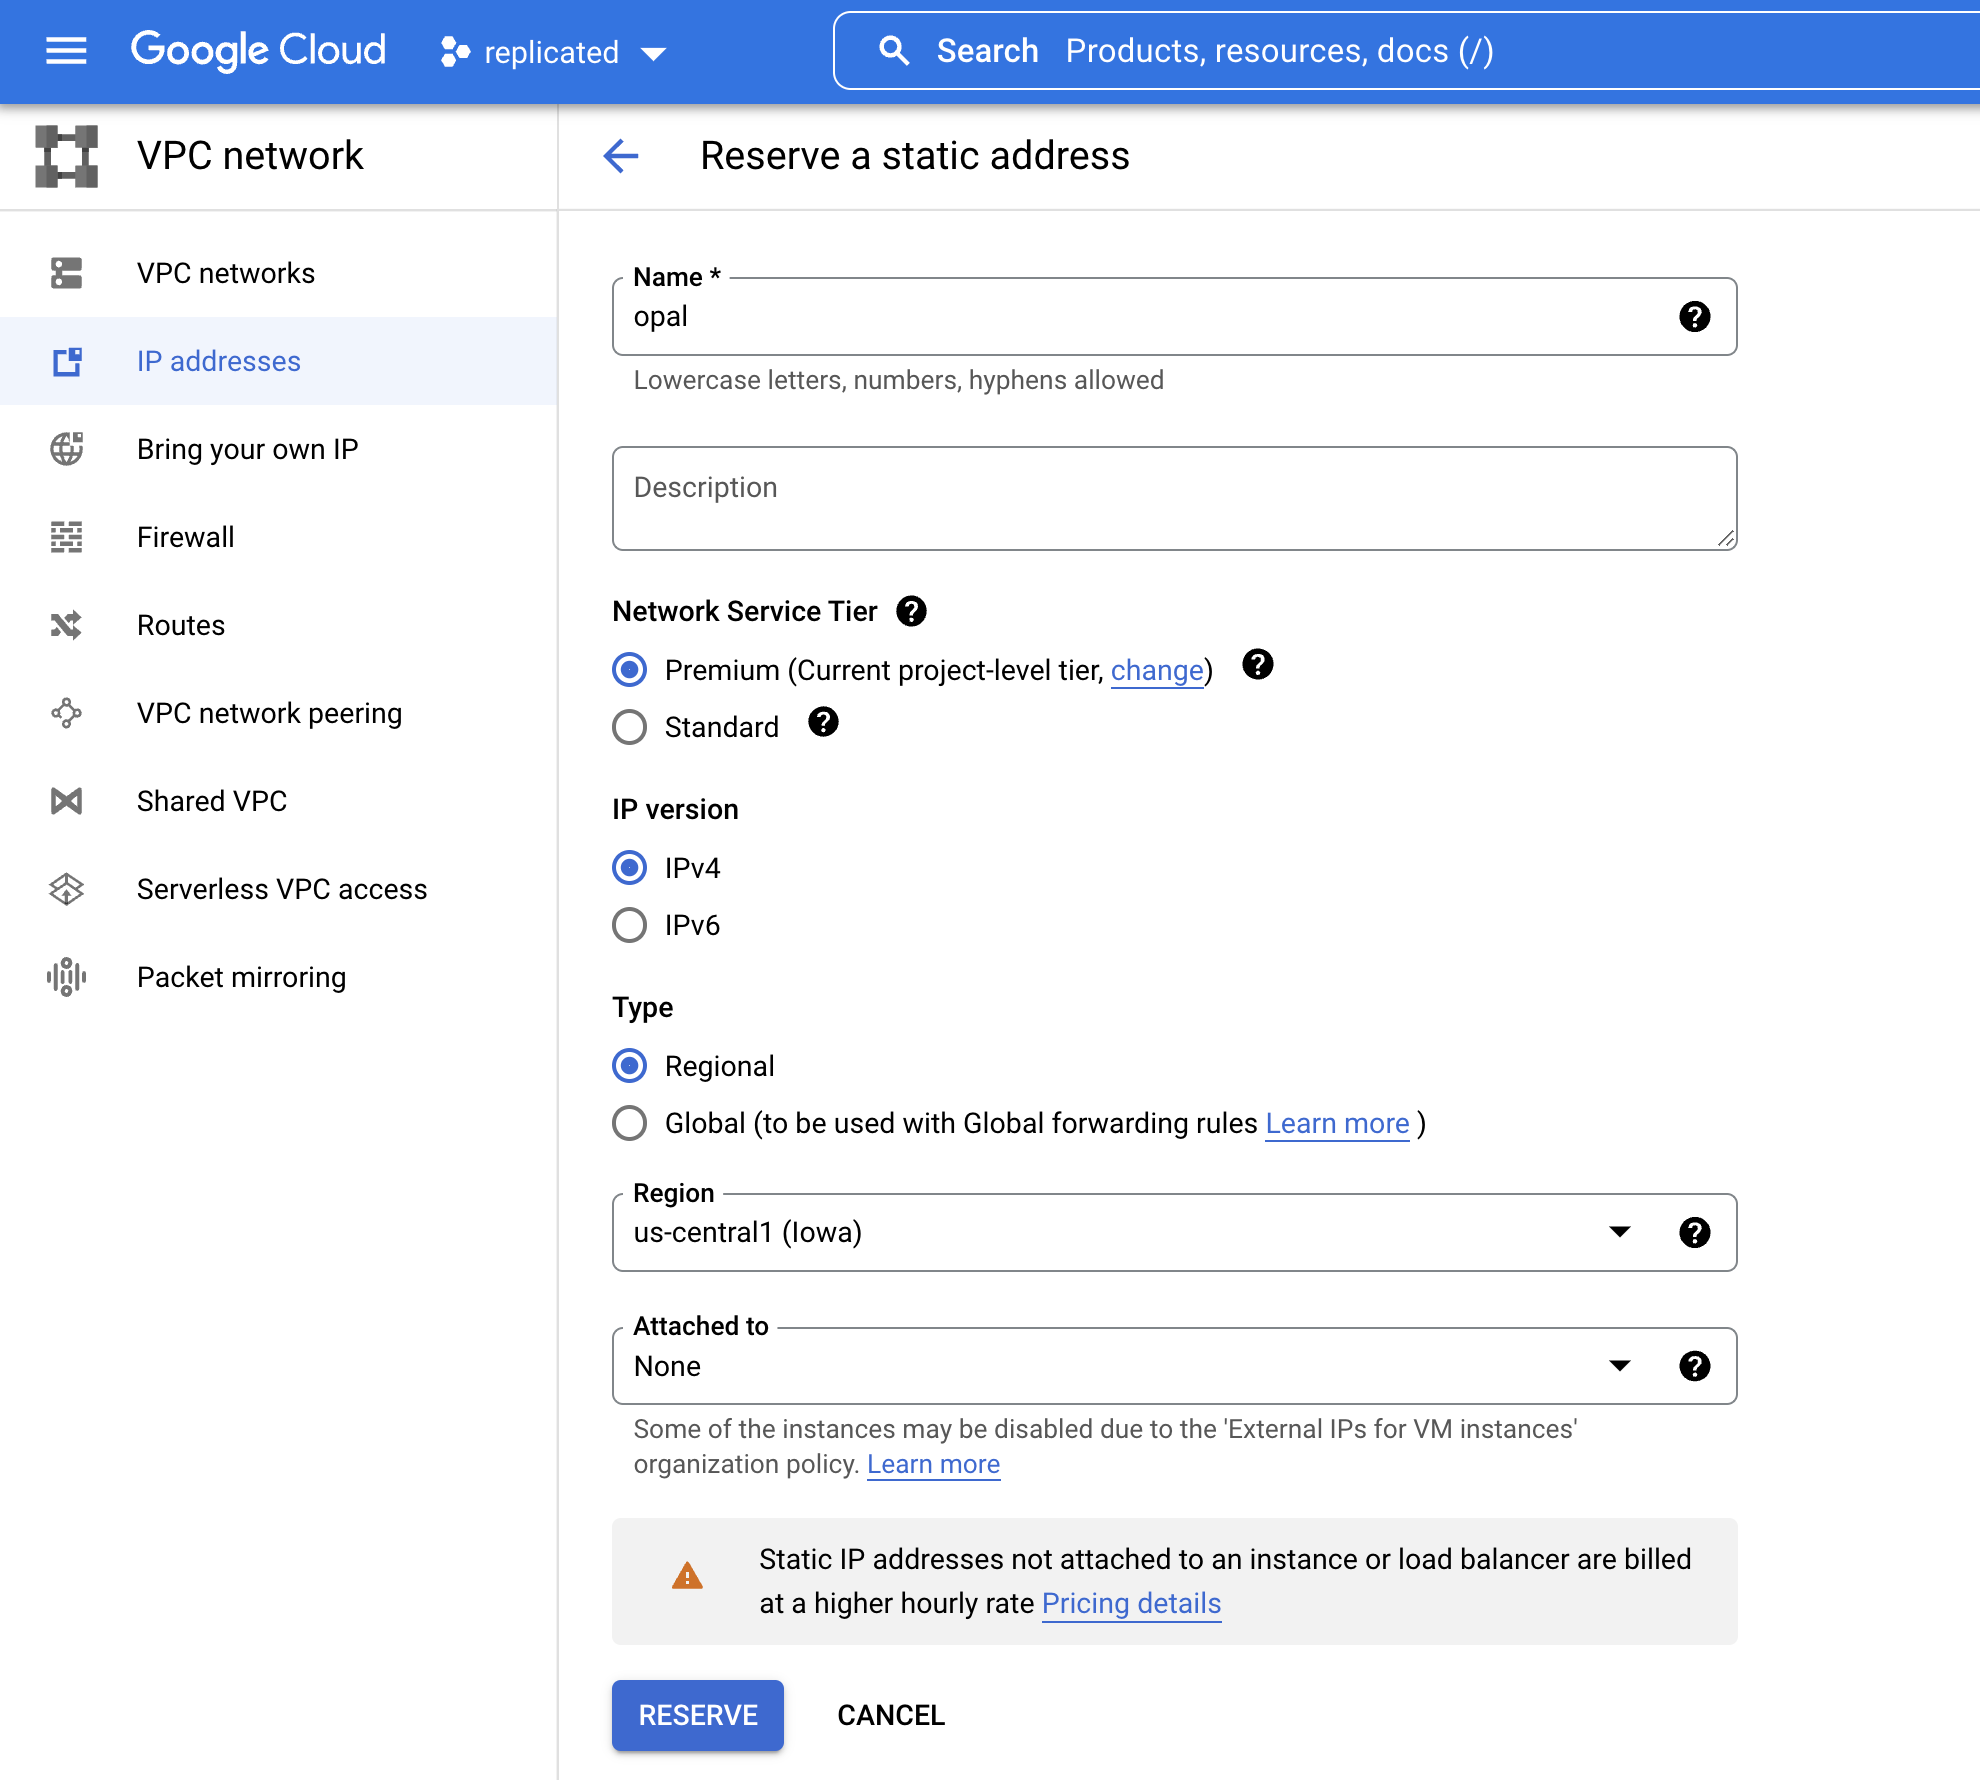
Static IP address
We’re going to create a static IP address so that traffic can be routed through the load balancer.- Go to IP addresses from the search bar
- Click Reserve external static address
- Fill out the form like so, then click Reserve:
2. Deploy Opal admin console
We use KOTS to package and monitor private cluster deployments of Opal. Specifically, it provides an admin console for configuring your Opal deployment and managing updates.If you would prefer to manage deployments yourself, you can alternatively install opal using helm.Otherwise, proceed with the instructions below for setting up with KOTS.
kotsadm-* pods. Once installed, you should see the following pods deployed as well as a URL for accessing the Opal admin console via port-forwarding.

If you kill your port-forwarding to the admin console, you can set it up again using this command:The admin console password may be reset with this command:
3. Configure and deploy Opal
When you access your admin console, you’ll be prompted to upload a license. This should have been provided by your Opal representative. Next, you’ll be asked to configure your Opal deployment: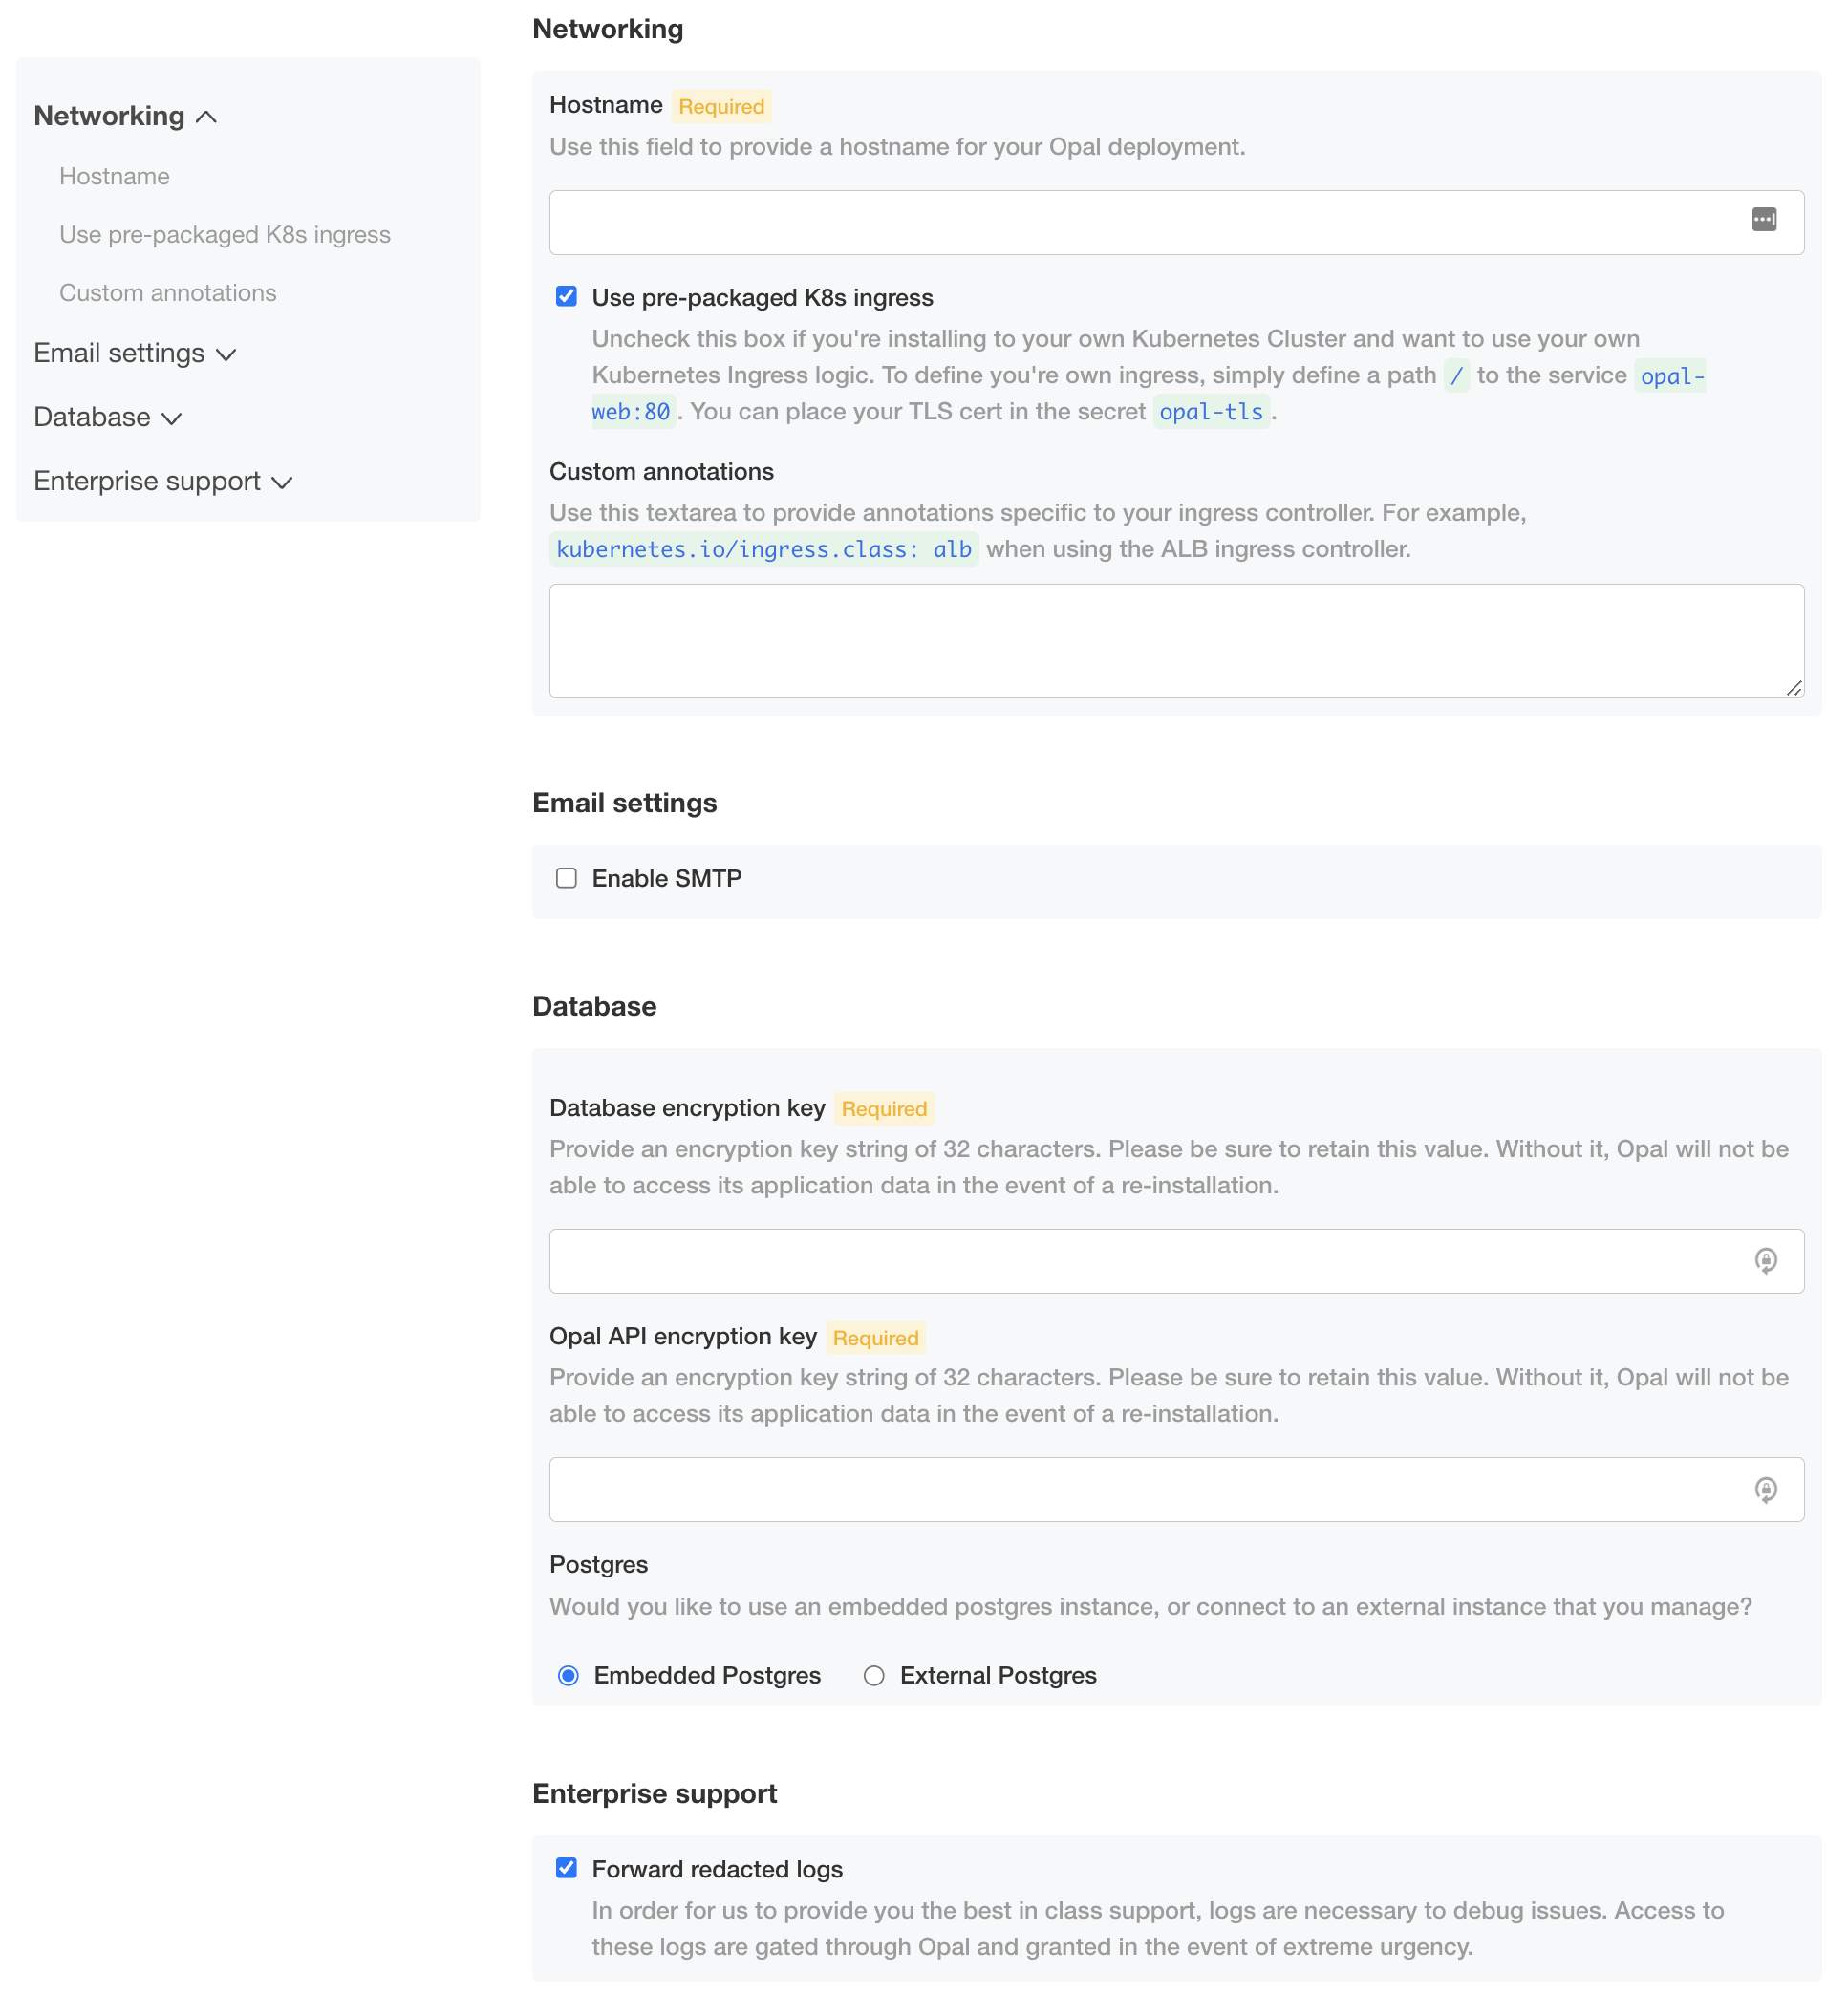
- Hostname: Enter the hostname used to access the Opal application. This cannot be updated later.
- Ingress: If using the pre-packaged ingress, enter the desired annotations. Here is an example using the names of the TLS certificate and the static IP address created above:- Custom annotations:
- Postgres: Select External Postgres and point it to your RDS instance.
- Redis: Select Embedded Redis.
- Database encryption key: Generate a 32-character string for encrypting sensitive data, like 3rd party API tokens, in your database.
- Opal API encryption key: Generate a 32-character string for encrypting generated Opal API tokens.
- Email settings: You may enable SMTP for sending email notifications and use the SMTP provider of your choice. If you use Google Workspace’s SMTP, you’ll be required to add the public IP addresses of the Kubernetes nodes to the allowlist.
