Webhooks
Learn how to configure webhooks to push changes on access requests.
In this guide, you'll learn how to use Webhooks to integrate a custom app with Opal. See the Custom Integrations overview to learn when to use webhooks.
Setup
First, under Configuration > Settings in the left panel, go to Webhooks, fill out the URL for your webhook endpoint, and select Save Changes.
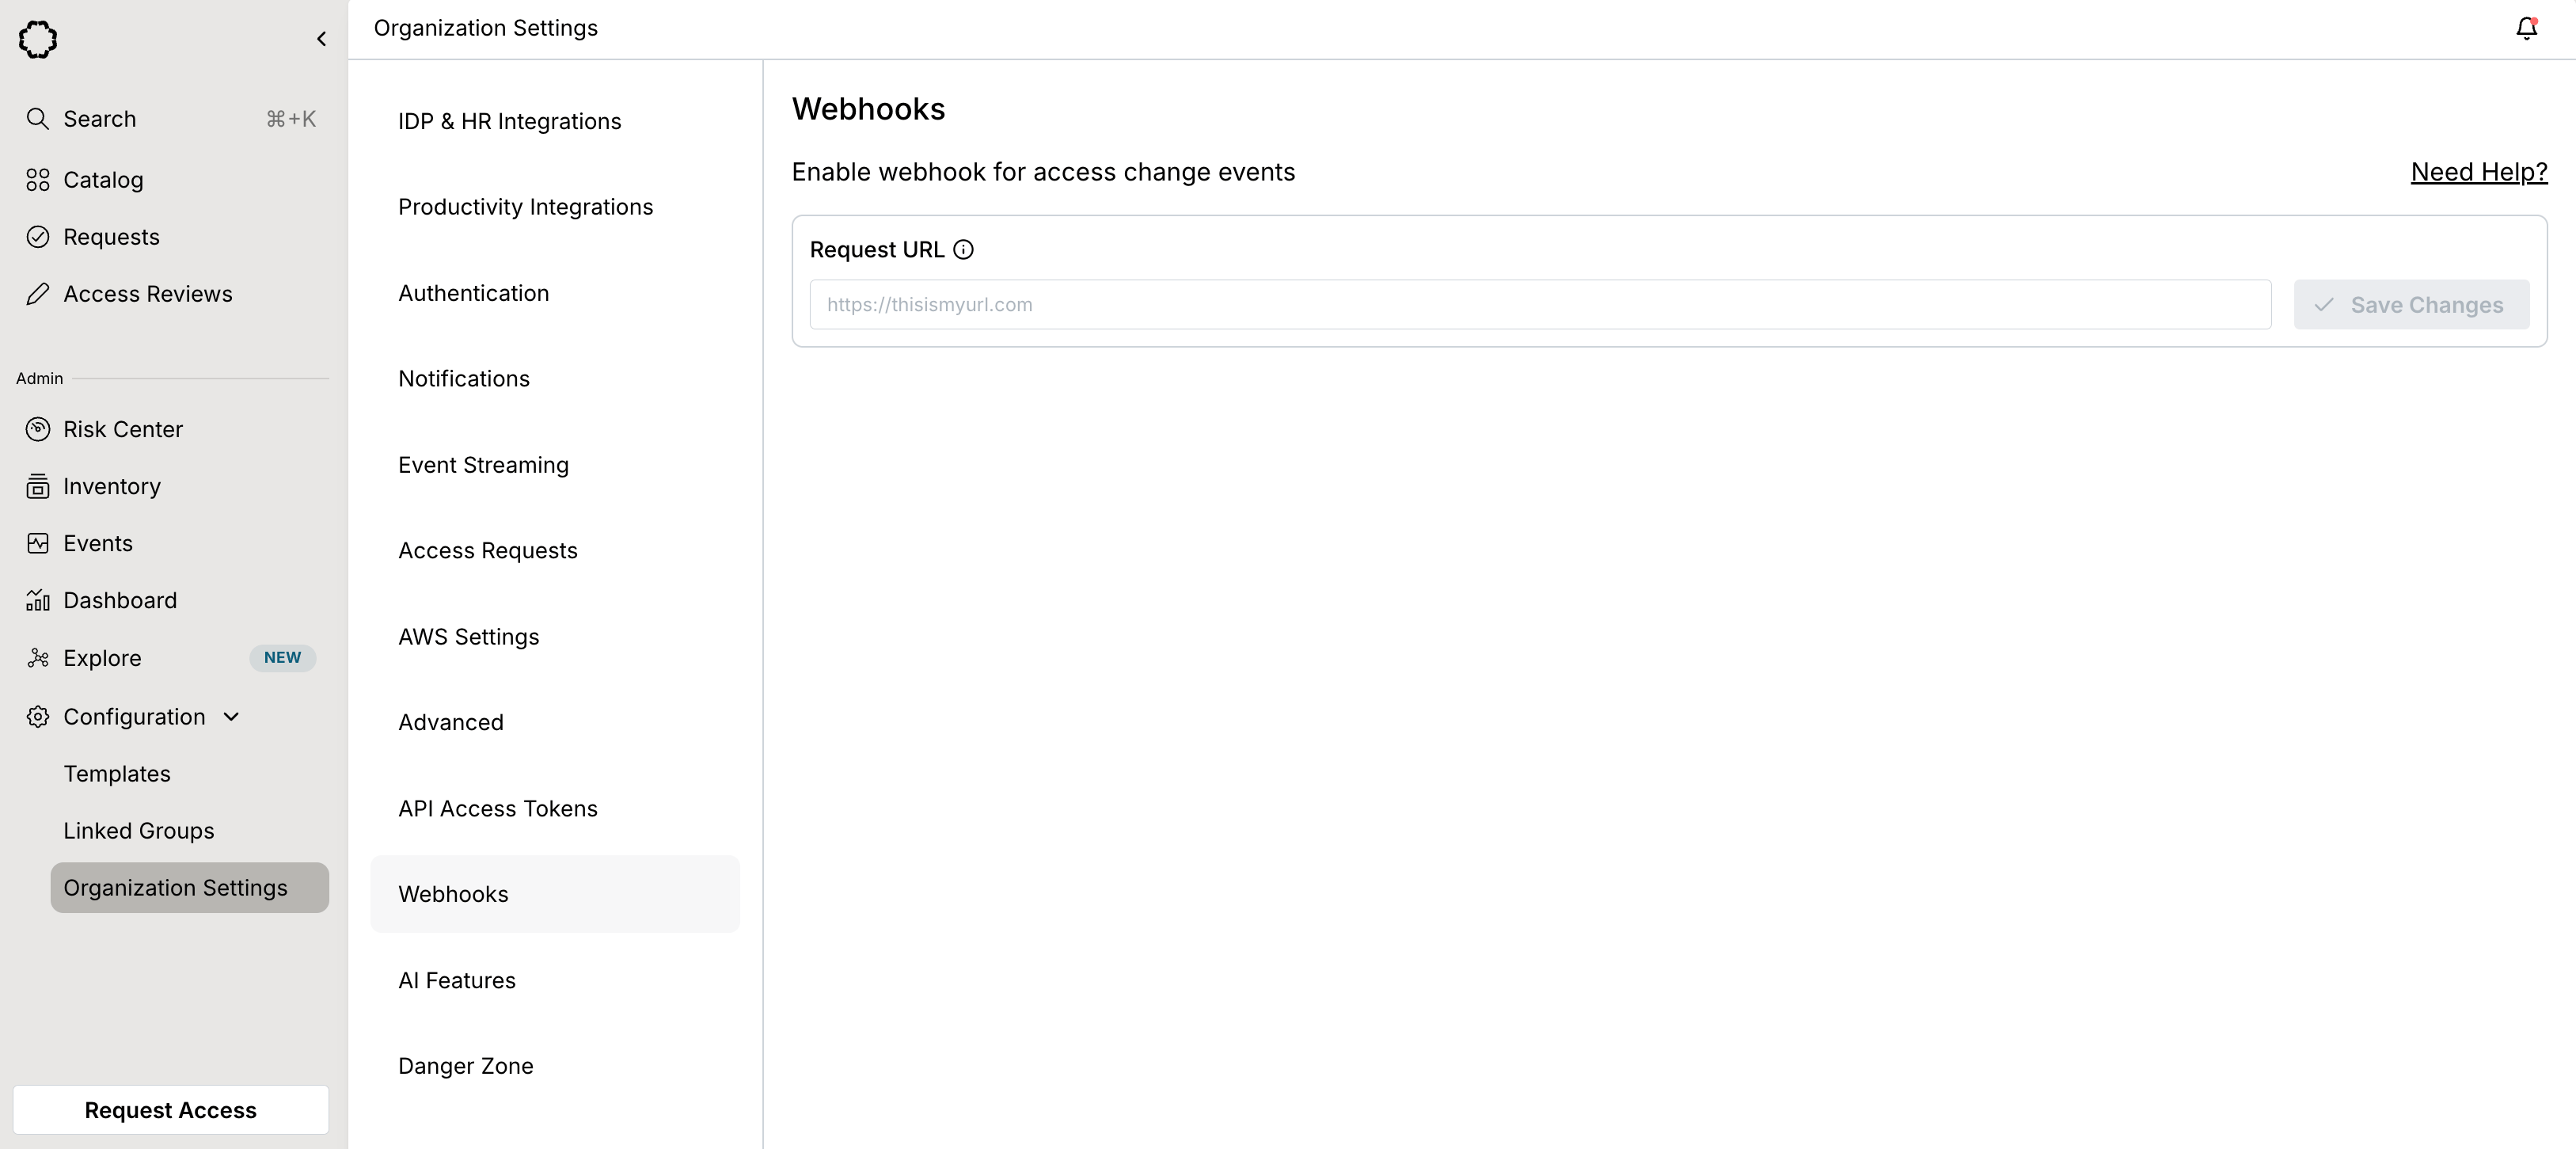
A signing secret will be generated. Your system should use this secret to validate the webhook's origin. Please see this section for more details.
Next, go to the custom app(s) that you wish to configure webhooks for, and toggle Webhook for access changes to Enabled.
The webhook endpoint is expected to reply to the HTTP POST request with an HTTP 200 response within 3 seconds of receiving the payload.
Payload samples
Opal sends different payloads depending on the event type. The following event types are supported.
Add users to resource
{
event_ts: 1643355931,
organization_id: 'eec5dcd9-fb0a-4726-b283-4379b524a772',
events: [
{
event_type: 'USER_ADDED_TO_RESOURCE',
resource_type: 'CUSTOM',
user_id: 'john.smith@company.dev',
resource_id: '0eb35db24007c8148',
access_level: 'admin'
}
]
}
Remove users from resource
{
event_ts: 1643355980,
organization_id: 'eec5dcd9-fb0a-4726-b283-4379b524a772',
events: [
{
event_type: 'USER_REMOVED_FROM_RESOURCE',
resource_type: 'CUSTOM',
user_id: 'john.smith@company.dev',
resource_id: '0eb35db24007c8148',
access_level: 'admin'
}
]
}
Add users to group
{
event_ts: 1643346009,
organization_id: 'eec5dcd9-fb0a-4726-b283-4379b524a772',
events: [
{
event_type: 'USER_ADDED_TO_GROUP',
group_type: 'CONNECTOR_GROUP',
user_id: 'john.smith@company.dev',
group_id: '00g1835ro5hxRmpel5d7'
}
]
}
Remove users from group
{
event_ts: 1643355811,
organization_id: 'eec5dcd9-fb0a-4726-b283-4379b524a772',
events: [
{
event_type: 'USER_REMOVED_FROM_GROUP',
group_type: 'CONNECTOR_GROUP',
user_id: 'john.smith@company.dev',
group_id: '00g1838z8y1VJcoTG5d7'
}
]
}
Add resources to group
{
event_ts: 1643356058,
organization_id: 'eec5dcd9-fb0a-4726-b283-4379b524a772',
events: [
{
event_type: 'RESOURCE_ADDED_TO_GROUP',
group_type: 'CONNECTOR_GROUP',
resource_type: 'CUSTOM',
group_id: '00g1838z8y1VJcoTG5d7',
resource_id: '0eb35db24007c8148'
}
]
}
Remove resources from group
{
event_ts: 1643356091,
organization_id: 'eec5dcd9-fb0a-4726-b283-4379b524a772',
events: [
{
event_type: 'RESOURCE_REMOVED_FROM_GROUP',
group_type: 'CONNECTOR_GROUP',
resource_type: 'CUSTOM',
group_id: '00g1838z8y1VJcoTG5d7',
resource_id: '0eb35db24007c8148'
}
]
}
Verify requests from Opal
Verify requests from Opal with confidence by checking signatures using your signing secret.
Opal includes an X-Opal-Signature
HTTP header on each HTTP request sent. The signature is created by combining the signing secret with the body of the request we're sending using a standard HMAC-SHA256 keyed hash.
Here is an example with Node to compute the signature using your signing secret. You can compare it against the value retrieved from the X-Opal-Signature
header.
const timestamp = request.header('X-Opal-Request-Timestamp')
const signingSecret = 'SIGNING_SECRET'
const sigBaseString = 'v0:' + timestamp + ':' + JSON.stringify(request.body)
const hmac = crypto.createHmac('sha256', signingSecret);
hmac.write(sigBaseString)
console.log(hmac.digest('hex'))
Updated 23 days ago