- Users can request time-bounded access to your Okta groups, apps, and admin roles
- Auditors can initiate access reviews that assign managers or group admins to periodically review users with long-lived access to Okta groups, apps, and admin roles
- Admins can add resources from other Opal integrations to an Okta group so an Okta group’s members can automatically gain birthright access to, for example, a GitHub repo, AWS IAM role, etc.
- All access changes are tracked in a permanent audit log that can notify a Slack channel or be exported to your favorite tools.
Supported resources
Note that the Okta integration does not support creating Okta groups, roles, or apps. Okta users can only be created through user provisioning. It also does not yet support syncing Okta API tokens nor Okta OAuth apps.
Additional capabilities
The Okta integration also supports automatic real-time sync, which syncs groups and resources as soon as they’re updated in Okta. You can also run automatic validation checks to confirm your Okta sync is working properly. The Okta integration also supports user account provisioning and deprovisioning.Real-time sync
Opal automatically enables real-time sync for Okta integrations. When access changes occur in Okta, Opal automatically syncs and reflects the change. Real-time sync includes:- New groups
- New apps
- Users added to groups or apps
- New apps added and removed to groups
Getting Started
To get started, go to the Inventory page, click + App at the top right. Then, click on the Okta Directory tile.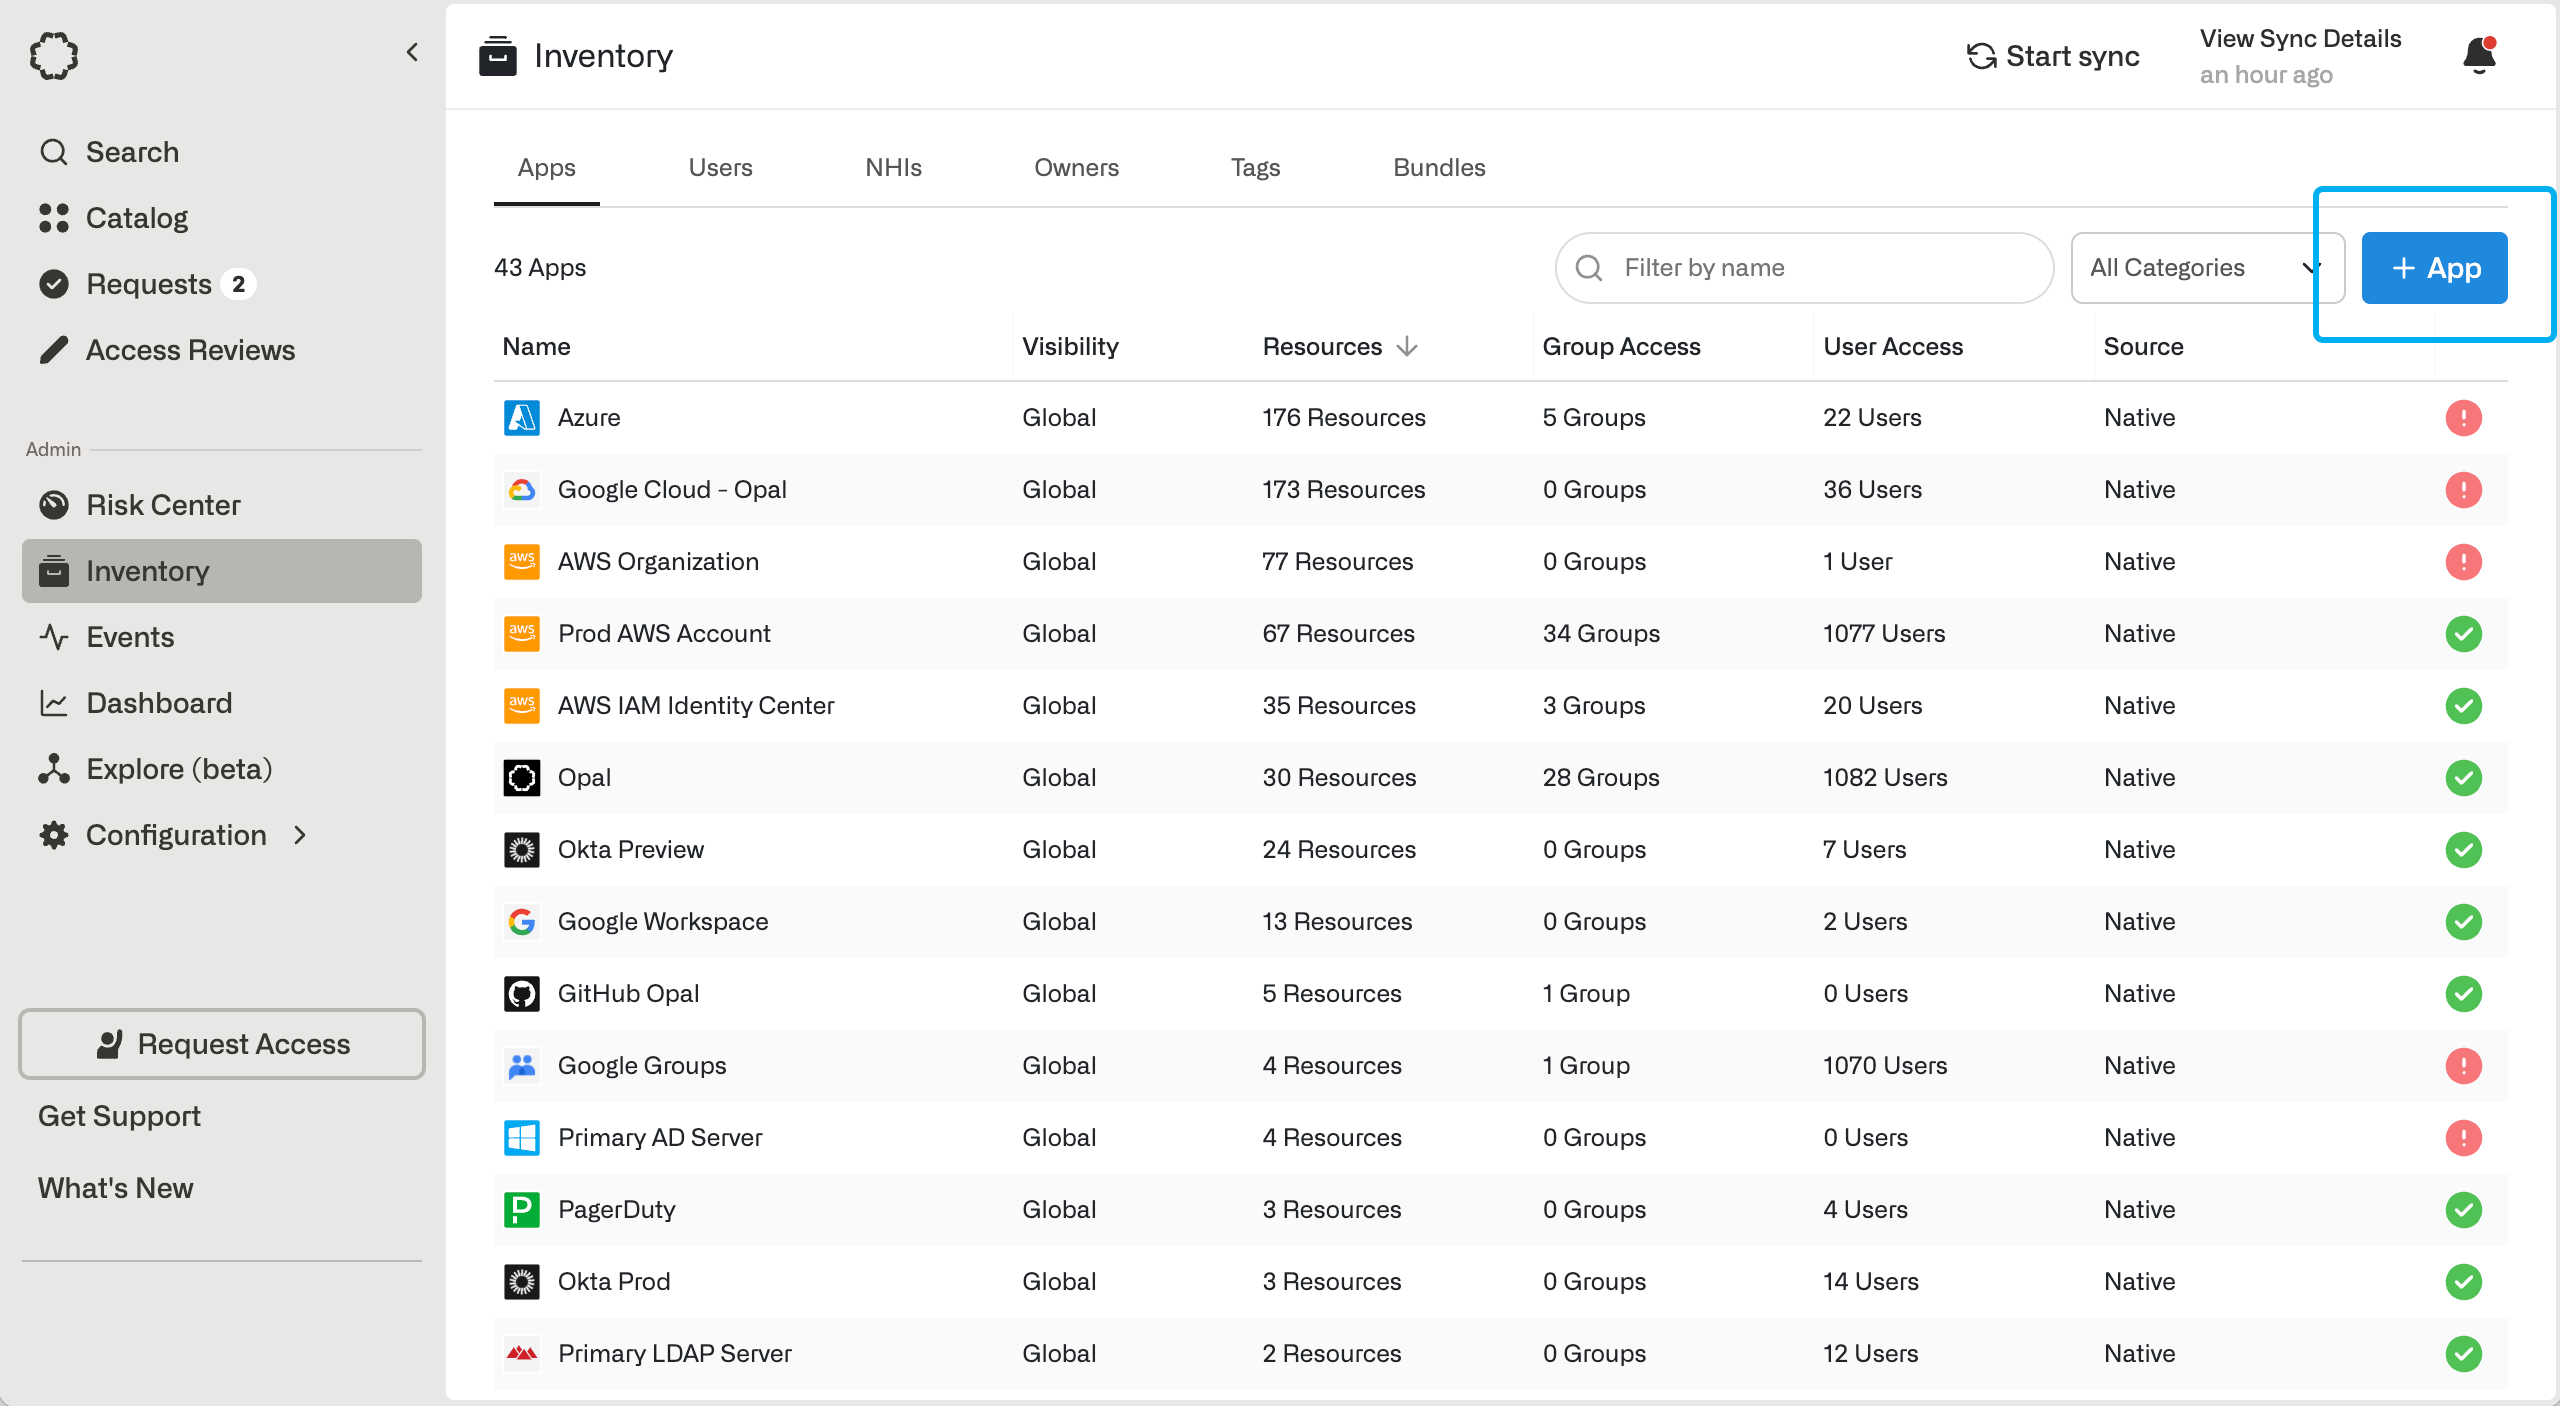
- OAuth App (recommended): Opal authenticates as a dedicated Okta API Services app using a private key. No shared user account needed.
- API token: Opal authenticates as a real Okta user account using a static SSWS token. This method is still fully supported but requires a dedicated Okta user and manual token rotation.
- OAuth App
- API Token
Opal supports authenticating via an Okta API Services app using the OAuth 2.0 Client Credentials flow. This is the recommended method for new integrations.For a full overview of the Okta OAuth for service apps flow, see the Okta guide.Assign the minimum role needed for what you want Opal to manage. Following the principle of least privilege, avoid granting Super Admin unless you specifically need Opal to manage admin role assignments.On the service app detail page, go to the Admin roles > Edit assignments and assign the appropriate role:
1. Create an API Services app in Okta
In Okta Admin Console, go to Applications > Applications > Create App Integration, and select API Services. Give the app a name (e.g. “Opal”) and save. In the app, navigate to General > General Settings. Find Proof of possession and make sure Require Demonstrating Proof of Possession (DPoP) header in token requests is unchecked.Opal does not currently support DPoP.
2. Generate a private key
In the app, navigate to General > Client Credentials and click Edit. Switch the Client authentication method to Public key / Private key and click Add key > Generate new key.In the Private key - Copy this! dialog, select the PEM tab. Save the private key and the Key ID (kid) shown alongside the key. This key will only be shown once.3. Grant OAuth scopes
On the app’s Okta API Scopes tab, grant the scopes that match what you want Opal to manage.4. Assign an admin role to the service app
OAuth scopes and admin roles are two separate and complementary authorization layers in Okta: Scopes define what actions the service app is allowed to request (e.g. read users, manage groups), while Admin roles define which resources those actions actually apply to.Both must be configured — granting scopes without an admin role causes Okta to accept the credentials and issue a token, but API calls will return empty results with no error.
Okta also supports custom admin roles that let you scope permissions to specific resource sets rather than granting a broad built-in role. A custom role with the “Identity and Access Management” resource set is accepted by Opal as equivalent to Super Admin for admin role management.
Opal verifies the admin role assigned to the service app as part of its validation checks. This verification itself requires the service app to have Super Admin or a custom role with IAM permissions. If the service app has neither, Opal will show a warning that it could not verify admin role assignments, but core sync of users and groups will continue to work with Org Admin. To also sync apps and manage user and group assignments to apps, assign App Admin alongside Org Admin.
5. Upload credentials in Opal
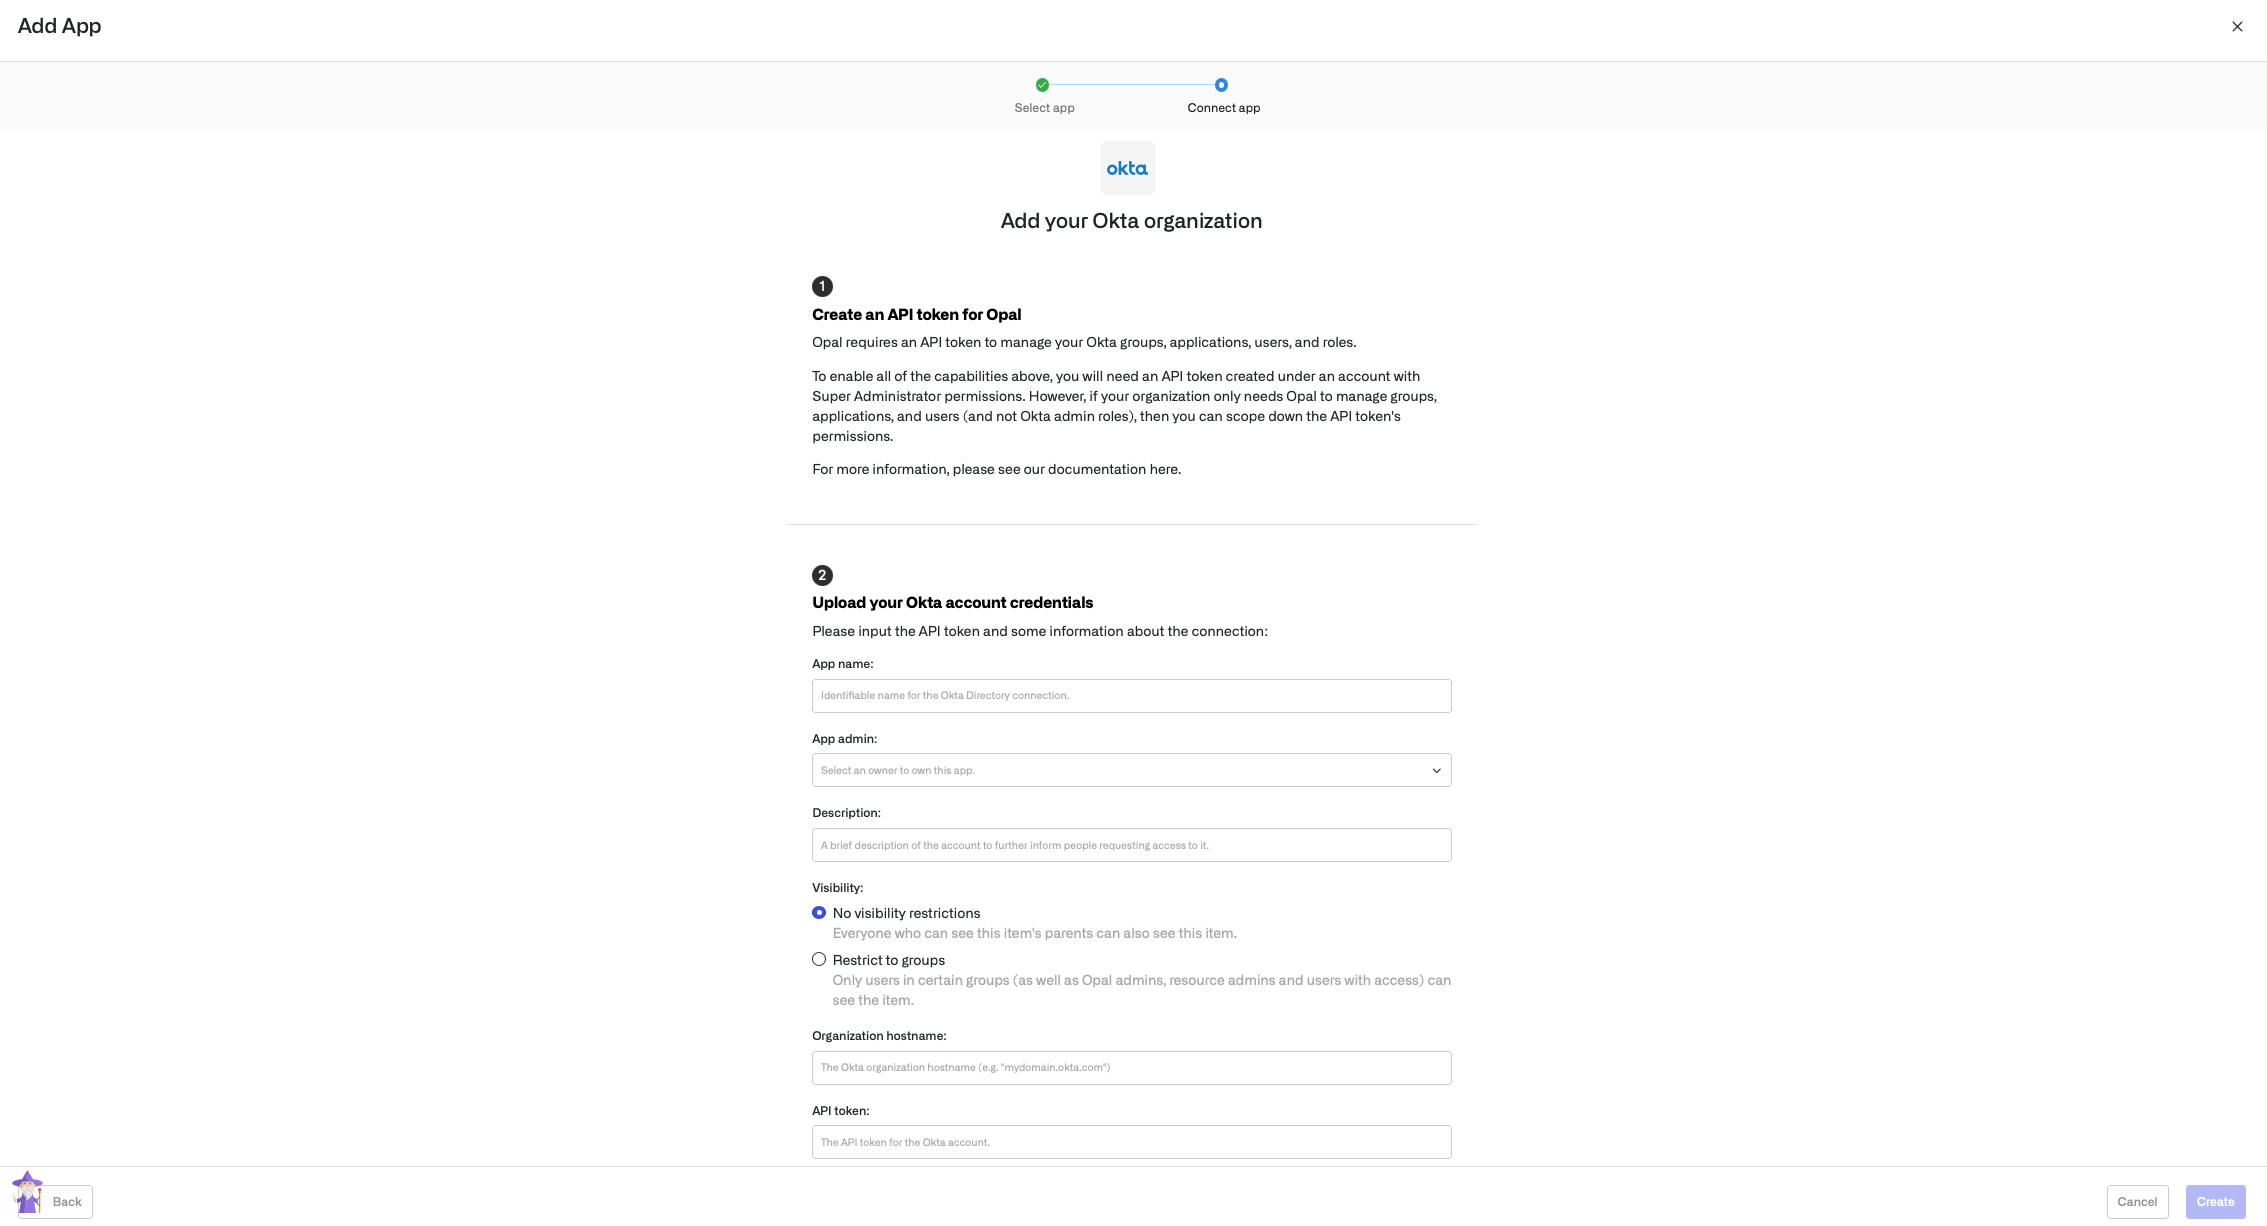
In the Opal New App form, select OAuth App as the authentication method and fill in:- Organization hostname: the hostname of your Okta org (e.g.
mydomain.okta.com) - Client ID: the Client ID shown on the app’s General tab
- Private Key PEM: the PEM key copied in Step 2
- Key ID: the
kidvalue from Step 2 (optional if you have only one key registered)
Run app validation checks
After you save your app, you can view existing sync issues from the Setup tab on the app detail page. Missing permissions and sync issues show in the App Validations section. Select the refresh icon to rerun validation checks.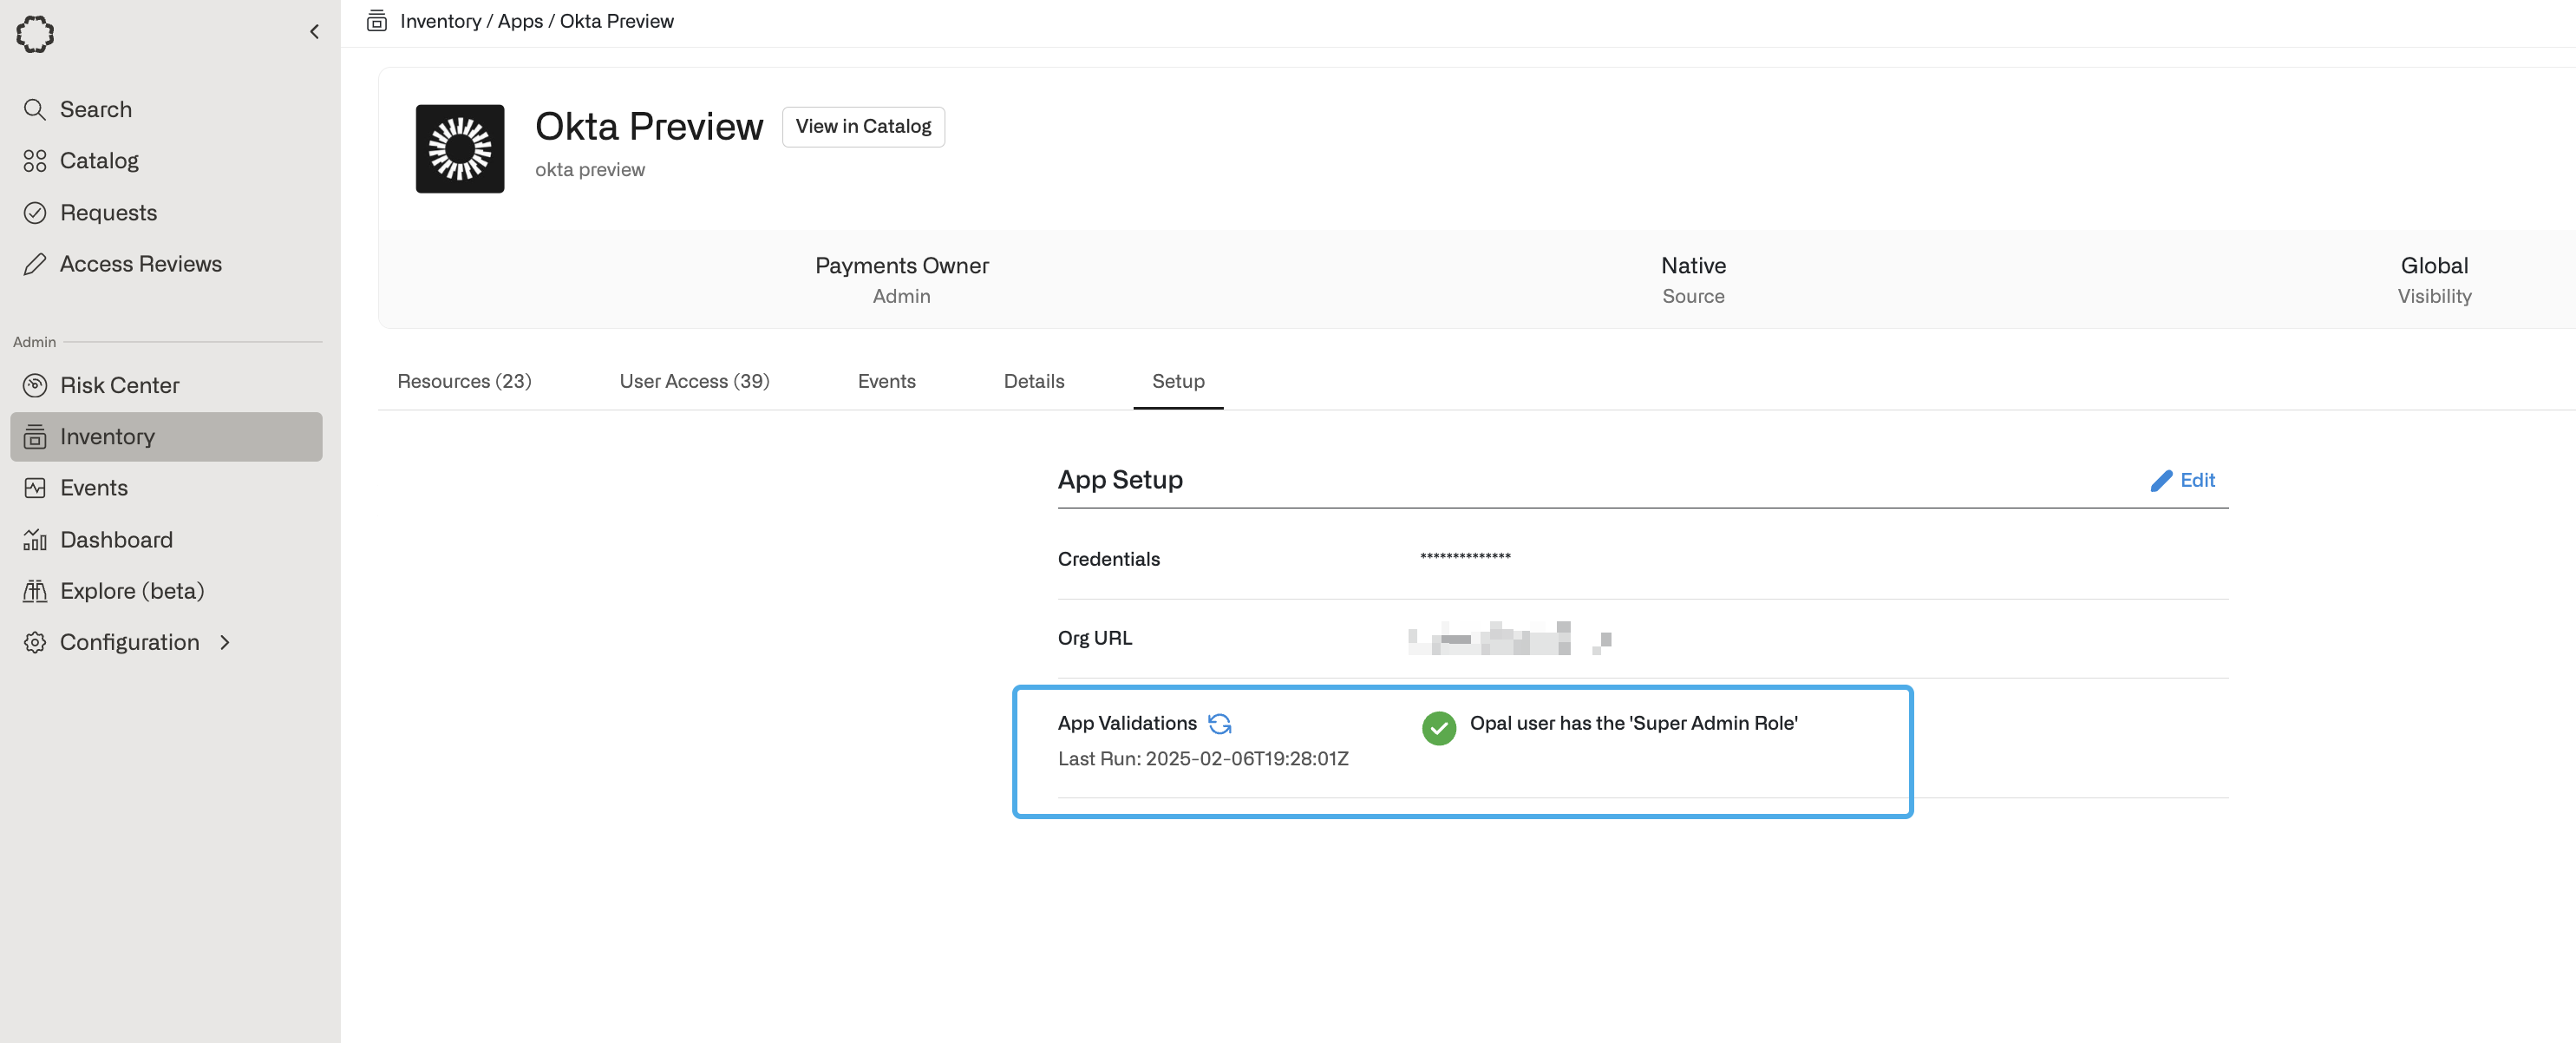
Automatic import (Okta groups only)
You can configure your Okta groups to be auto-imported into Opal each time the Okta app is synced. Sync happens throughout the day, approximately once an hour. Sync can also be manually triggered by an admin by clicking the Sync button in the top-right of the app.-
In Okta, create a custom group profile attribute
opal- Navigate to Directory > Profile Editor, then select the desired group profile and click Add attribute.
- Fill out the form as follows, and click Save:
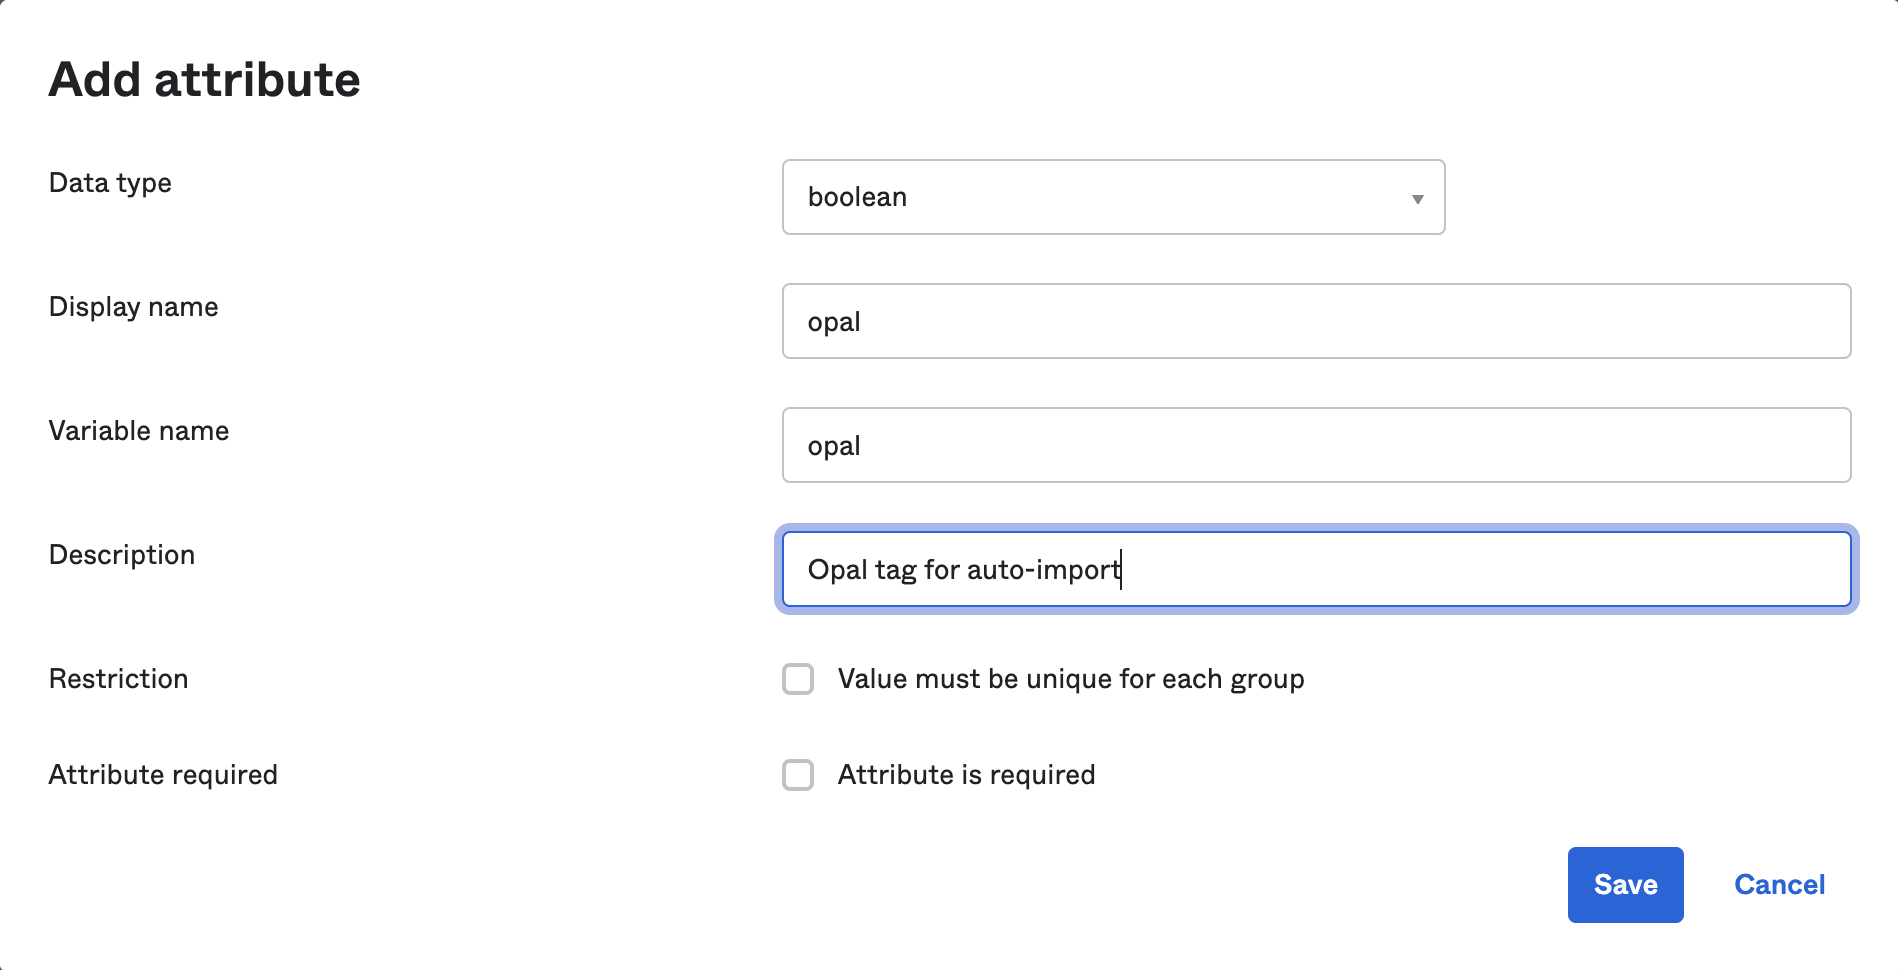
-
Set the
opalattribute totruefor all Okta groups you want to auto-import. -
Enable auto-import in Opal
- Click into your newly-created Okta app by going to Apps on the left sidebar.
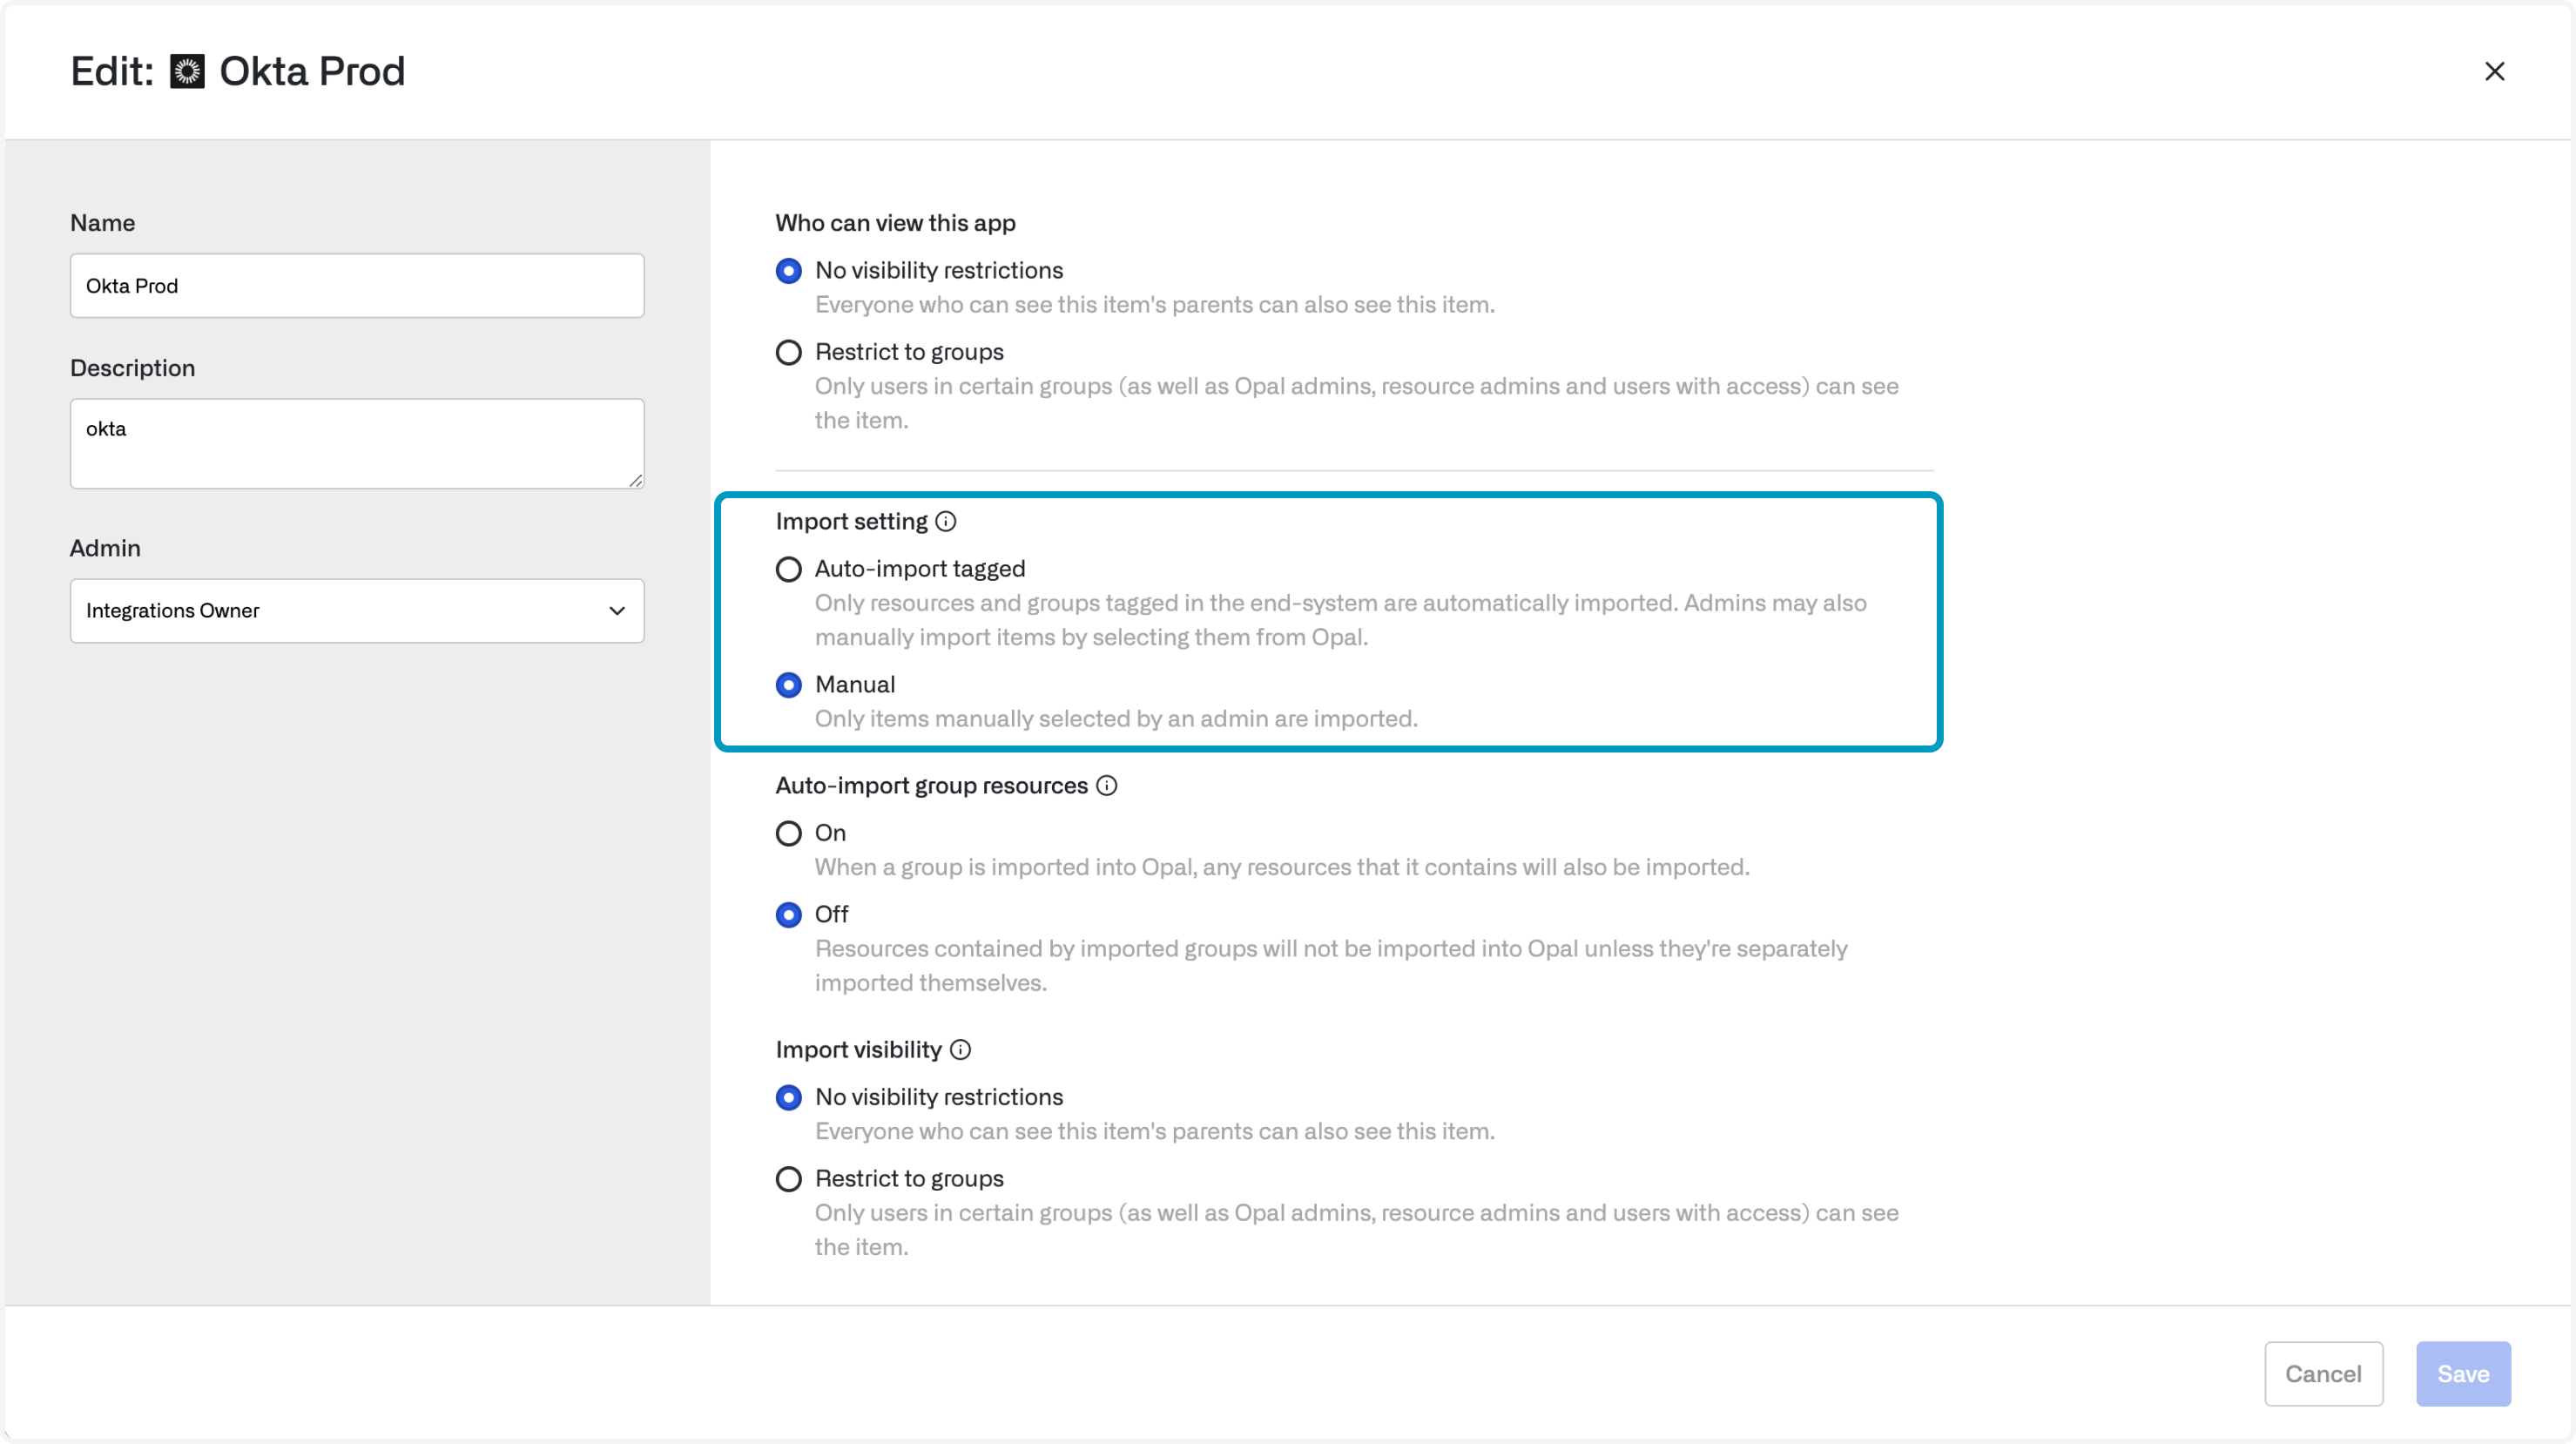
- Click the Edit button
- Next to Import Settings > Import setting. Toggle the setting to Auto-import tagged.