Opal cannot modify Administrator roles due to NetSuite API limitations.
Supported resources and functionality
Opal syncs all active NetSuite roles and employees who have login access enabled (
Give Access = true).
Getting Started
In Opal, go to the Inventory, select the +App icon, and select NetSuite.1. Generate a key pair
The NetSuite integration uses OAuth 2.0 Client Credentials (machine-to-machine) with a certificate-based JWT. You need to generate a key pair and register the public certificate in NetSuite. Run the following commands to generate an EC key pair (ES256):private_key.pem — you will upload it to Opal. You will upload certificate.pem to NetSuite in the next step.
2. Enable required NetSuite features
- In NetSuite, go to Setup > Company > Enable Features.
- Click the SuiteCloud tab.
- Under SuiteTalk, check REST Web Services.
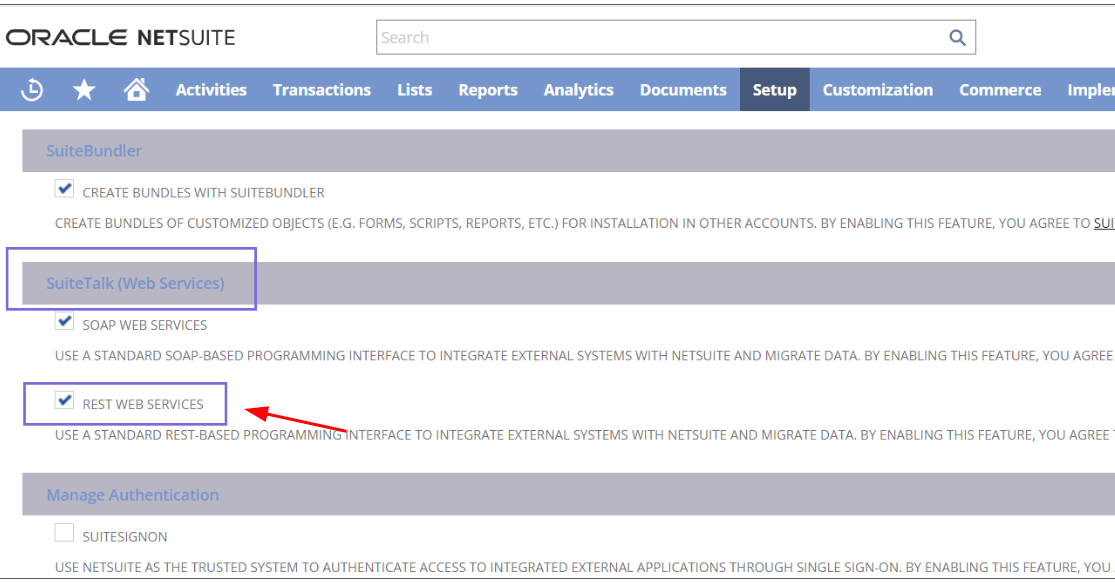
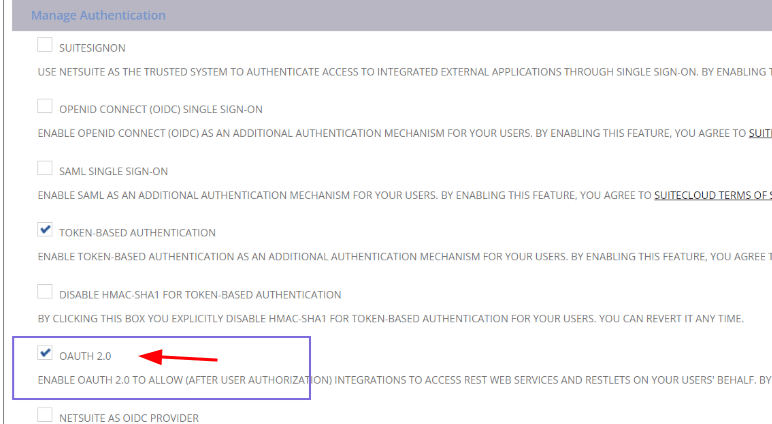
- Under Manage Authentication, check OAuth 2.0.
- Save.
3. Create a NetSuite integration record
- In NetSuite, go to Setup > Integration > Manage Integrations > New.
- Fill in the following settings:
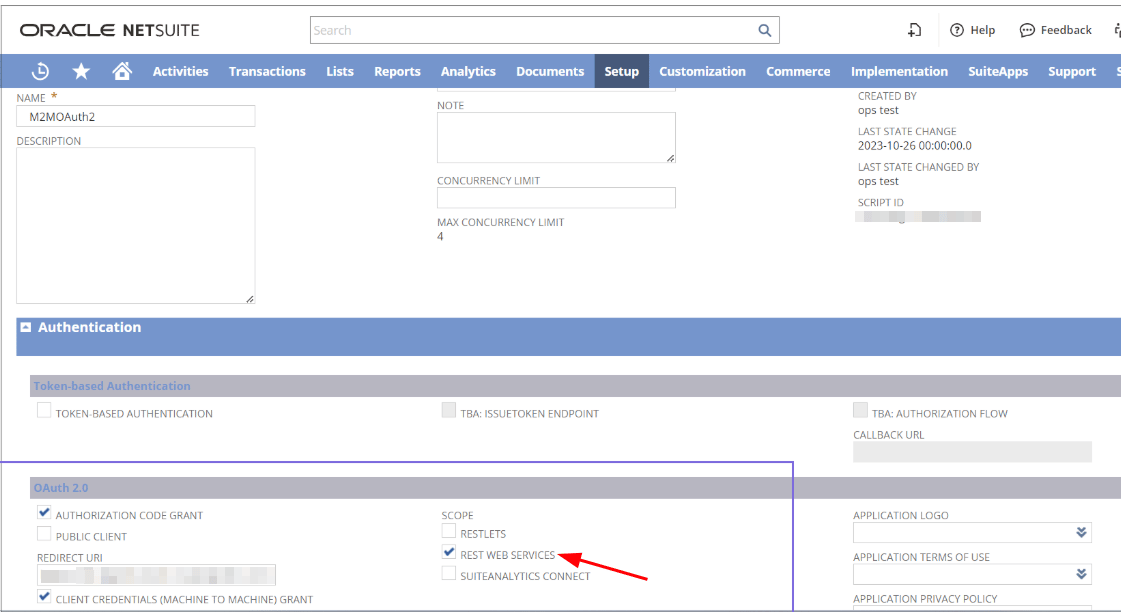
- Save the record. Copy the Client ID — you will need it later.
4. Upload the certificate
- Still in NetSuite, go to Setup > Integration > OAuth 2.0 Client Credentials (M2M) Setup.
- Set Entity to the service account user or role that Opal will authenticate as.
- Upload the
certificate.pemfile you generated in step 1. - Save the record. Copy the Certificate ID — you will need it later.
Every time you regenerate the certificate, NetSuite requires a new mapping row in this setup. Ensure the new row is bound to the correct user and the Opal Integration role.
5. Create the Opal Integration role
Create a dedicated NetSuite role with the minimum permissions required by Opal.- Go to Setup > Users/Roles > Manage Roles > New.
- Set the Name to
Opal Integration. - Under the Permissions tab, add the following permissions and save the role:
Lists
Reports
6. Assign the role to the integration certificate
- Go to Setup > Users/Roles > Manage Roles and open the Opal Integration role.
- Under the Users subtab, add the employee or service account that owns the certificate created in step 4.
7. Connect NetSuite in Opal
Back in the Opal New App form, fill in the following fields:
Click Connect. Opal will validate the credentials and verify the Opal Integration role has the required permissions. Any missing permissions appear in the App Validations section of the app’s Setup tab.