- Users can request time-bounded access to your IAM roles, EC2 instances, EKS instances, RDS databases, and Identity Center permission sets.
- Auditors can initiate access reviews that assign managers or group admins to periodically review users with long-lived access to AWS resources.
- All access changes are tracked in a permanent audit log that can notify a Slack channel or be exported to your favorite tools.
Supported resources
Note that the AWS integration does not support syncing IAM Groups.
Authentication model
The following shows a high-level summary of how Opal authenticates for two major workflows:- Synchronizing your AWS Organizations resources in Opal
- Granting Opal users sessions to AWS resources

Requirements
To configure your AWS organization in Opal, you must:- Be an Opal Admin
- Have an AWS Management or Delegated Administrator account
- Set up an OIDC provider in Opal, if you want to use Opal to manage IAM roles, EC2 instances, EKS instances, or RDS databases.
Set up OIDC
Set up OIDC
Setting up an OpenID Connect (OIDC) provider in Opal is required to use Opal to manage IAM roles, EC2 instances, EKS instances, or RDS databases. Opal uses OIDC to authenticate users when they start an AWS session with these accounts. This adds an extra layer of security by preventing Opal from being able to give access to users that aren’t registered with your Identity Provider.To configure an OIDC identity provider: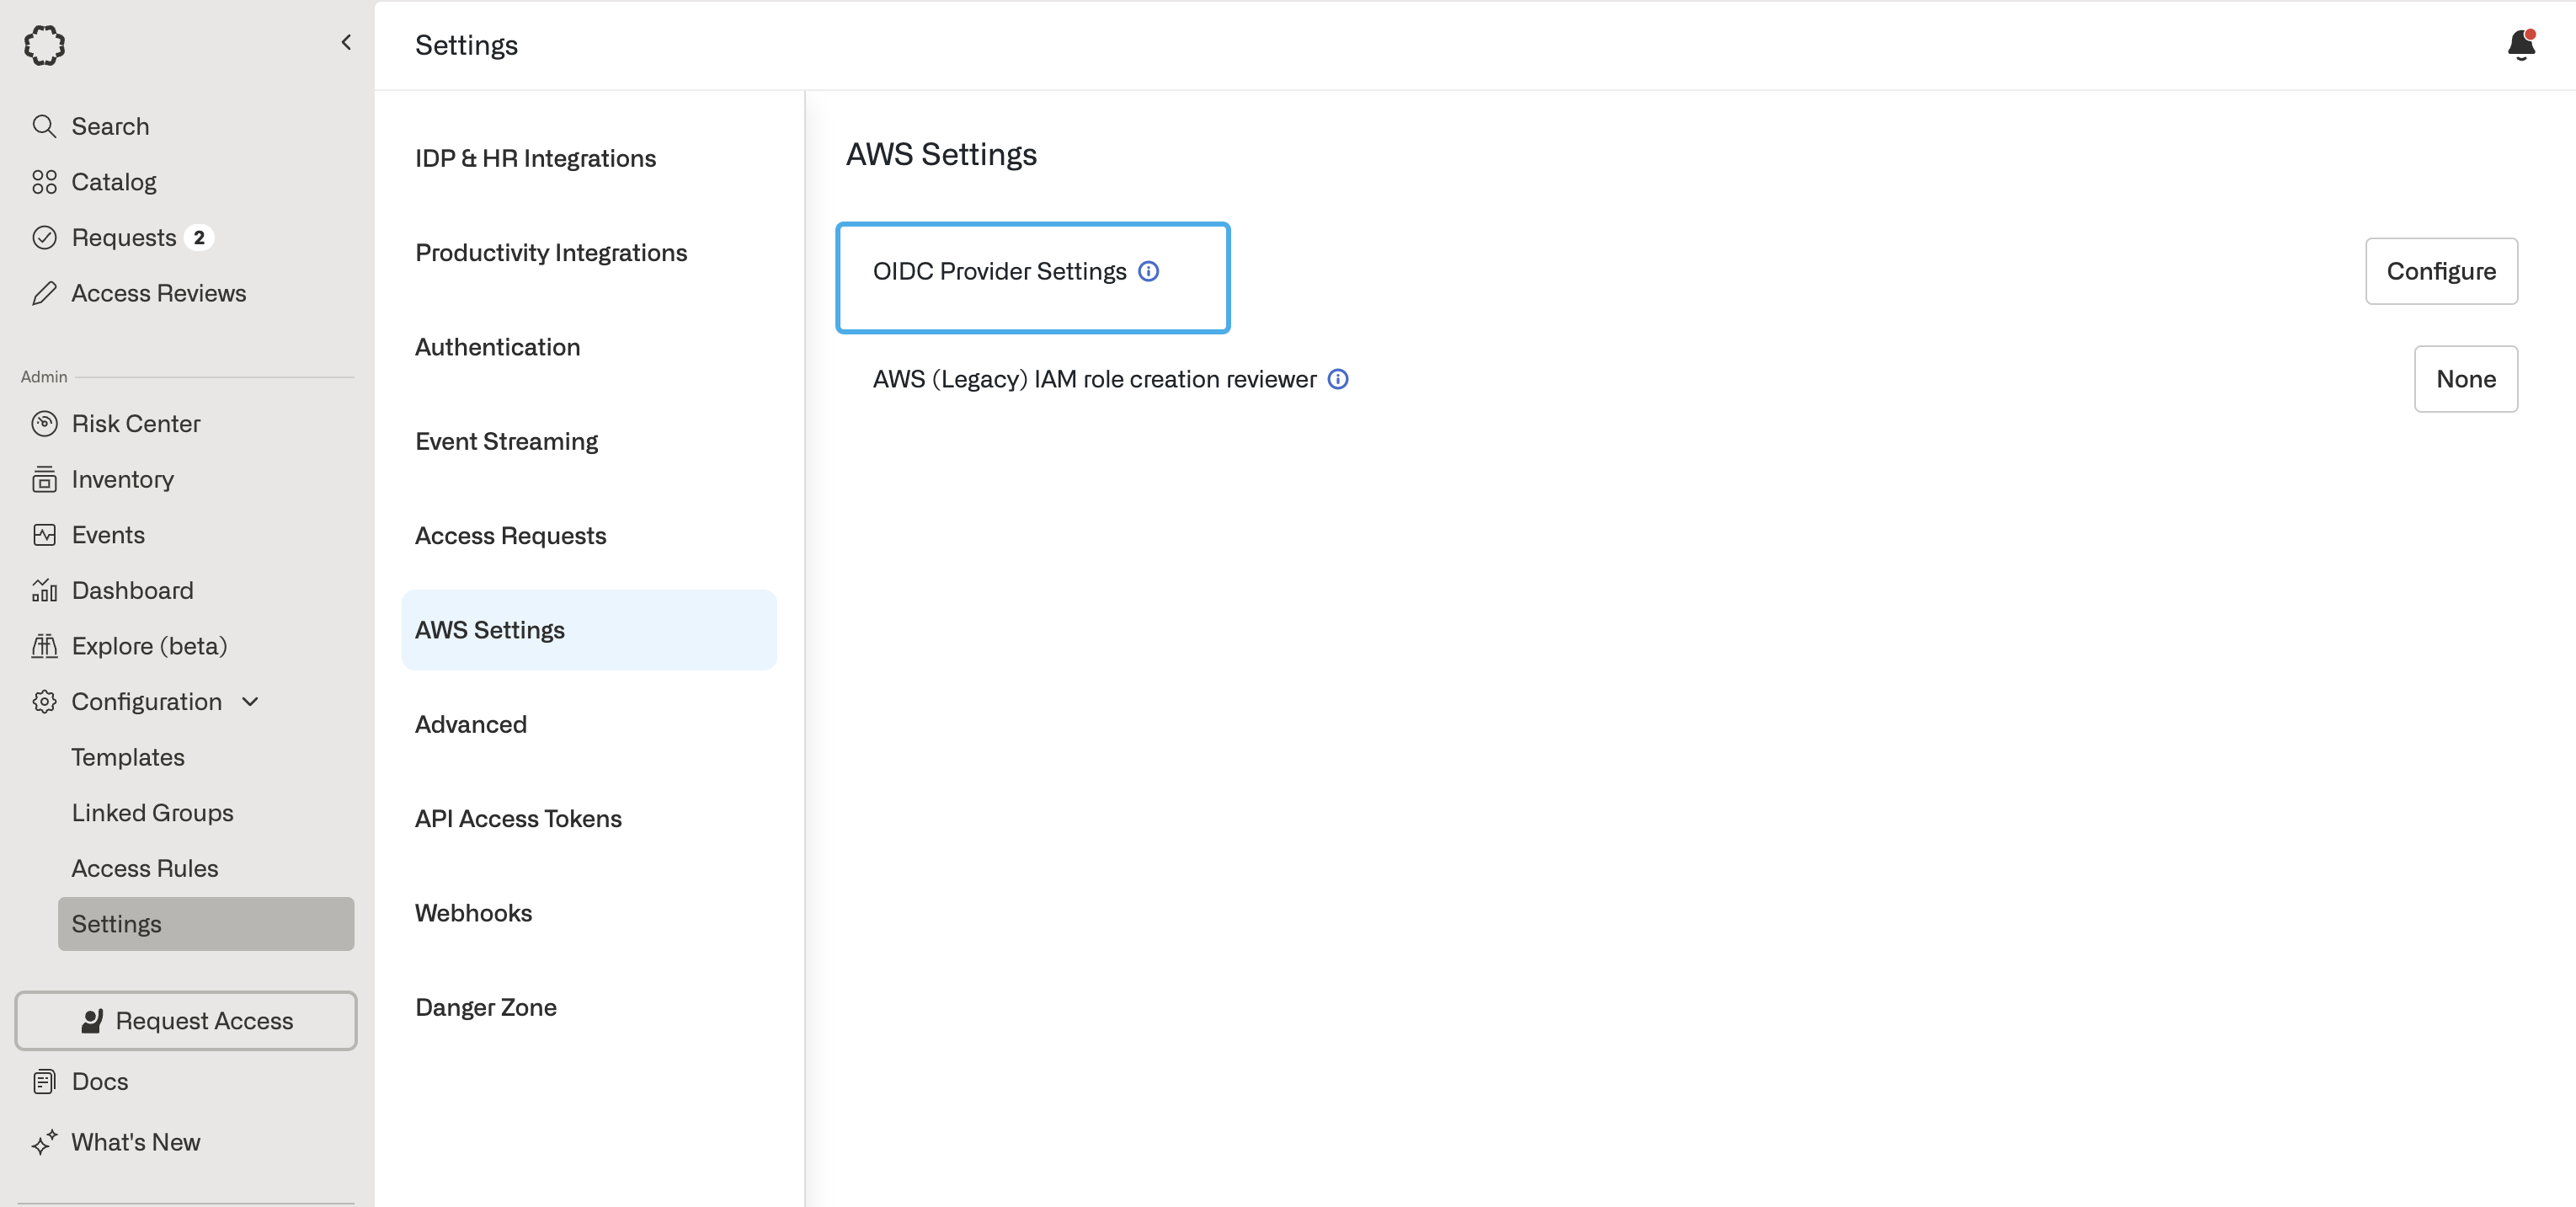
- Register Opal with your OIDC provider to receive a Client ID and Client Secret that will be used to establish a trust relationship between Opal and your OIDC provider.
- Use the callback URL
https://{{YOUR_OPAL_BASE_URL}/callback/oidc, substituting in your Opal base URL, which is usuallyapp.opal.devfor Opal Cloud organizations. For example,https://app.opal.dev/callback/oidc.
To learn more about obtaining these credentials, refer to your OIDC
documentation — for example, see Okta OIDC
docs
or Google OIDC
docs.
If you use Okta, set application type to Web Application. In Opal, go to
the Configuration > Settings tab at the bottom of the left sidebar.
- Find the OIDC Provider Settings setting under AWS Settings. Select Configure.
- Enter the Client ID, Client Secret, and Issuer URL from your OIDC provider.
- Save the Client ID and Issuer URLs, as you’ll need them in a subsequent step.
1. Find your External ID
- In Opal, go to the Inventory and select the + App button in the top right corner to create a new app. Select Amazon Web Services.
- Save the External ID, which is unique to your Opal organization and is necessary for the following step. Opal uses this to safeguard Opal’s third-party access to your data.
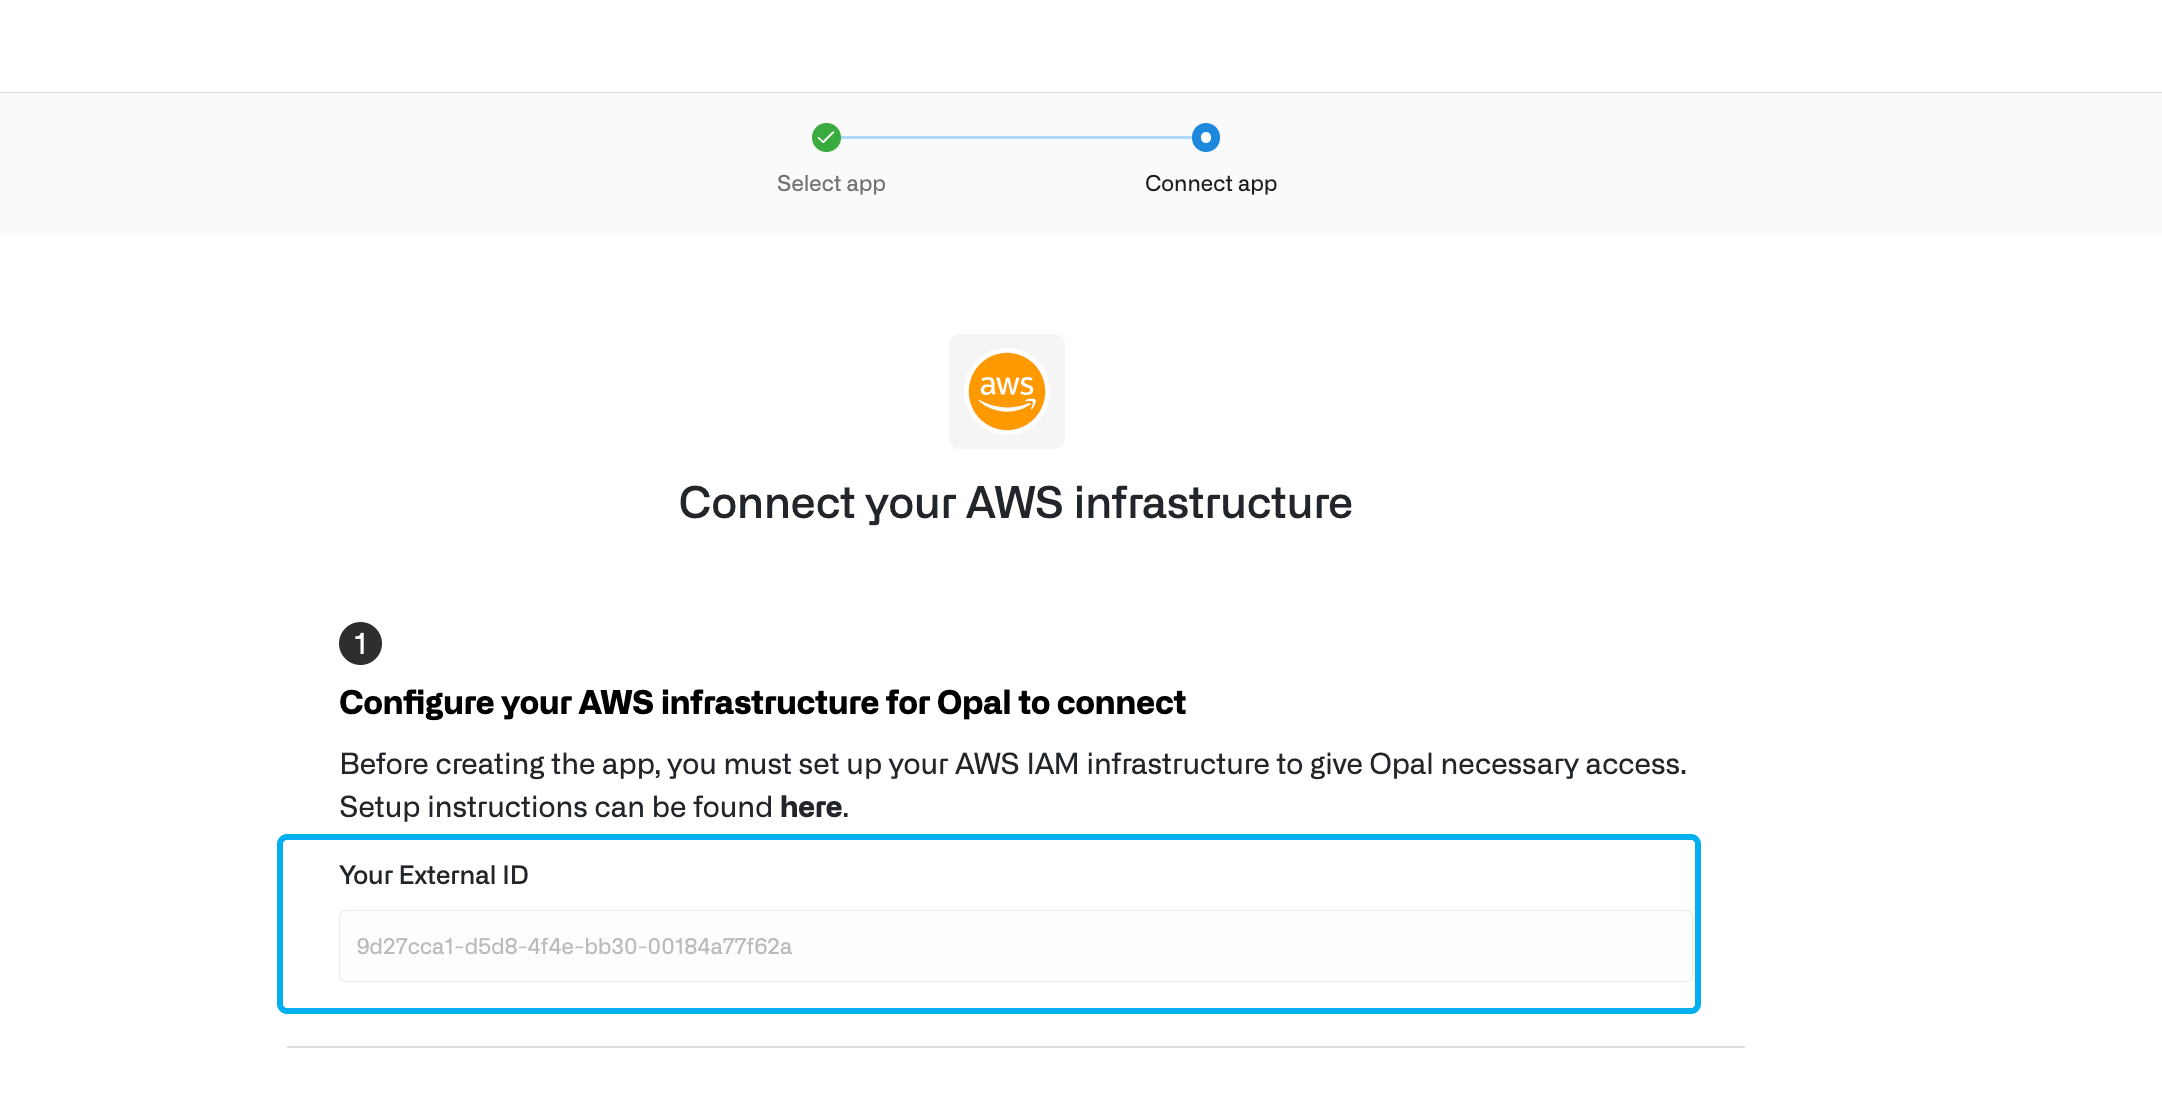
Copy the External ID to use in a later step.
2. Configure your AWS management account
If your Opal instance is self-hosted, follow the AWS setup for self-hosted Opal guide to set up the trust policy for the OpalIngester IAM role.Once complete, return to these instructions to add the permissions policy for the role and complete the following steps.
${EXTERNAL_ID} with the External ID from the Create App page in Opal:
3. Configure additional AWS accounts to be managed by Opal
If you are only setting up AWS IAM Identity Center to use Opal to manage
AWS IAM Identity Center groups and resources, you can skip to Step 4.
4. Configure Opal app
- In Opal, return to the Create App form and enter your AWS configuration details.
- Enter your AWS Account ID in the AWS Management or Delegated Administrator Account ID field. In the AWS console, this is in the upper right corner.
- Optional. If you’re using real-time sync, enter your CloudTrail events SQS queue URL. You can also configure real-time sync after you create the app.
- Enable or disable the following toggles based on your use cases. You can change these settings later from your app’s Setup page.
- AWS Organization management: Enable if you want to manage IAM roles, EC2 instances, EKS instances, or RDS databases in Opal.
- IAM Identity Center management: Enable if you want to manage AWS IAM Identity Center groups and permission sets in Opal.
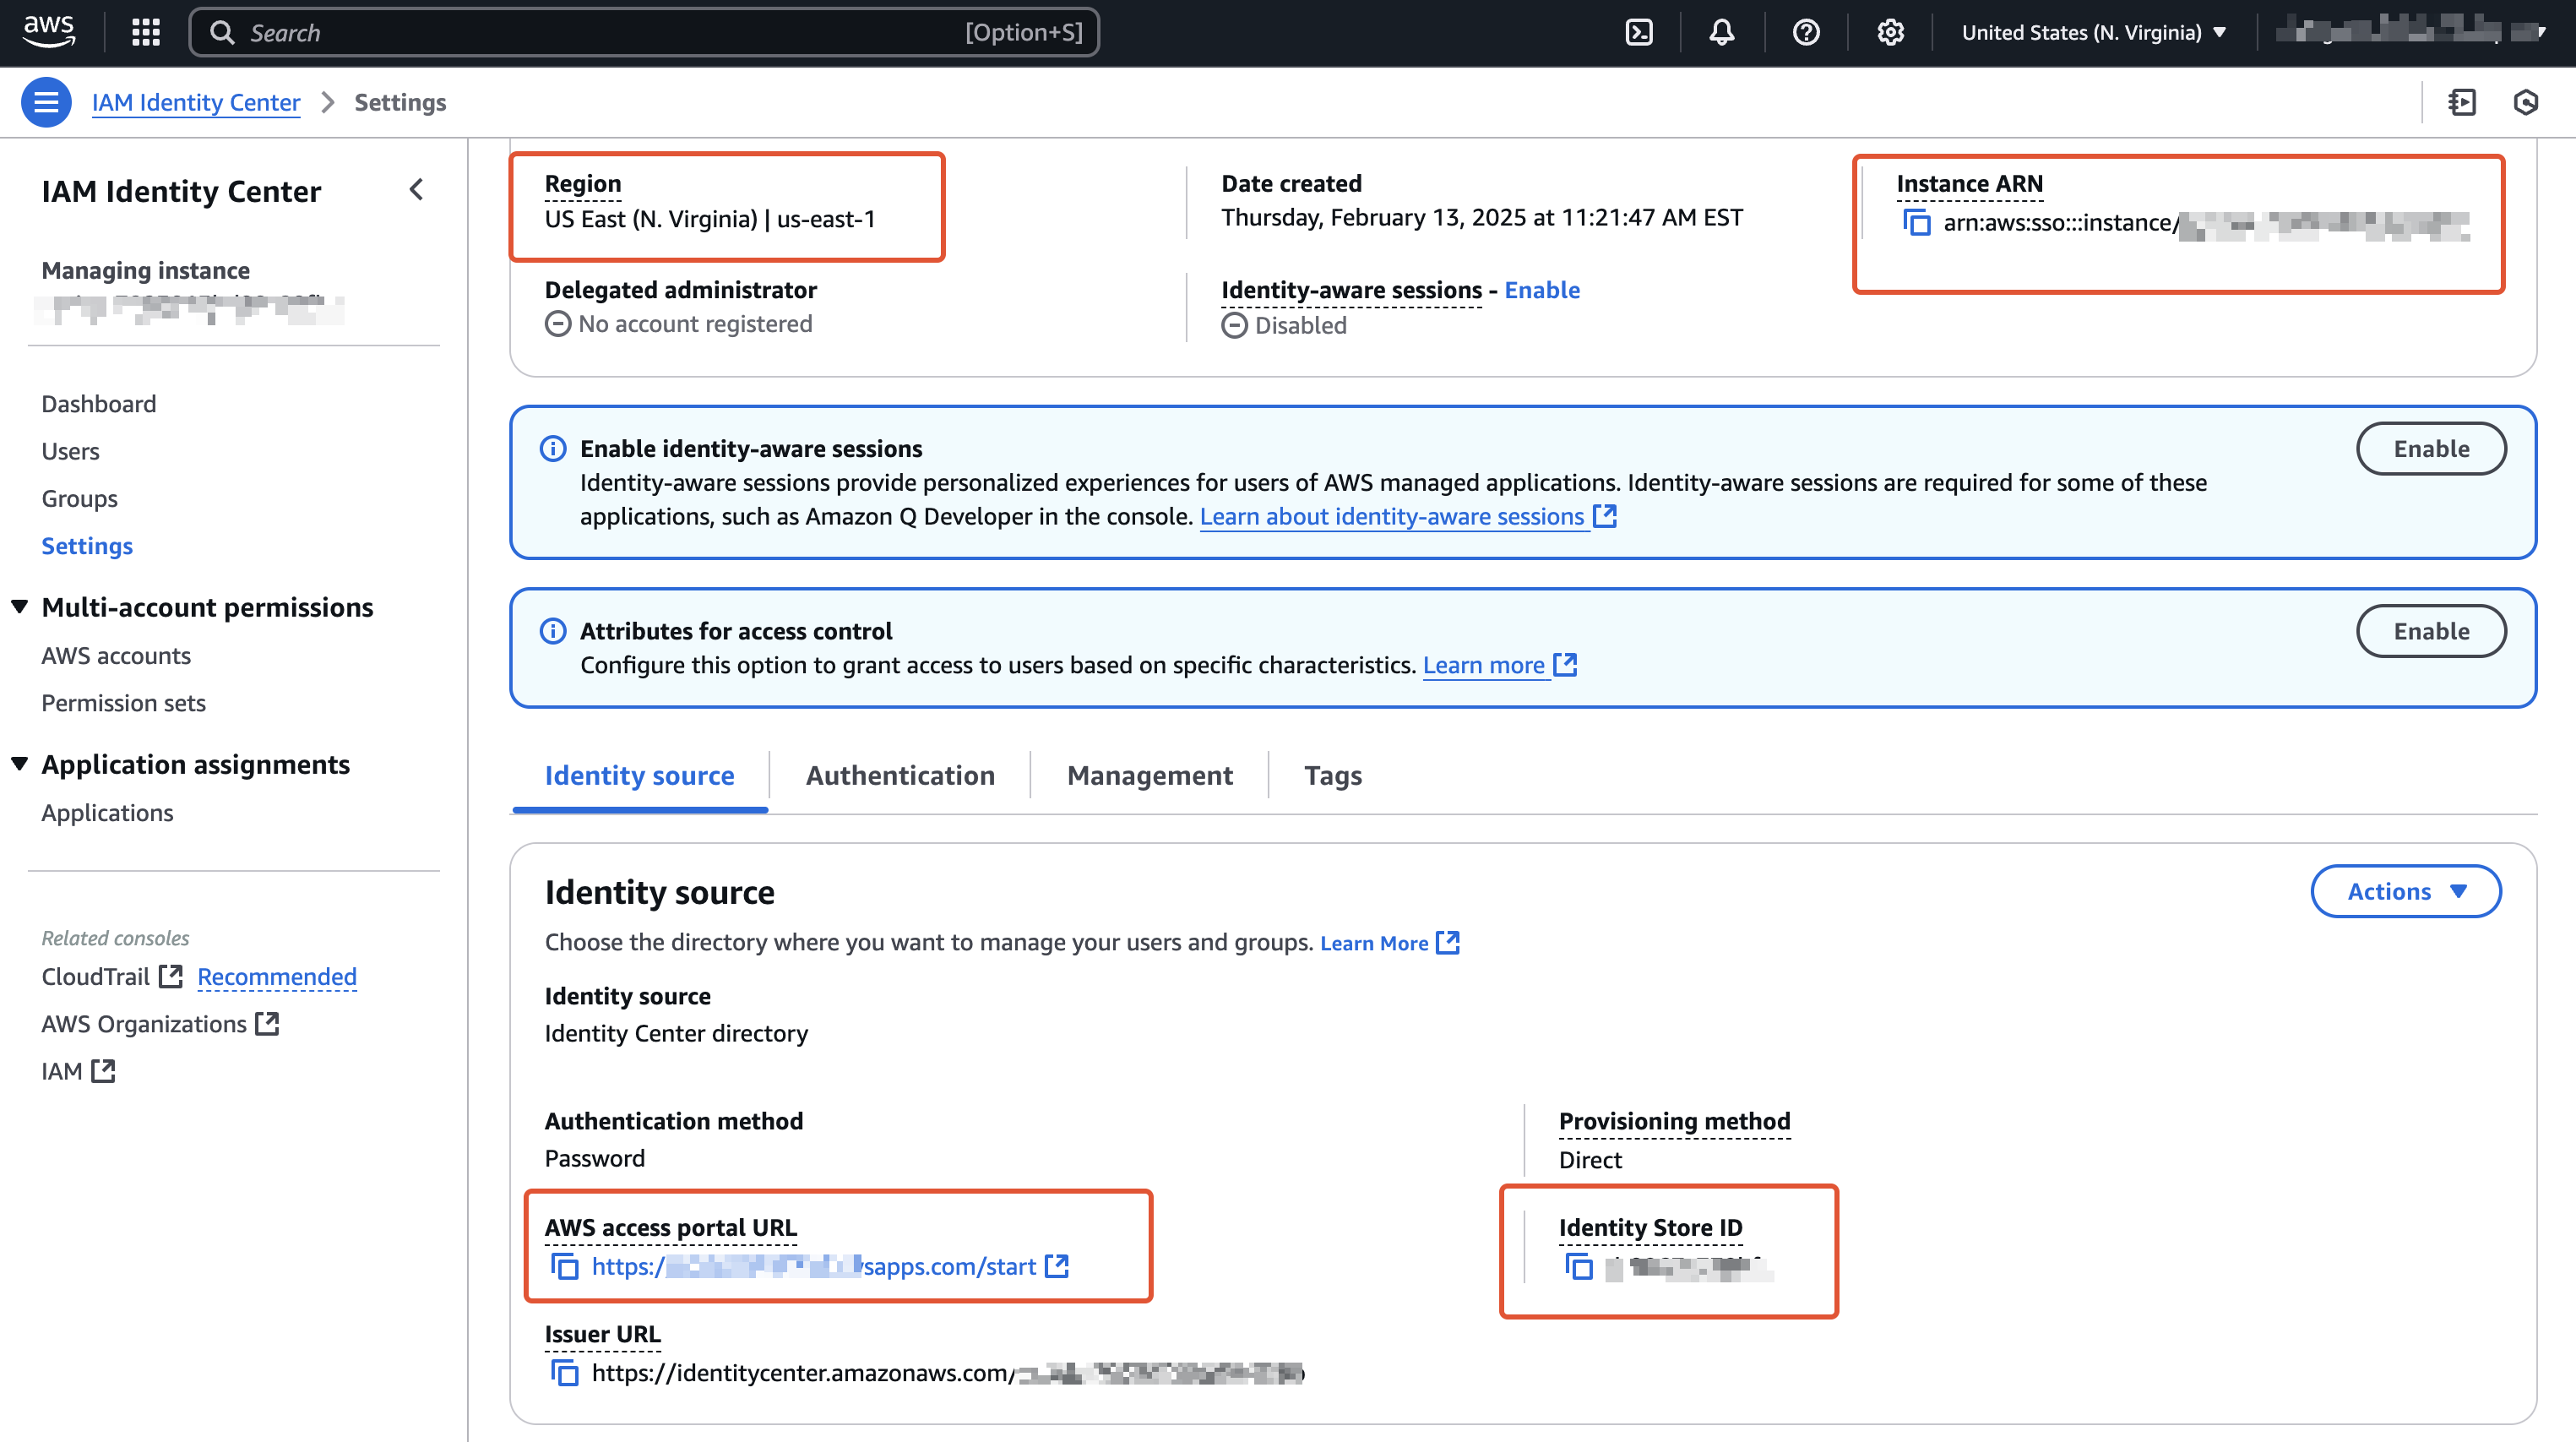
- If you want to manage AWS IAM Identity Center groups and permissions in Opal, enter the following additional settings, which you can find in your AWS console in IAM Identity Center > Settings.
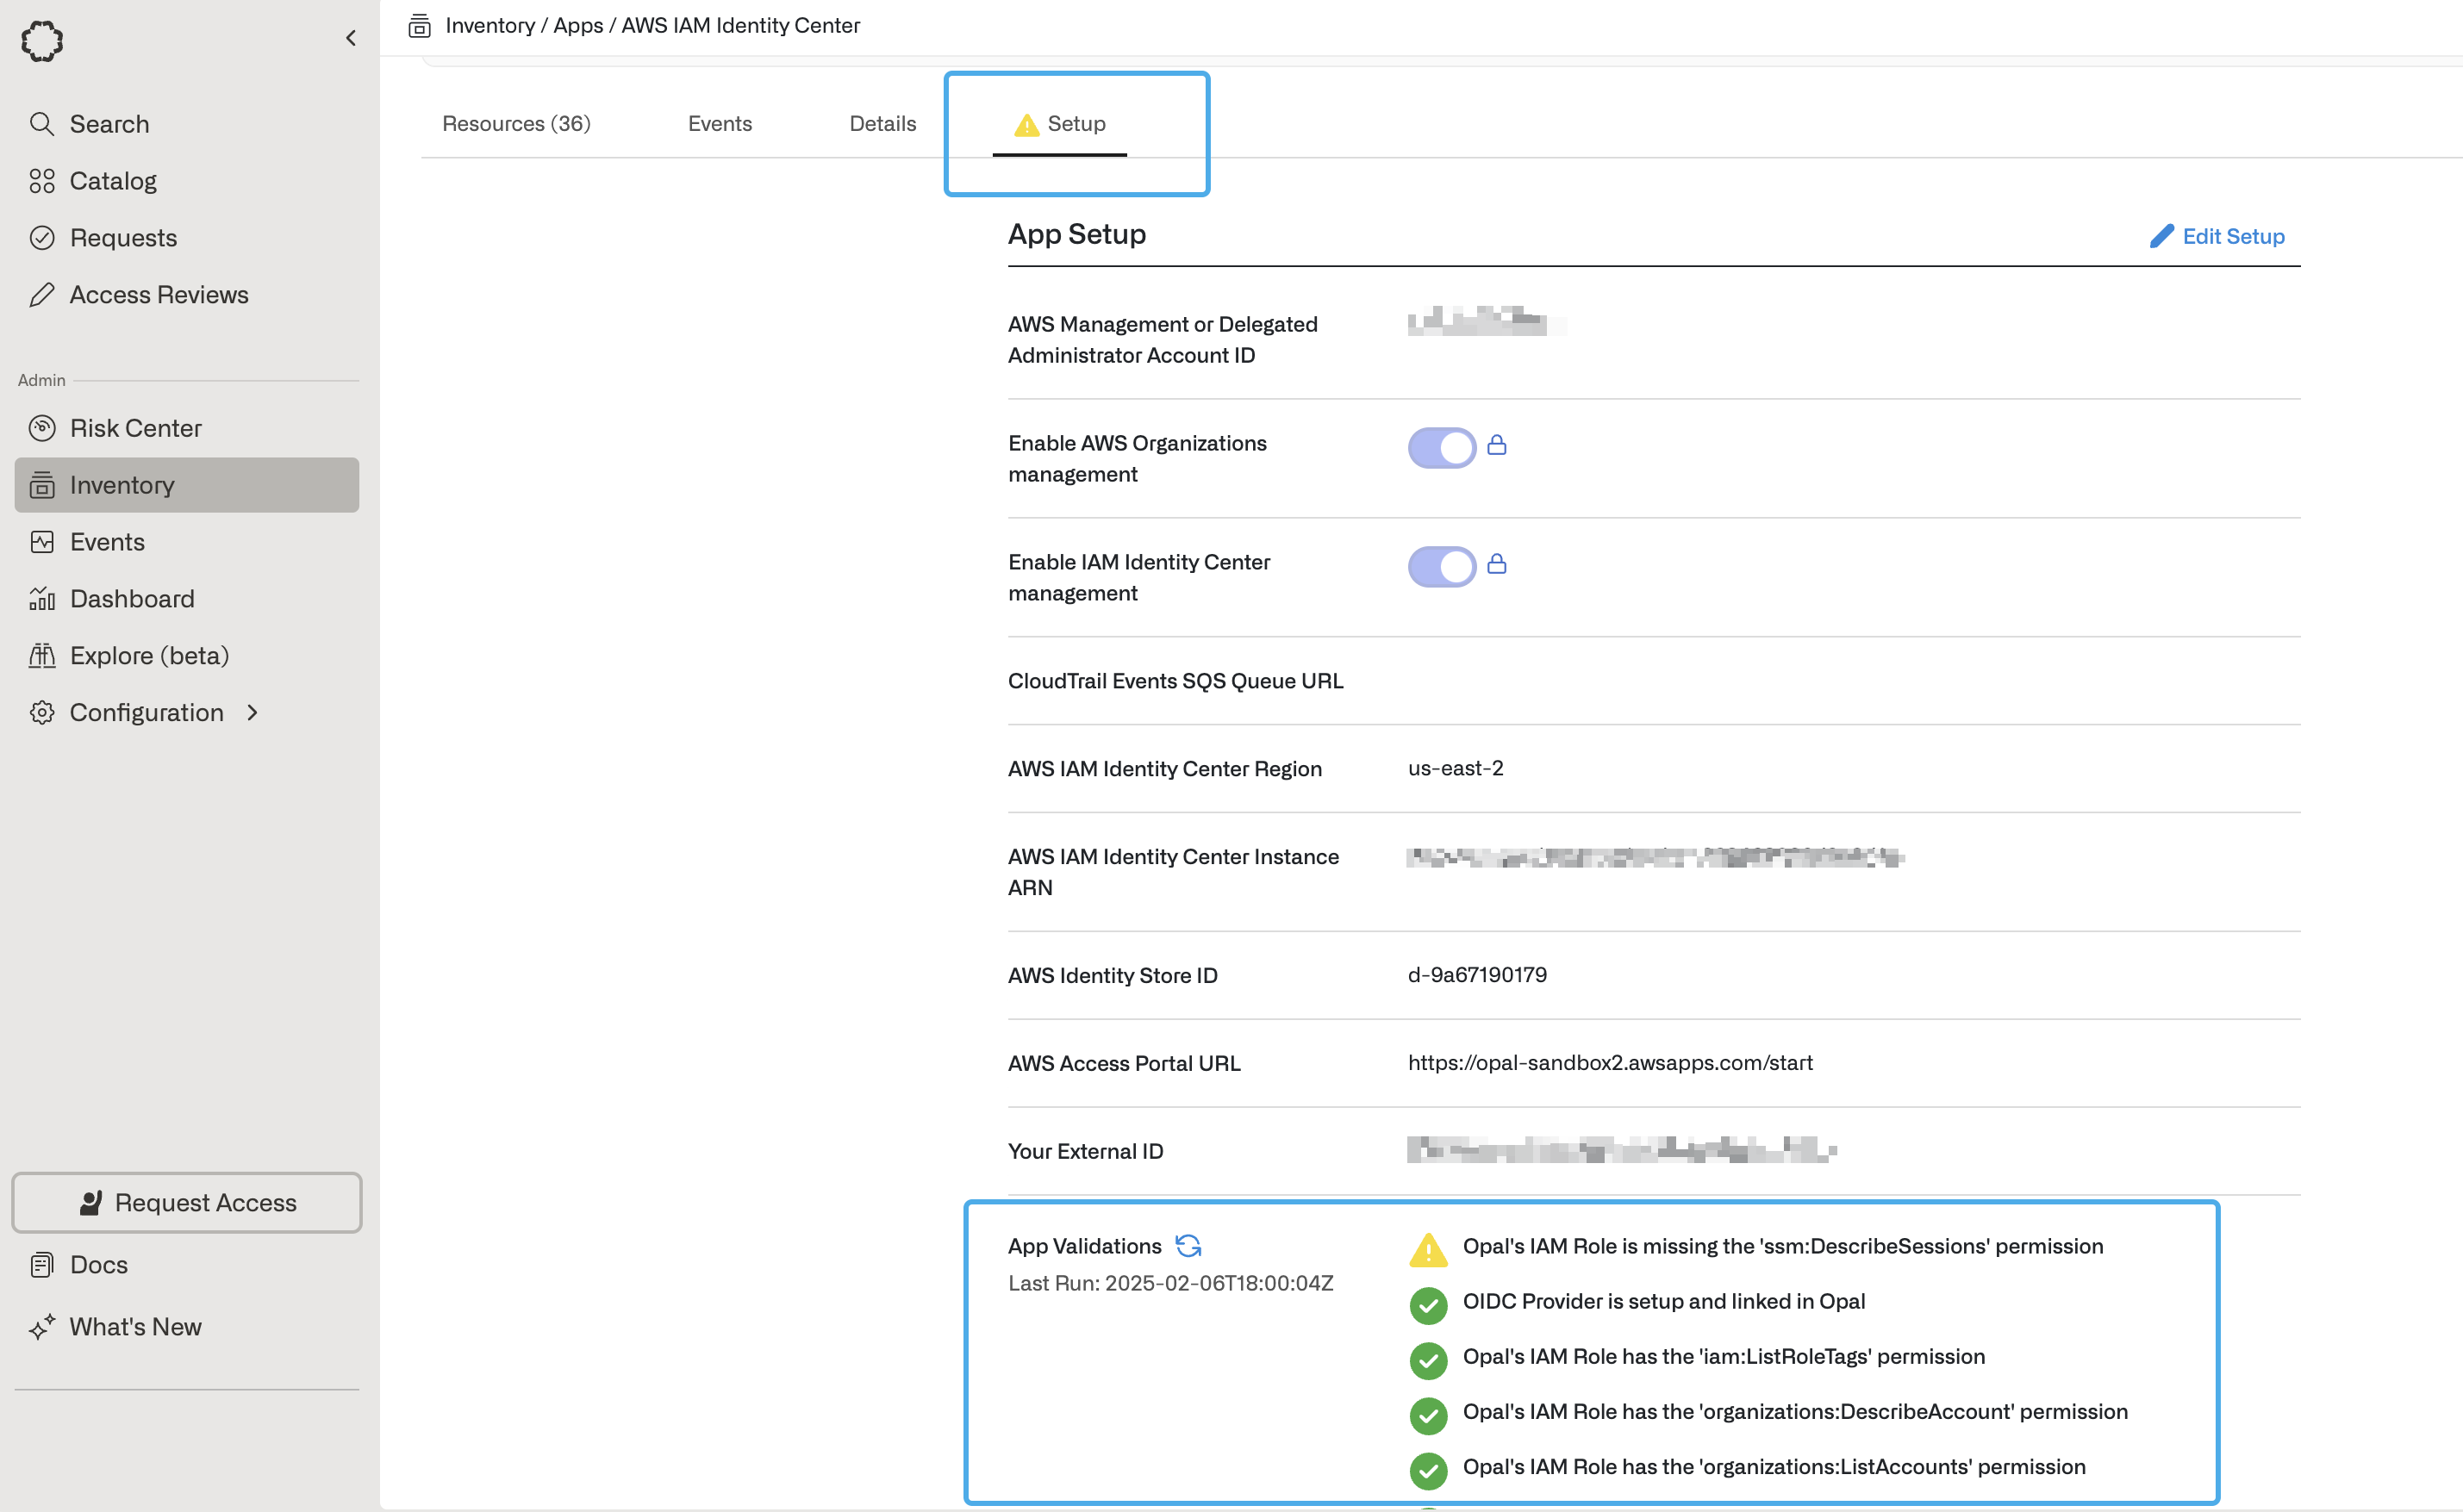
5. Run app validation checks
After you save your app, you can view existing sync issues from the Setup tab on the app detail page. Missing permissions and sync issues show in the App Validations section. Select the refresh icon to rerun validation checks.