- Give specific roles via birthright access
- Grant just-in-time short-lived access to roles
- Audit who has access specific roles and why
- Review roles in user access reviews
Supported resources
Configuration steps
In Teleport, you will need to set up a service account for Opal to perform operations.- Create an
opal-servicerole.
opal-service role is used by Opal to make changes to your system. Note that we use a max session TTL of 8760 hours (1 year). The credentials you generate in a subsequent step will be bound by this TTL, and you will need to reissue the credentials at this interval. You may want to set this value higher to avoid needing to reissue the credentials.
- Next, create an
opal-impersonatorrole on the same page. Use the following YAML:
opal-service service user.
-
Attach this role to yourself in the Teleport dashboard by finding your user and going to Options > Edit, and adding
opal-impersonatorto your User Roles. -
Create the
opal-serviceservice user. Go to Team > Users > Create New User. Useopal-serviceas the name and add theopal-servicerole. -
In your terminal, use
tsh loginto log in to your account (not theopal-serviceaccount). If you were already logged in, you musttsh logoutand log in again to pick up the newopal-impersonatorrole.
- Sign a new credential for the
opal-serviceservice account.
opal-impersonator role to your Teleport user. The TTL in this step should match the value you configured in step 1.
- In Opal, go to Inventory, click on the + App icon, and select the Teleport App. Fill out the details for the integration, using the contents of
opal-service.pemgenerated in the previous step as the Opal service account credentials file.
Link Teleport users to Opal users
Teleport does not expose user emails. Therefore, Opal is not able to associate Teleport users with Opal users by default. To use the integration, you need to import the mapping via a custom attribute from your IDP.- Make sure that users in your IDP have a field with their Teleport username.
- In Opal, make sure that you have connected your IDP.
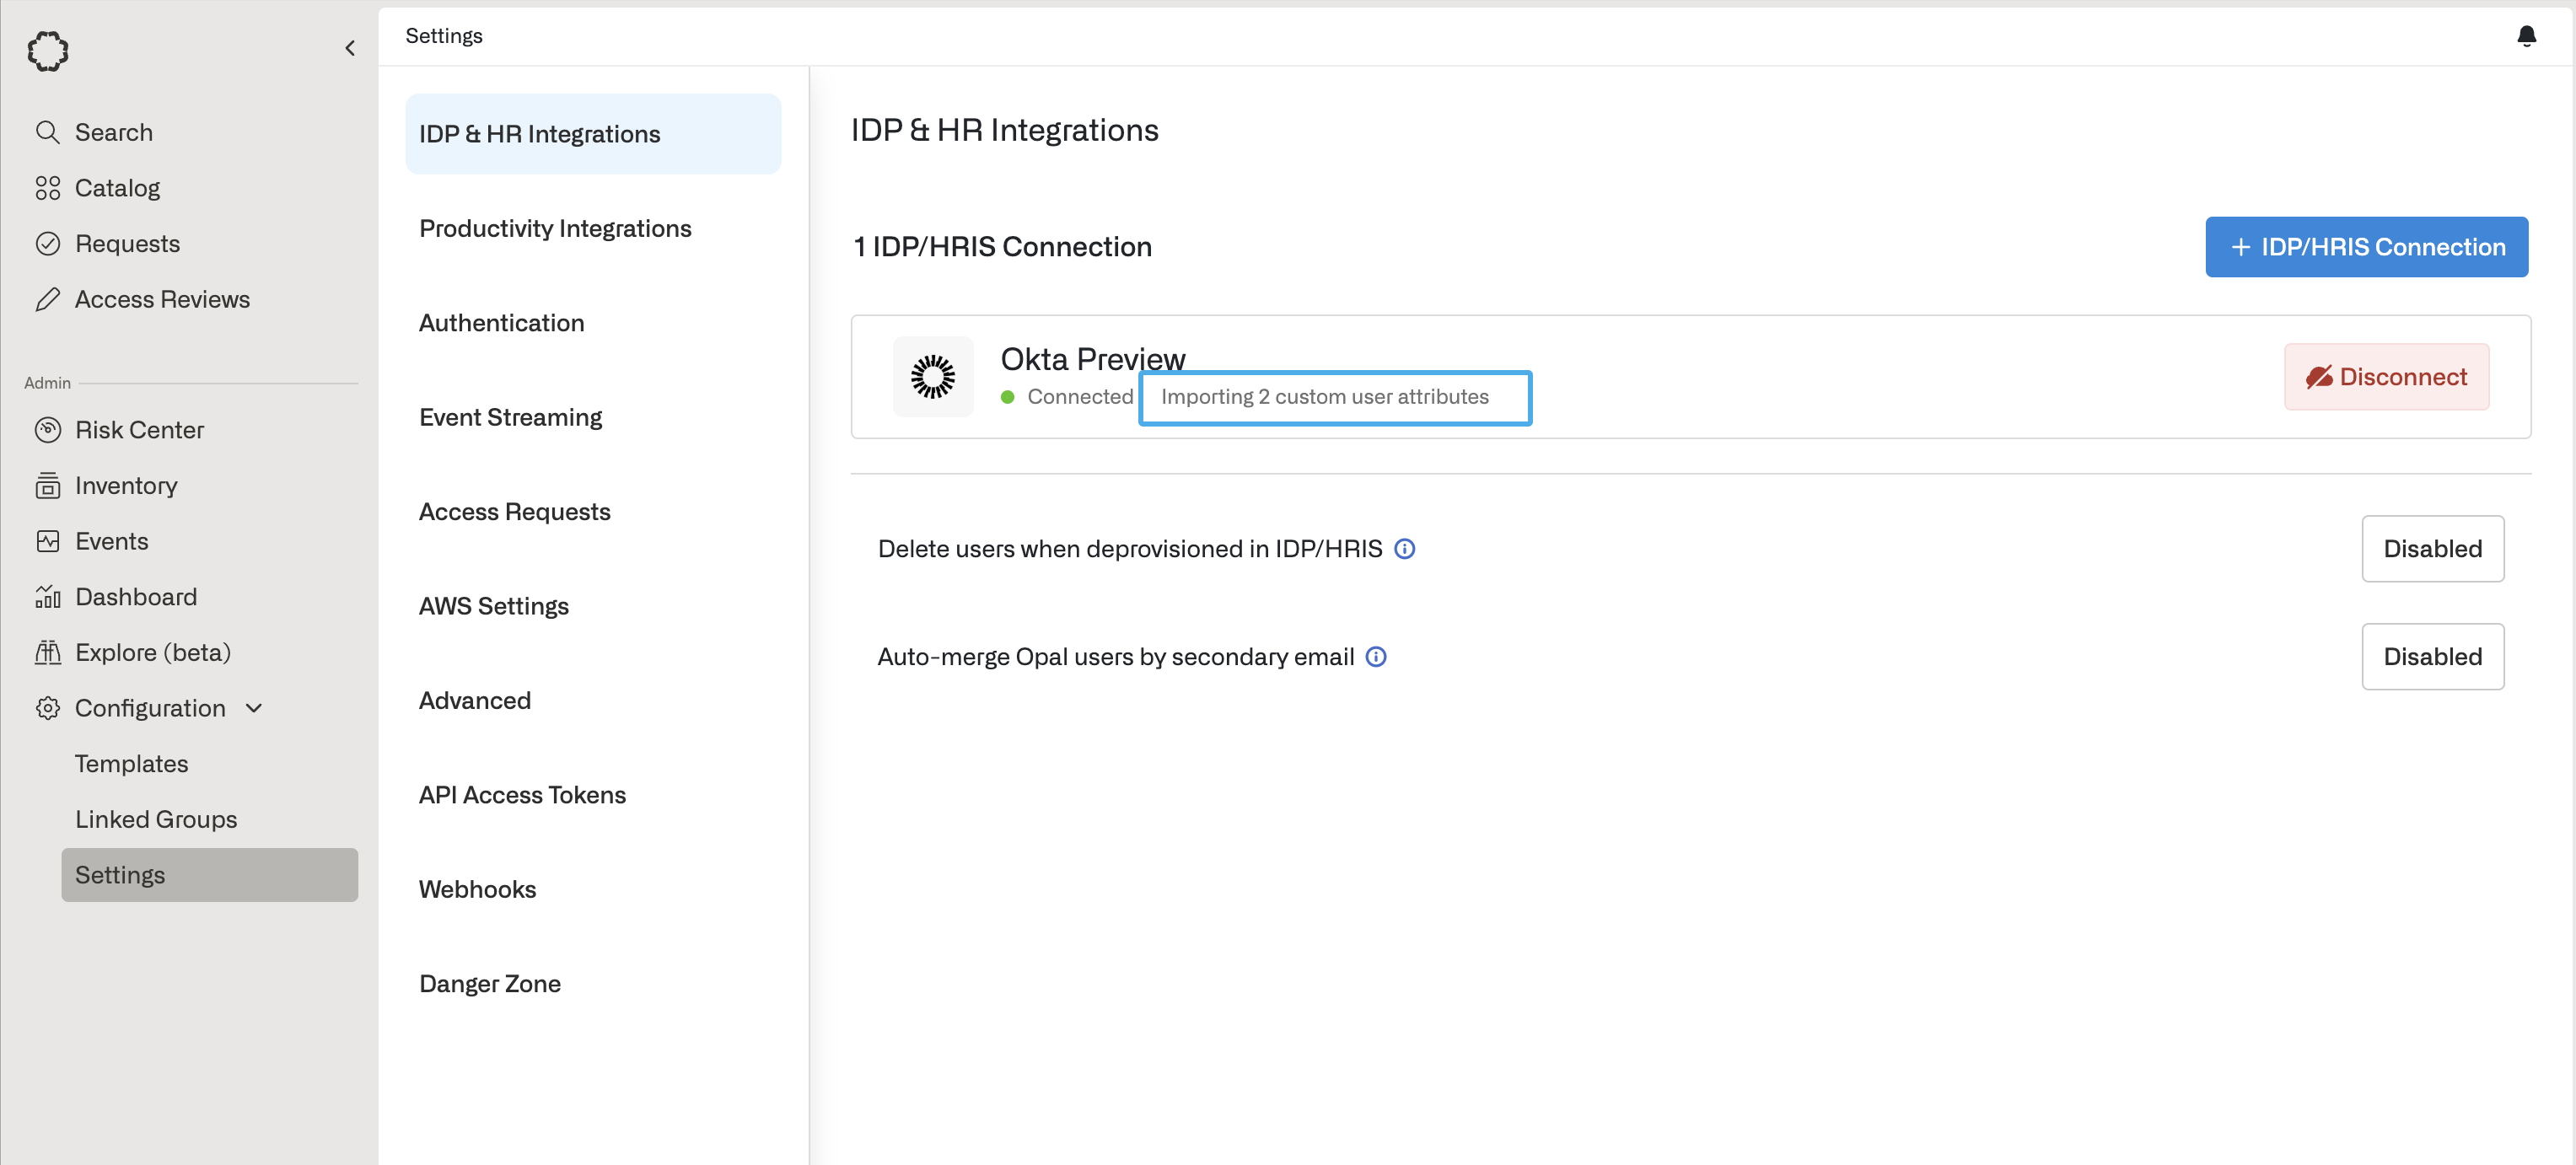
- In Opal, go to Settings > IDP & HR Integrations select the Importing X custom user attributes link on your IDP tile.
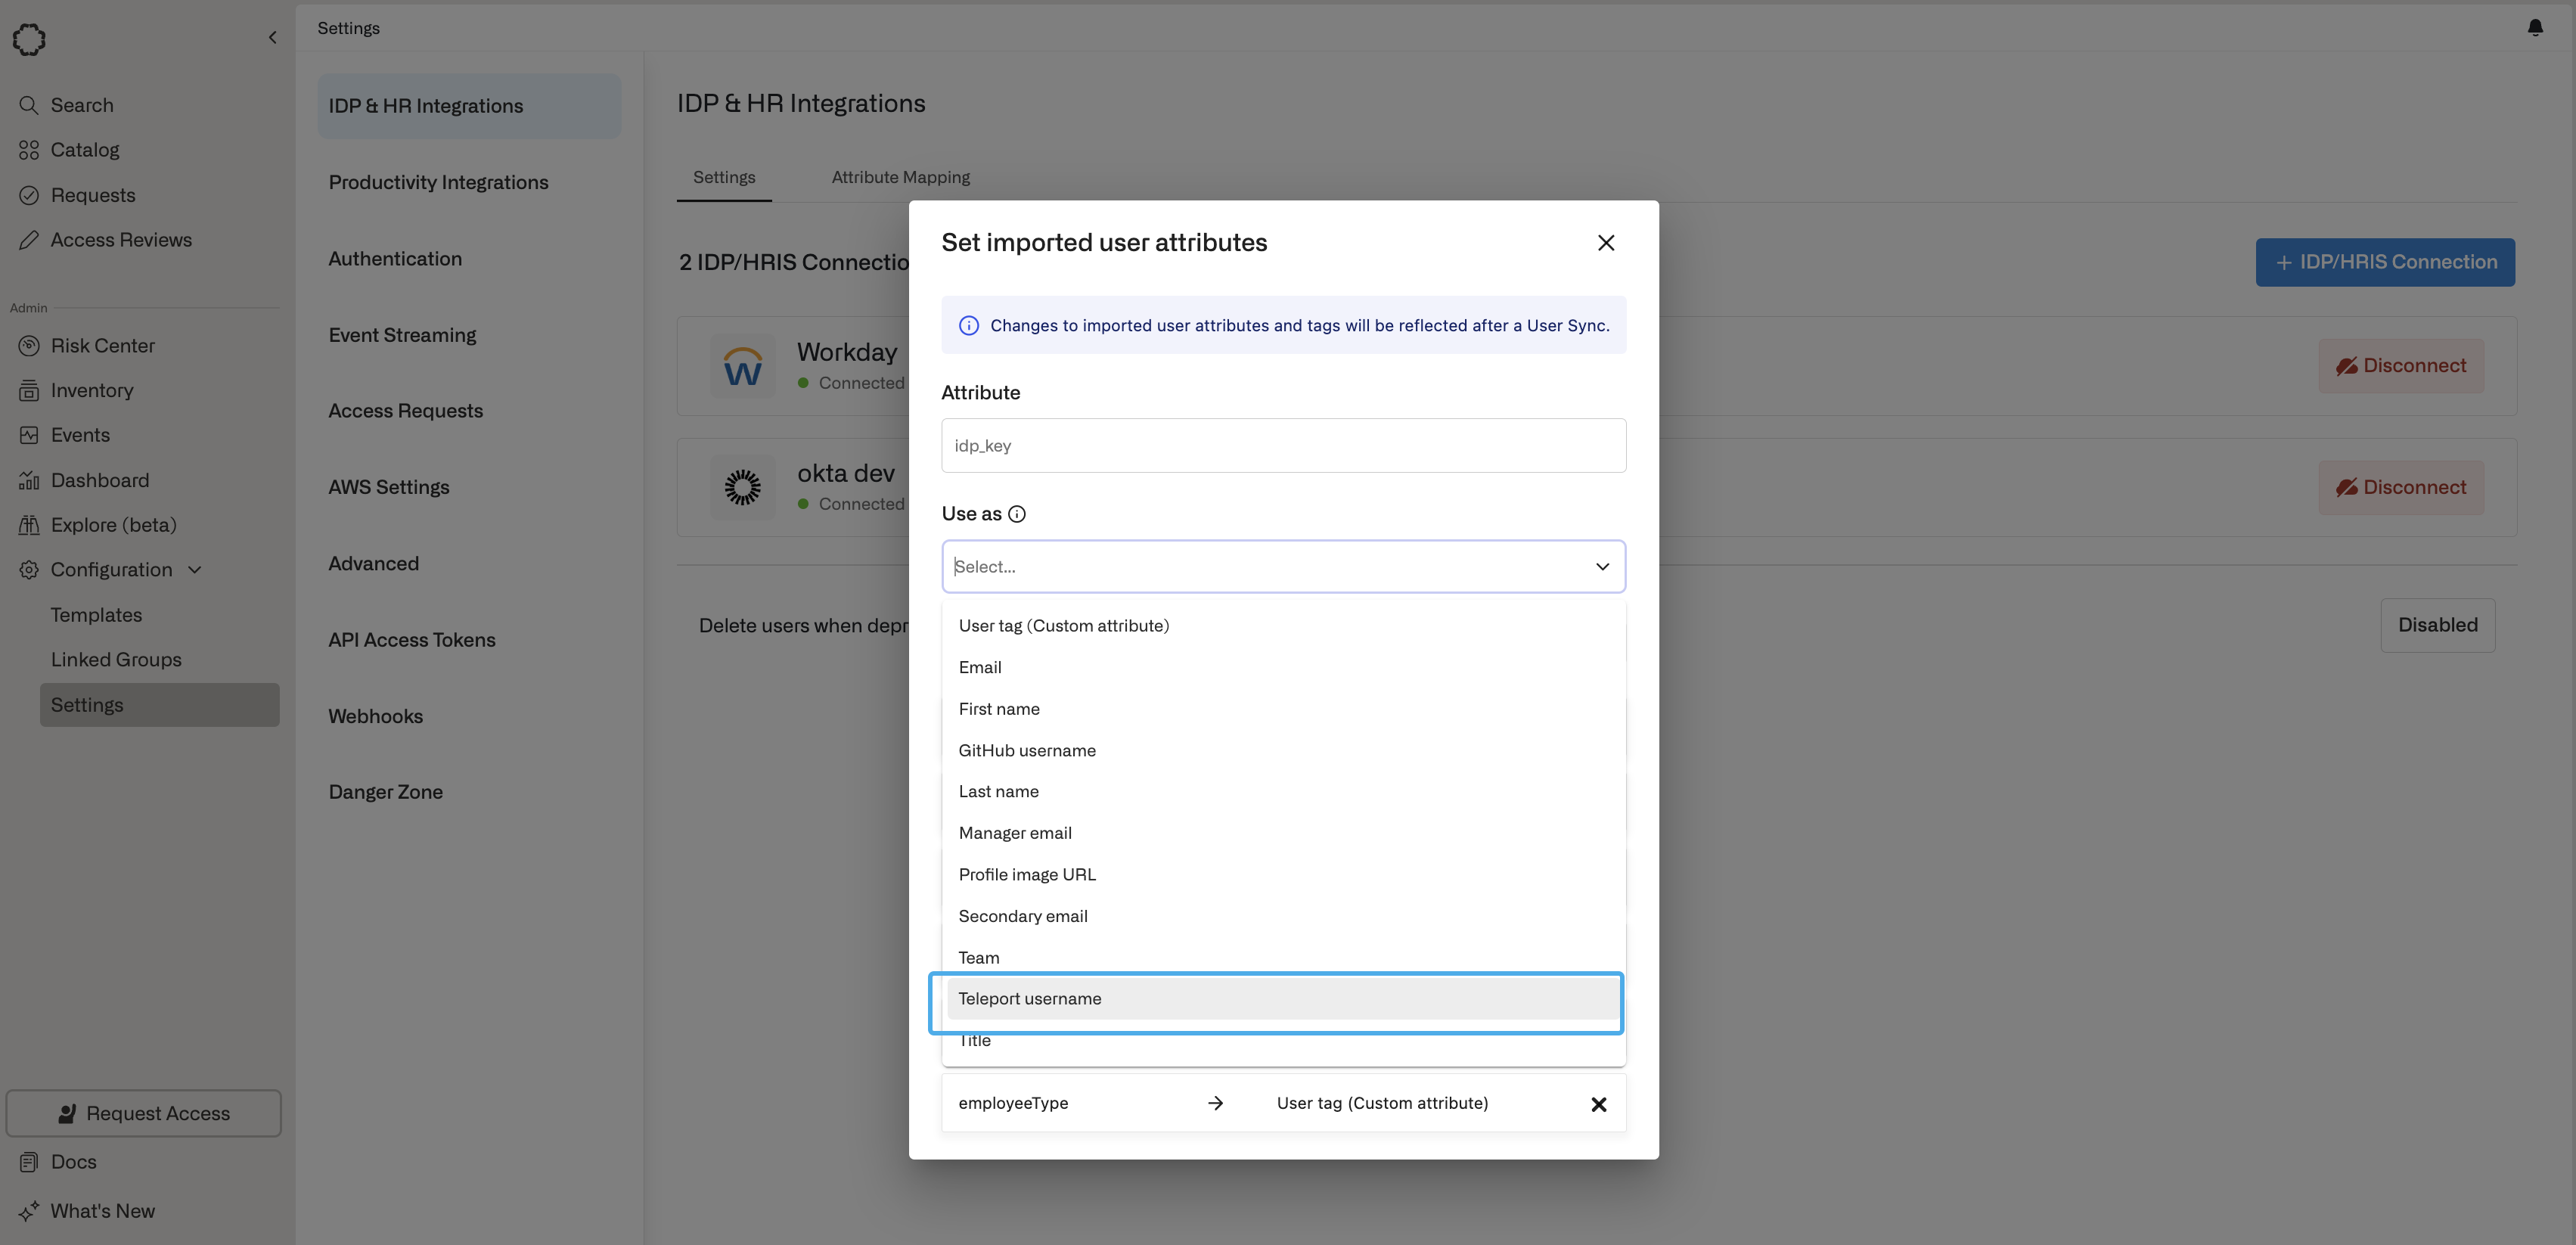
- Enter the attribute name from your IDP that has the Teleport username, select Teleport username as the Use as value from the dropdown and click Add attribute.
- The mappings from Opal user to Teleport username are now imported from your IDP and you can start using the integration.