- Database is not responsive: See the configure and restore database backups section to get the database back up and running.
- Kubernetes cluster is not responsive: Follow the steps in the reinstall cluster section.
Reinstall cluster
To reinstall the cluster:- If Opal is still accessible, toggle the “read-only mode” in Admin settings before cutting traffic over to the new cluster.

- Have a copy of the database encryption keys securely stored in a password manager. Opal won’t be able to use the data from an existing database on the new cluster without these keys.
- Follow the installation instructions while re-using the existing encryption keys and database:
- We can re-use the existing database, or recreate it from a backup if it’s unhealthy.
- Restore the Admin console backup, if available. This will restore all Kubernetes objects, the Admin console configuration and Opal version.
- Disable “read-only mode” in Admin settings.
- Update DNS to point to the load balancer on the new cluster.
Configure database backups
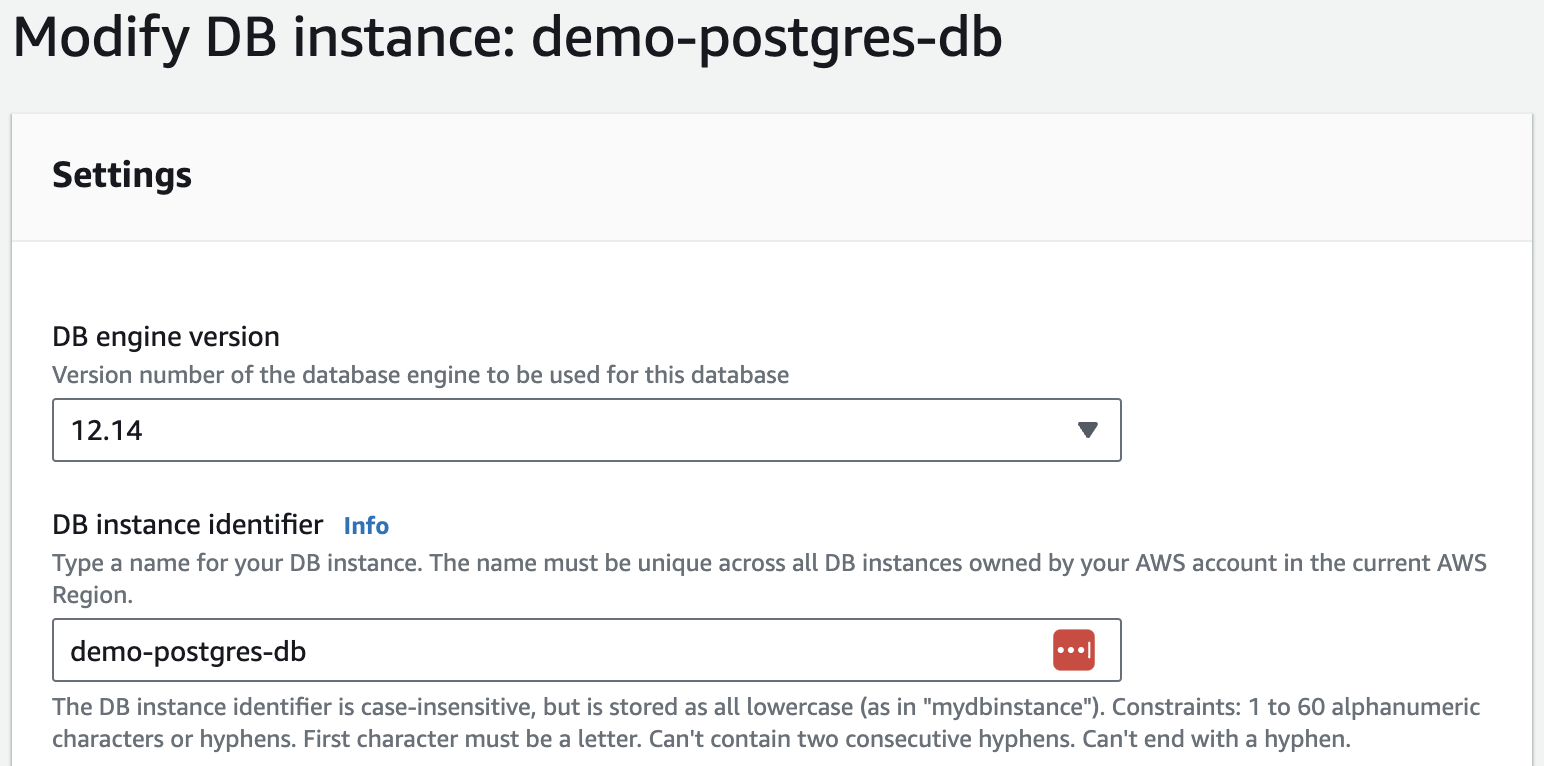
Time estimate: 15 min The database is the most sensitive piece of the Opal infrastructure as it holds all the state. The only thing not included is the Admin console configuration. It’s a good practice to set up automated backups in the event that data need to be recovered, or if the database becomes unhealthy. Here are the steps to enable backups on Amazon RDS:- Select the database instance, then click Modify:

- Navigate to the Additional configuration section and select a Backup retention period. You may also enable Backup replication in another region. This can be helpful in the event of an outage with an entire AWS region. We recommend setting a backup retention period of 30 days.
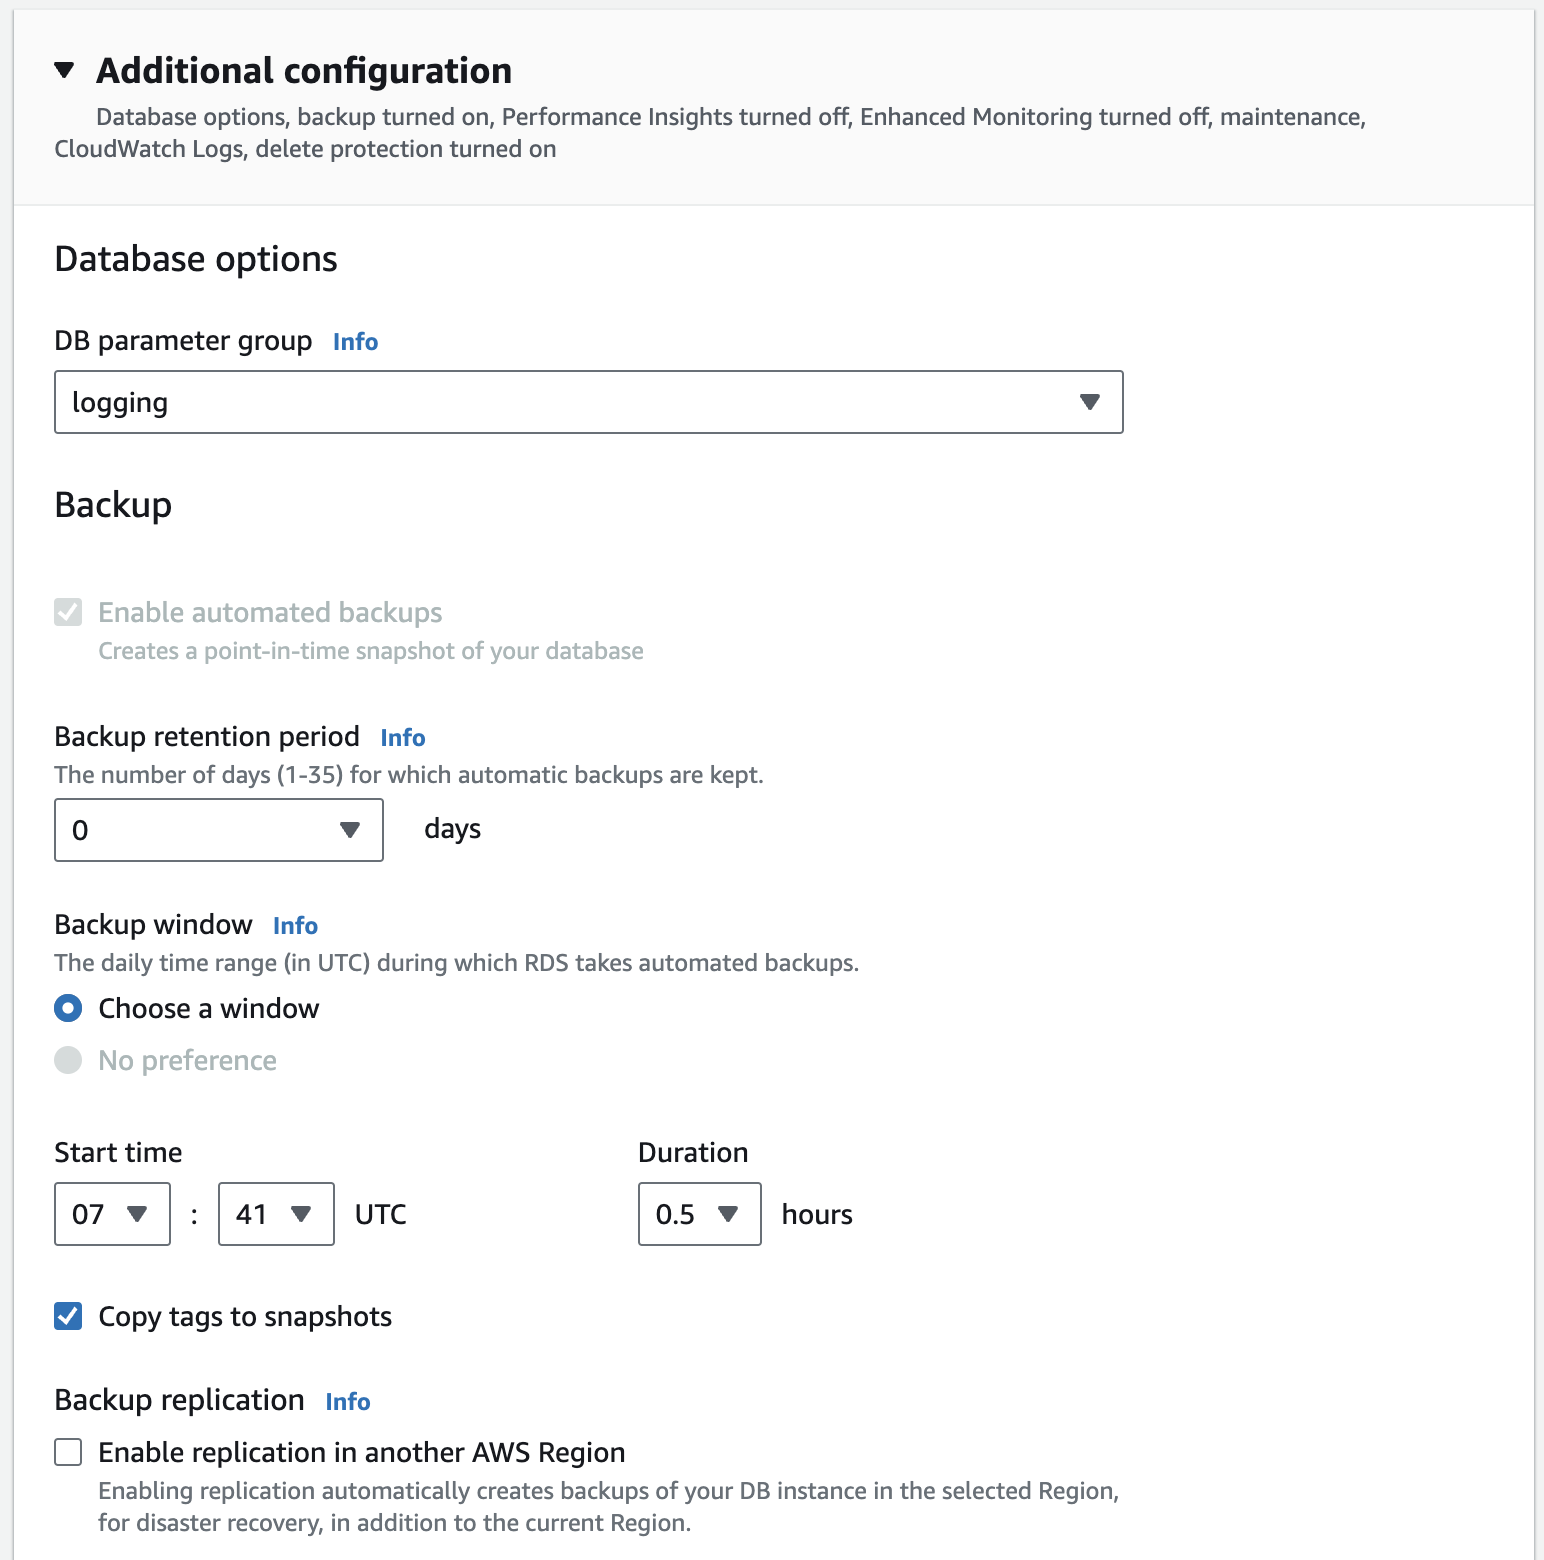
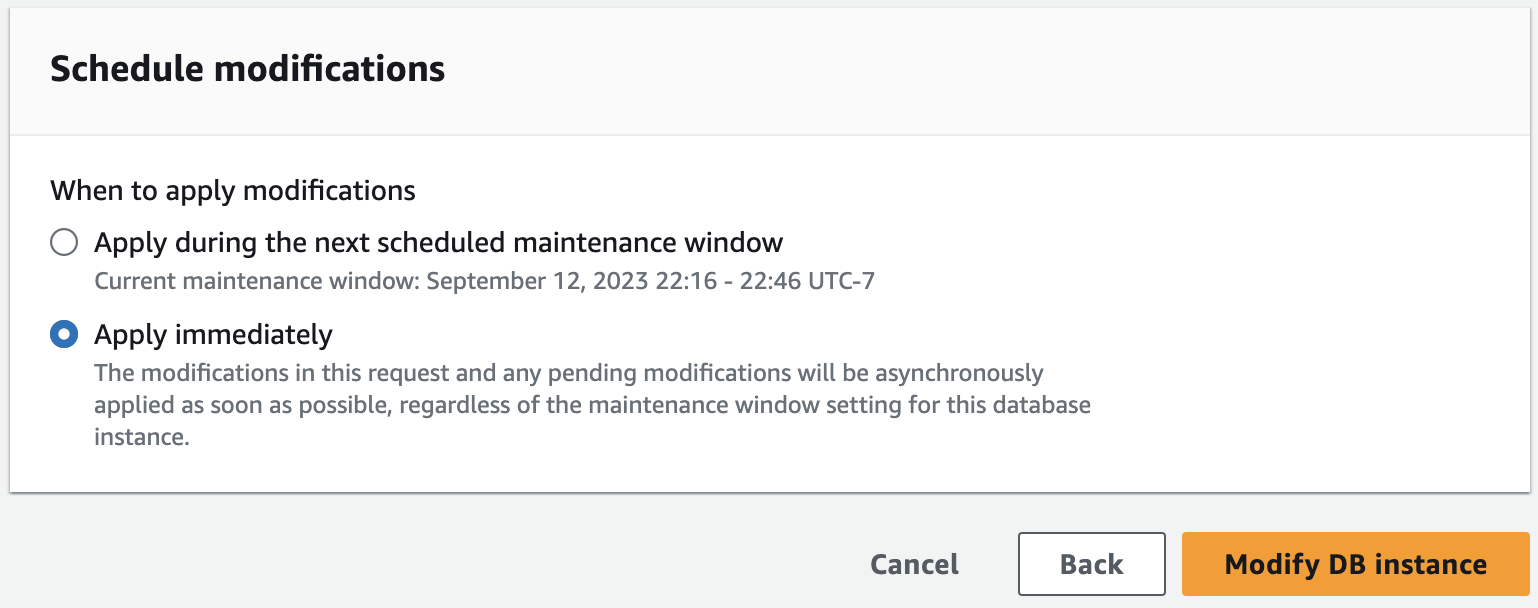
- Click Continue to finish the backup configuration, then you can select Apply immediately. Finally, click Modify DB instance.
- Automated backups are now enabled.
Restore the database from a backup
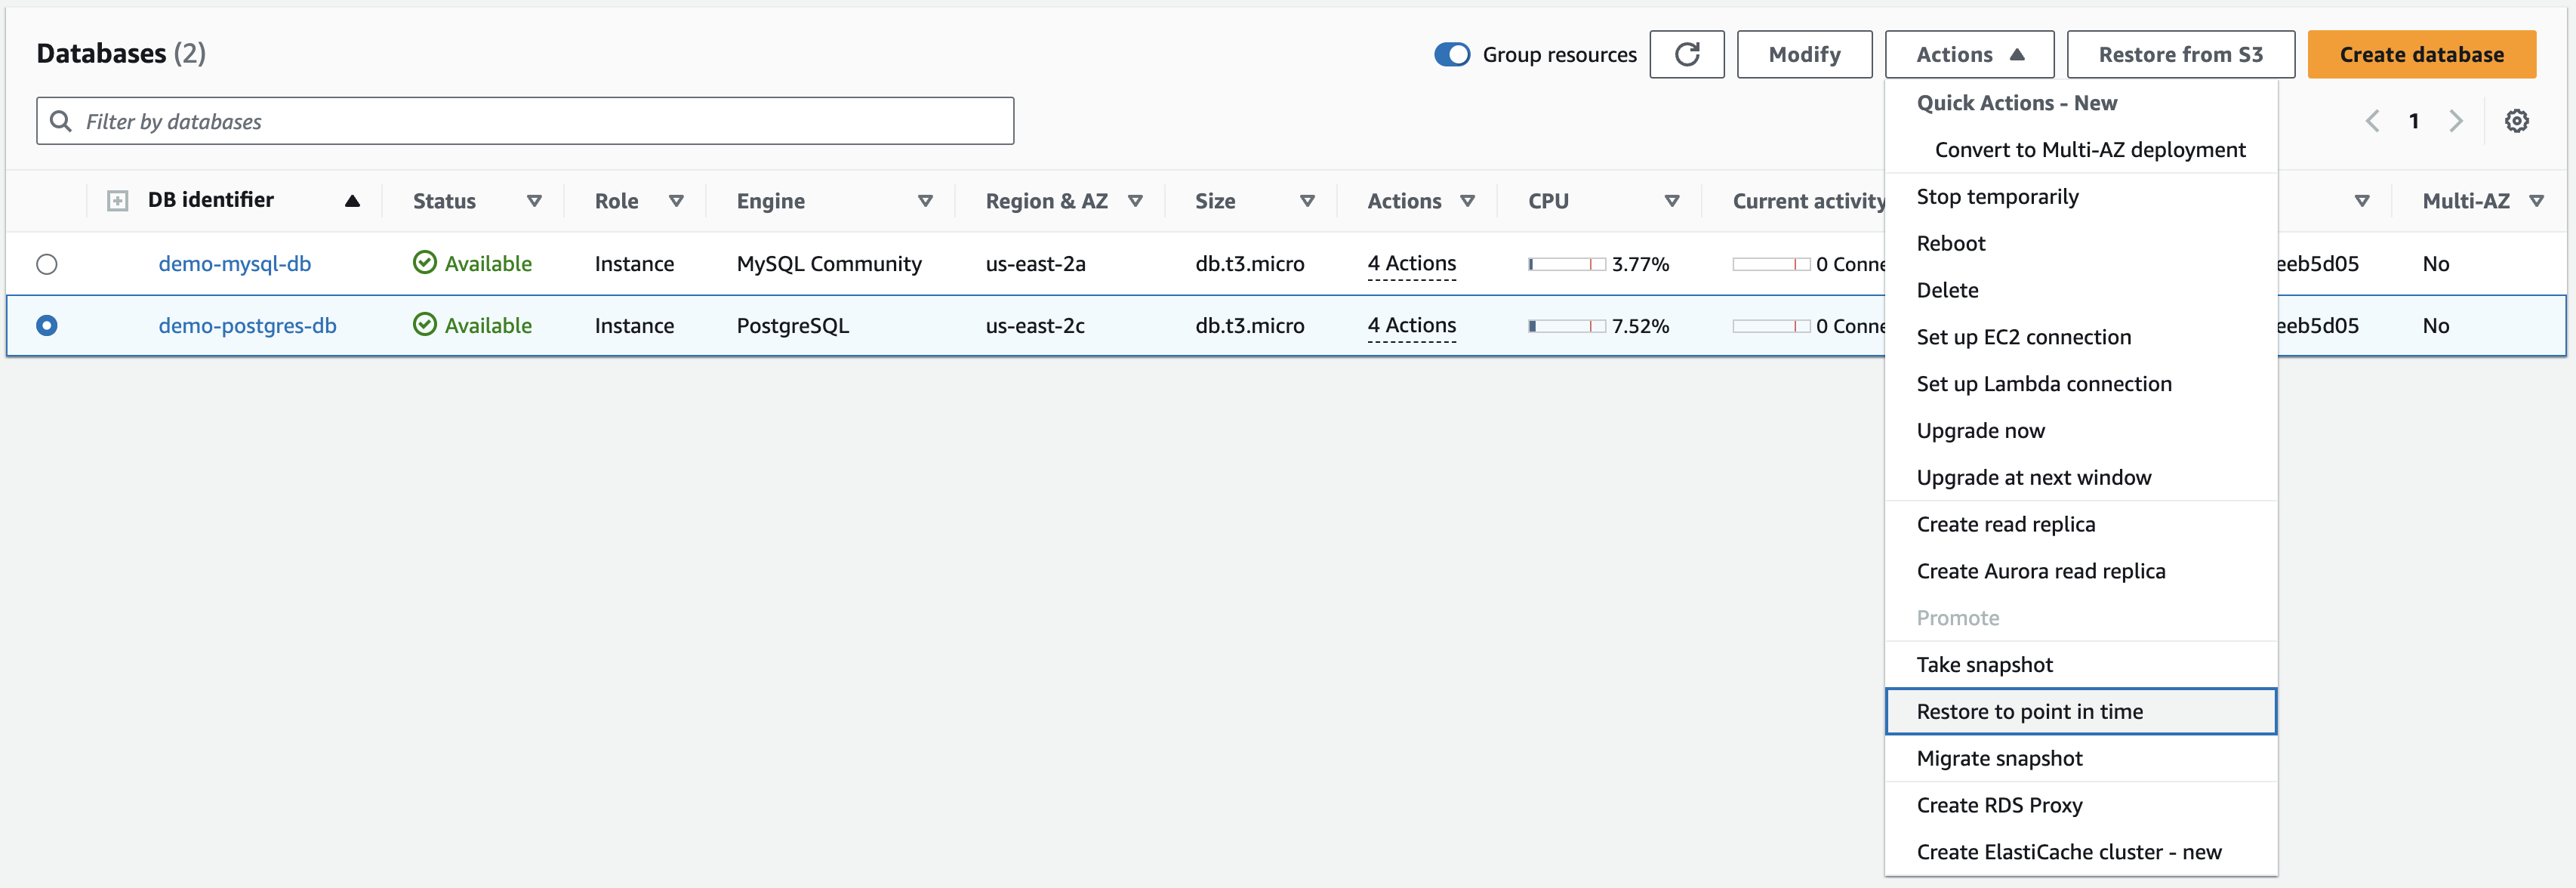
Time estimate: 30 min Here are the steps to restore a database from a backup on Amazon RDS:- Select the database instance, then click the Actions button, then click Restore to point in time.
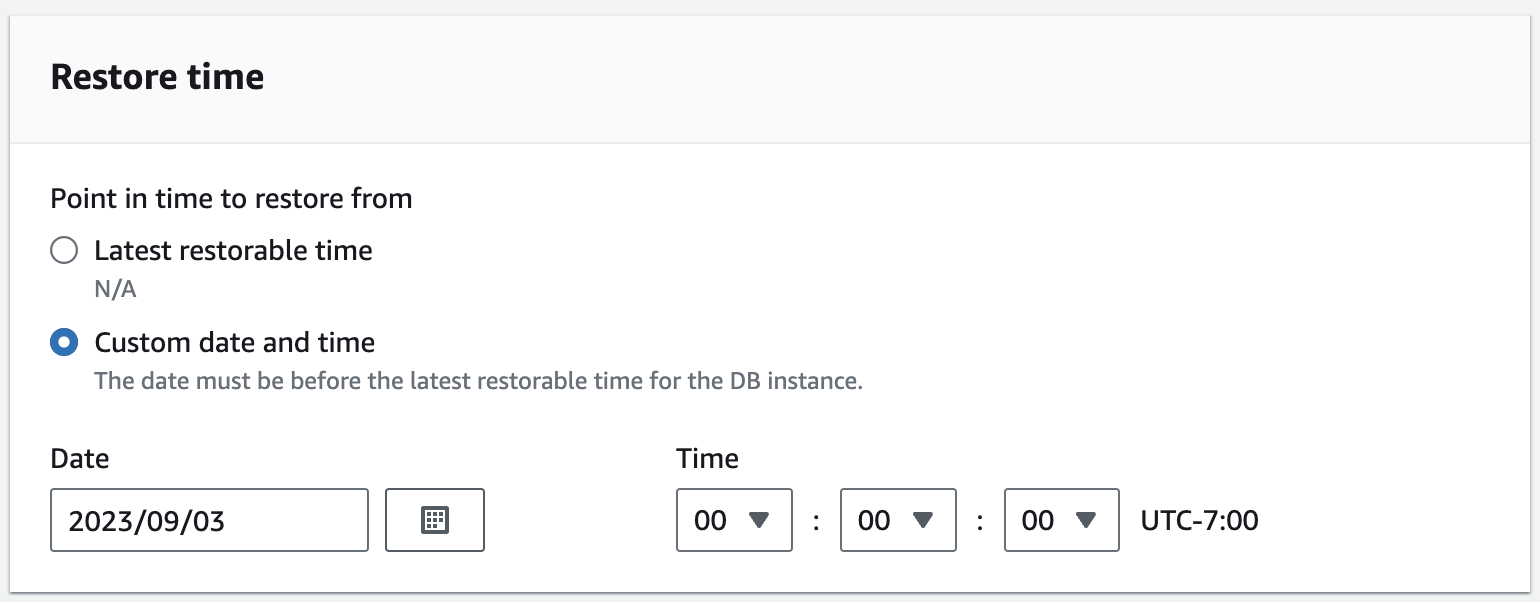
- Select a date to restore data from a specific snapshot:
- Make sure that the rest of the configuration settings are matching with the existing instance.
- Click Restore to point in time at the bottom.
- A new instance will come online. We now need to switch Opal over to use the restored database.
- Rename the existing database:
- Then rename the restored database to match the original database name. This way it will have the same hostname, and there is no additional change needed on the application side.
- Triggering a new deployment in the Admin console may be needed to force the application to reset the database connection.
Back up the Admin console
Time estimate: 30 min Backups of the Opal Admin console can be created through KOTS. To enable backup support, you will need to install and configure Velero on your cluster. This section describes backing up the admin console and all application data.-
Installing the Velero CLI
-
Open a terminal in the environment that you manage the cluster from, which can be a local machine that has
kubectlinstalled. - Check for the latest supported release of the Velero CLI in the Velero GitHub repo at https://github.com/vmware-tanzu/velero/releases. We recommend using the latest supported version. For more information about supported versions, see Velero Version Compatibility. Note the version number for the next step.
-
Run the following command to download the latest supported Velero CLI version for the Linux AMD64 operating system to the cluster:
Replace VERSION with the version number using the format
vx.x.x. Example: -
Run the following command to uncompress the TAR file:
Replace VERSION with the version number using the format
vx.x.x. -
Run the following command to install the Velero CLI:
Replace VERSION with the version number using the format
vx.x.x. -
Run
velero versionto test that the Velero CLI installation worked correctly. You might get an error message stating that there are no matches for the server version. This is acceptable, as long as you get a confirmation for the client version. After the Velero installation, you also see the server version.
-
Open a terminal in the environment that you manage the cluster from, which can be a local machine that has
-
Set up backups on AWS
- Follow the instructions for installing Velero on AWS in the Velero documentation.
-
Run the
velero installcommand with these additional flags:--use-node-agent --uploader-type=restic --use-volume-snapshots=falseExample:
- Creating full backups
- Create a backup with KOTS CLI
NAMESPACE with the namespace where the admin console is installed.
- Create a backup with KOTS Admin Console
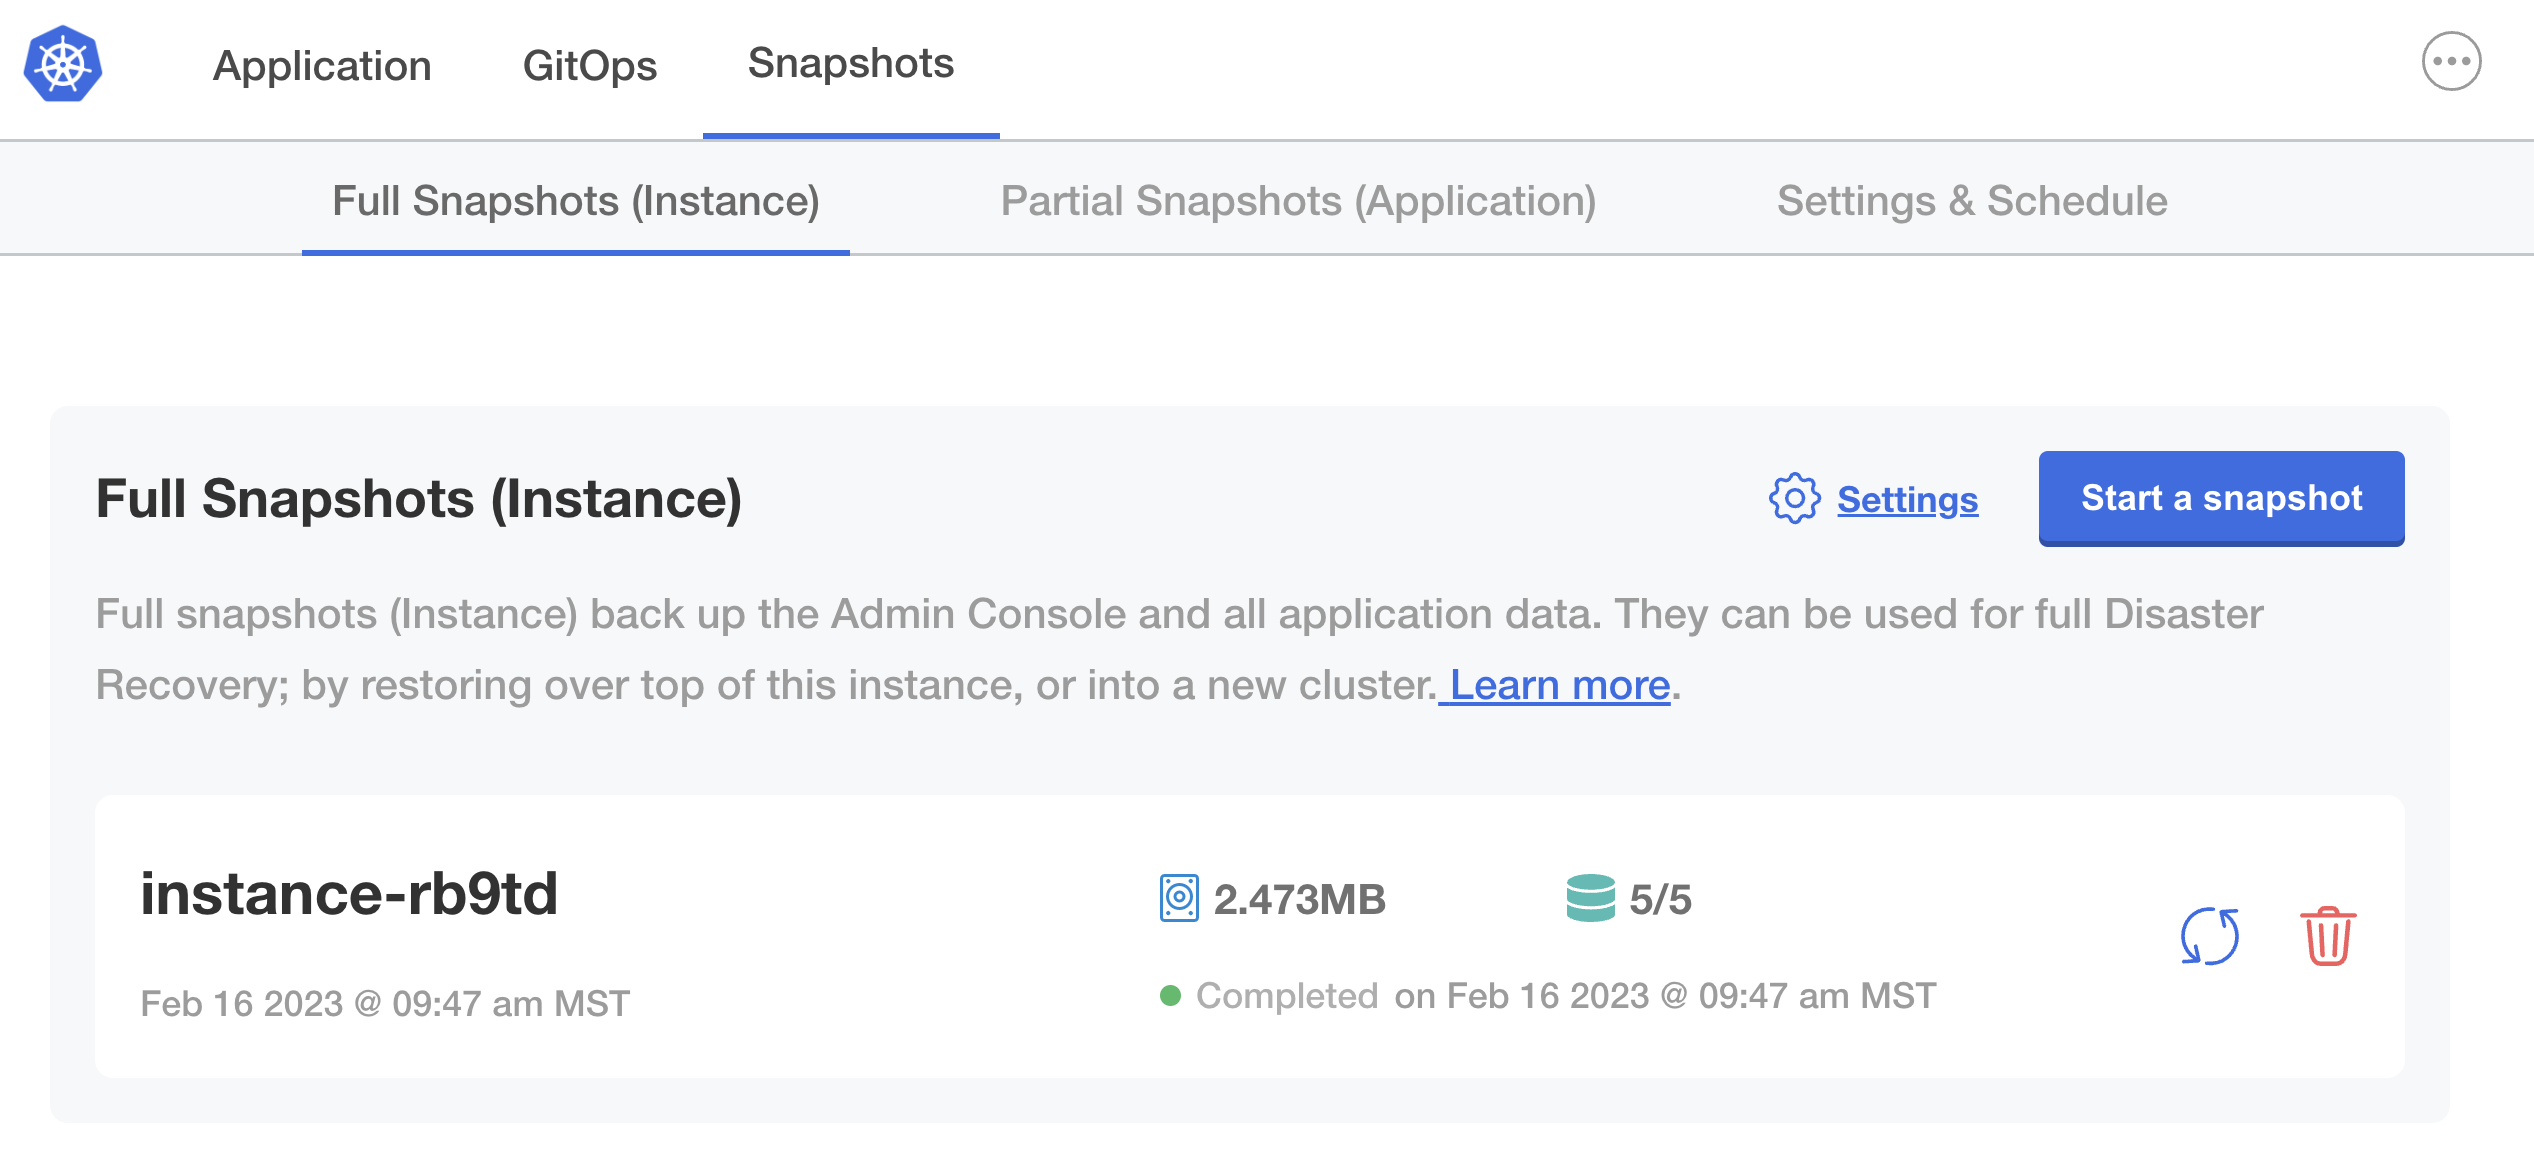
- Go to Snapshots > Full Snapshots (Instance).
- Click Start a snapshot.
- Restoring from backups
- Full restore: Restores the admin console and the application
- Partial restore: Restores the application only
- Admin console: Restores the admin console only
get backups and restore commands in the last two steps.
To restore a backup on an existing cluster:
- (New or Unhealthy Clusters Only) Install a version of Velero compatible with the one that was used to make the snapshot backup: refer to section 2 for instructions.
-
Run the
kubectl kots get backupscommand to get a list of backups. -
Run the following command to restore a full backup:
Replace
BACKUPwith the the name of the backup to restore from.