

- Allow users to request just-in-time access to a Workato project, at the exact project role they need, from the web and Slack
- Manage collaborator group membership, and which project roles each group holds
- Set the right resource owners to delegate approvals to those with the most context
- Automatically revoke access when a time-bound grant expires
Supported resources
Opal syncs every collaborator in your workspace. The integration doesn’t invite or remove collaborators, and it doesn’t manage environment roles. Pending invitations appear only after the collaborator accepts them.
How Workato access maps to Opal
- Project access levels: each project role in your workspace, such as Project admin or Builder, is an access level on every project.
- One role per project: Workato allows each collaborator or group one role per project. Requesting a different role on a project replaces the existing role. When that grant is revoked or expires, the collaborator loses access to the project.
- Groups: a collaborator group can hold a project role, so granting a group access to a project gives every member that role. Workato’s built-in All collaborators group isn’t synced, because it always contains every collaborator.
Requirements
Before you begin, you must:- Be an Opal Admin
- Be a Workato workspace admin who can create API client roles and API clients
- Ask the Opal team to enable the Workato integration for your organization
Configuration steps
1. Create a client role
- In Workato, go to Workspace admin > API clients > Client roles, and select Add client role.
- Name the role, for example
Opal. - On the Admin tab, under Workspace collaborators, enable the following permissions:
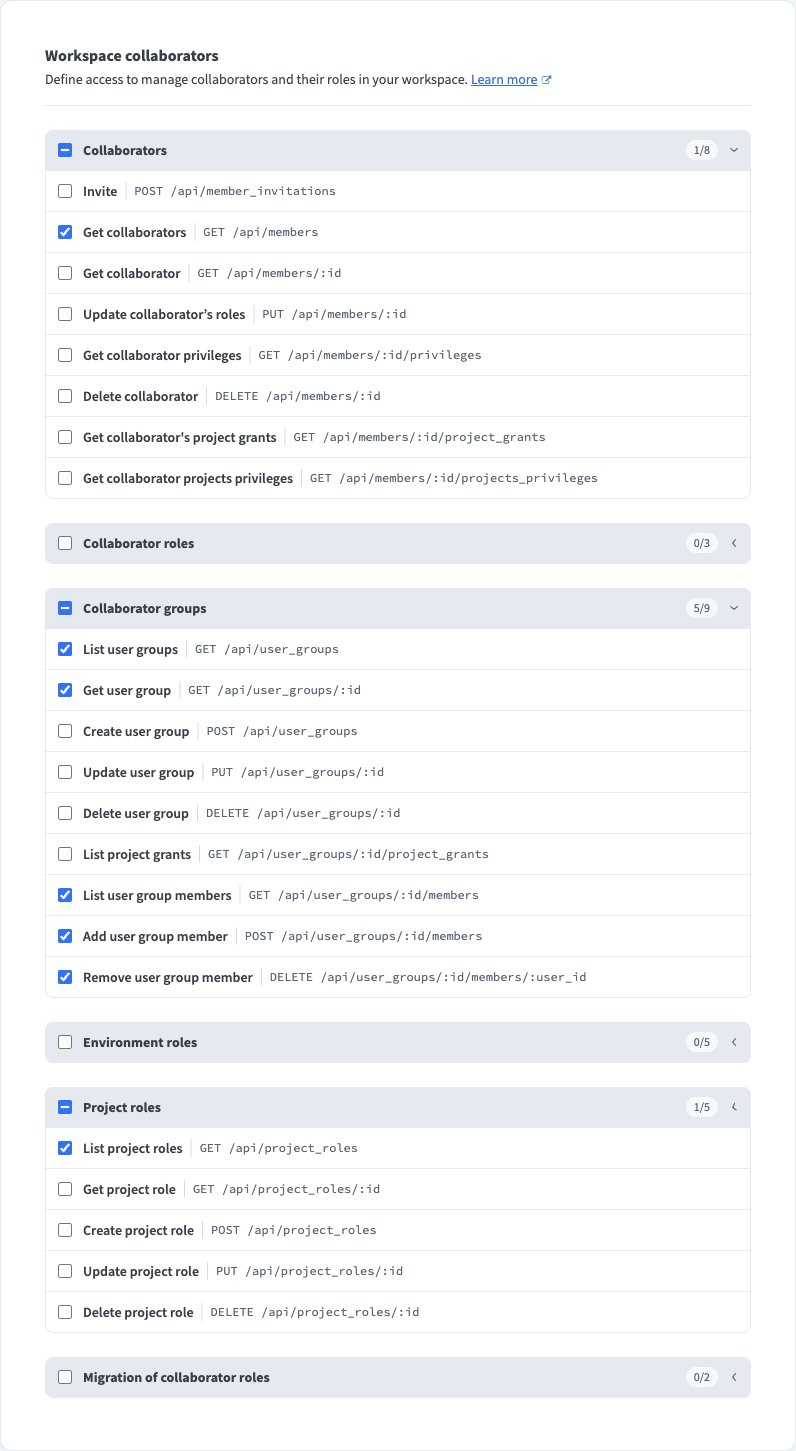
- On the Projects tab, enable the following permissions, then select Save changes:
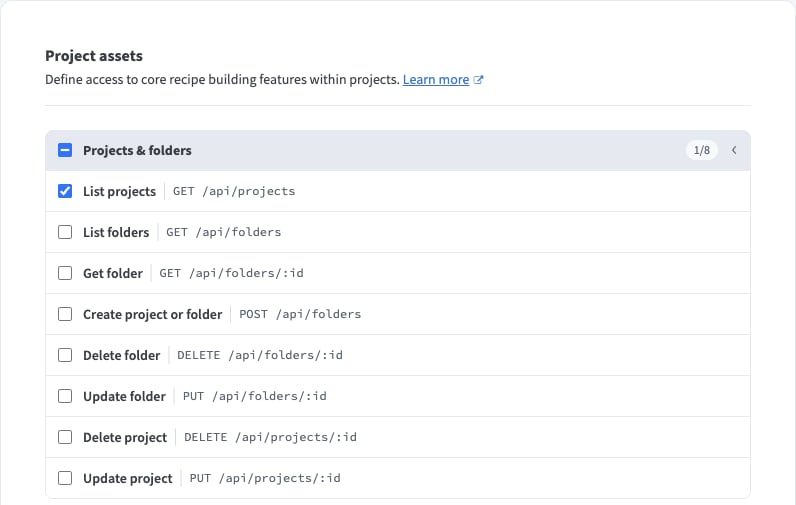
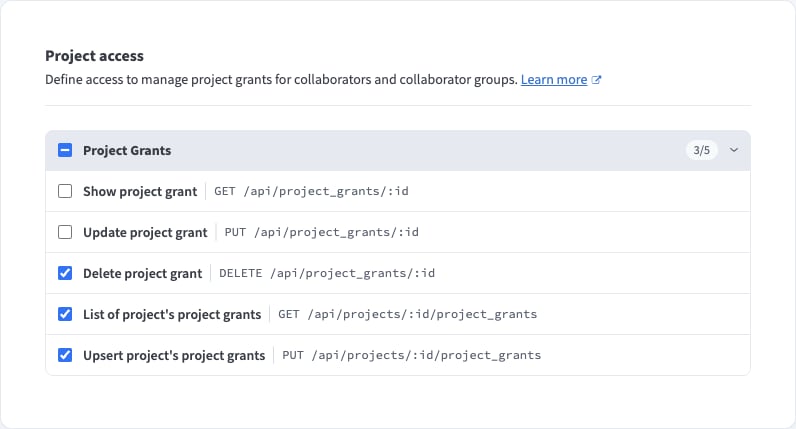
2. Create an API client
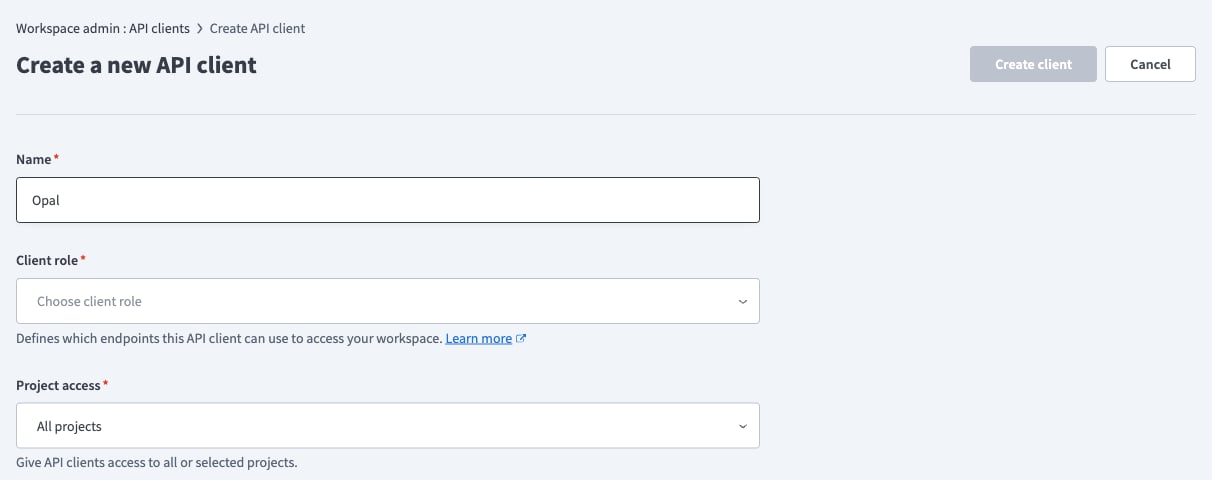
- Go to Workspace admin > API clients > API clients, and select Create API client.
- Name the client, for example
Opal, and select the client role from step 1. - Under Project access, select All projects. If you select specific projects instead, Opal can only see and manage those projects.
- Select Create client, then copy the API token that Workato shows. You’ll enter it in Opal in step 3.
3. Create the Workato app in Opal
In Opal, go to Inventory > +App and select Workato. Fill in the following fields:
Opal checks the API token when you save the app.