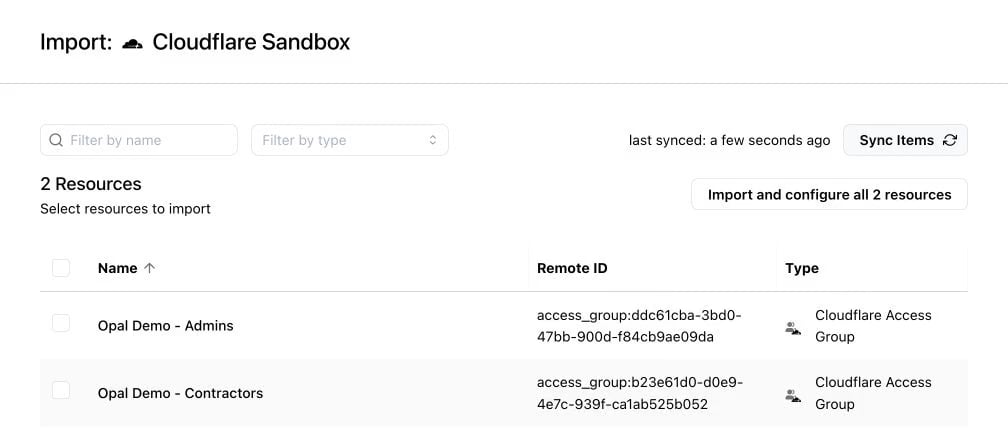
- Allow users to request account-wide permissions, IAM user group membership, and Zero Trust Access group membership from the web and Slack
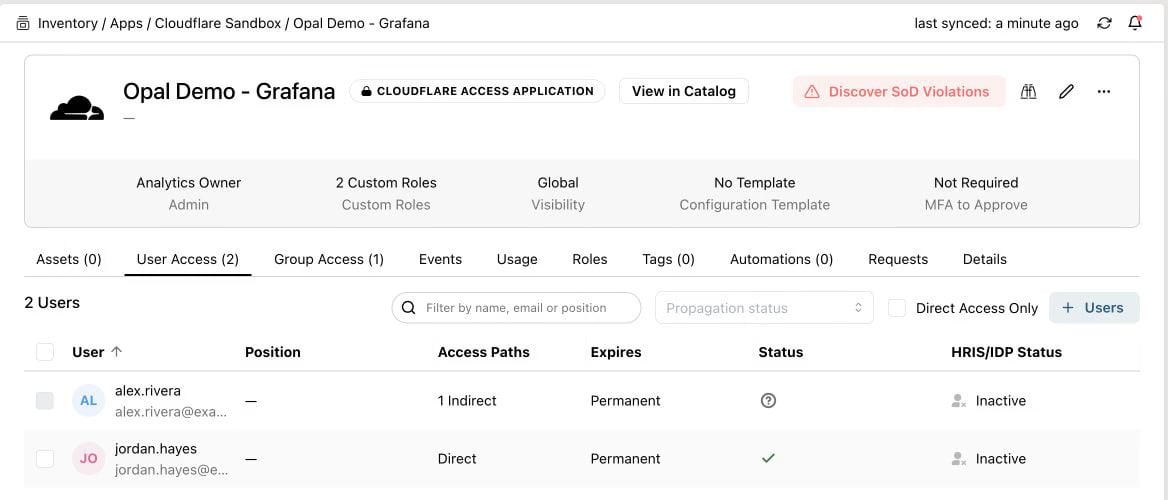
- Review who can reach each Zero Trust Access application
- Optionally invite and remove Cloudflare account members from Opal
- Optionally list account API tokens for access reviews
- Automatically revoke access when a time-bound grant expires
Supported resources
Opal syncs account members (including pending invites). By default it doesn’t invite or remove members, so your identity provider can keep provisioning Cloudflare over SCIM. You can turn member invites and removals on in the app settings.
How Cloudflare access maps to Opal
- Account permissions: your Cloudflare account appears as Cloudflare Account, with each account-scoped permission group as an access level. Opal grants and revokes these through Cloudflare policies. Zone-scoped or deny policies don’t count as account access. If a permission is bundled with others in one policy, Opal refuses to revoke it alone and asks you to split the policy in Cloudflare first.
- IAM user groups: each IAM user group appears as a Cloudflare User Group. You can grant and revoke membership, and grant or revoke the account permissions the group holds.
- Access groups: each Zero Trust Access group appears as a Cloudflare Access Group. Opal syncs people named by email rules, and can add or remove those email rules. Rules that admit people by email domain, identity-provider group, or similar aren’t listed as members; the group’s description names those rules, and any exclude or require rules Opal doesn’t apply, so the member list isn’t mistaken for everyone the group admits. Revoking the last email leaves a rule that matches nobody, because Cloudflare rejects an empty include list.
- Access applications: each Access application appears as a Cloudflare Access Application, read-only. People named by email in allow policies show as direct access; Access groups included by a policy show as the path to the app. Change who can reach an app by managing those Access groups, not the application itself.
- Account API tokens: optional and off by default. When enabled, each account API token appears as a Cloudflare Account API Token, read-only, so reviews can see which non-human credentials exist. Tokens have no email, so they aren’t shown as users holding access.
Limitations
- Opal syncs account-wide permissions only. Permissions scoped to zones or other resource groups aren’t included yet.
- Access-application rules that name identity-provider groups (for example Entra or Okta) aren’t linked to those groups in Opal yet.
- SCIM-managed IAM user groups may reject membership changes from Opal; Cloudflare’s own error explains when the identity provider owns the group.
Requirements
Before you begin, you must:- Be an Opal Admin
- Have a Cloudflare account admin who can create an account-owned API token
- Ask the Opal team to enable the Cloudflare integration for your organization
Configuration steps
1. Find your Account ID
In the Cloudflare dashboard:- Open Account home.
- Press Command + K (Mac) or Ctrl + K (Windows), type
Copy account ID, and run the suggested command.
2. Create an account-owned API token
- In the Cloudflare dashboard, go to Manage account > Account API Tokens.
- Select Create Token, name it (for example
Opal), choose an optional expiration, and set the permissions below. - Select Continue to summary, then Create Token, and copy the token. Cloudflare shows it only once.
For a read-only connection, grant only the Read permissions. For a connection that can change access, use Edit instead of Read where you need writes.
Copy the token. Cloudflare shows it only once.
3. Create the Cloudflare app in Opal
In Opal, go to Inventory > + App and select Cloudflare. Fill in the following fields:
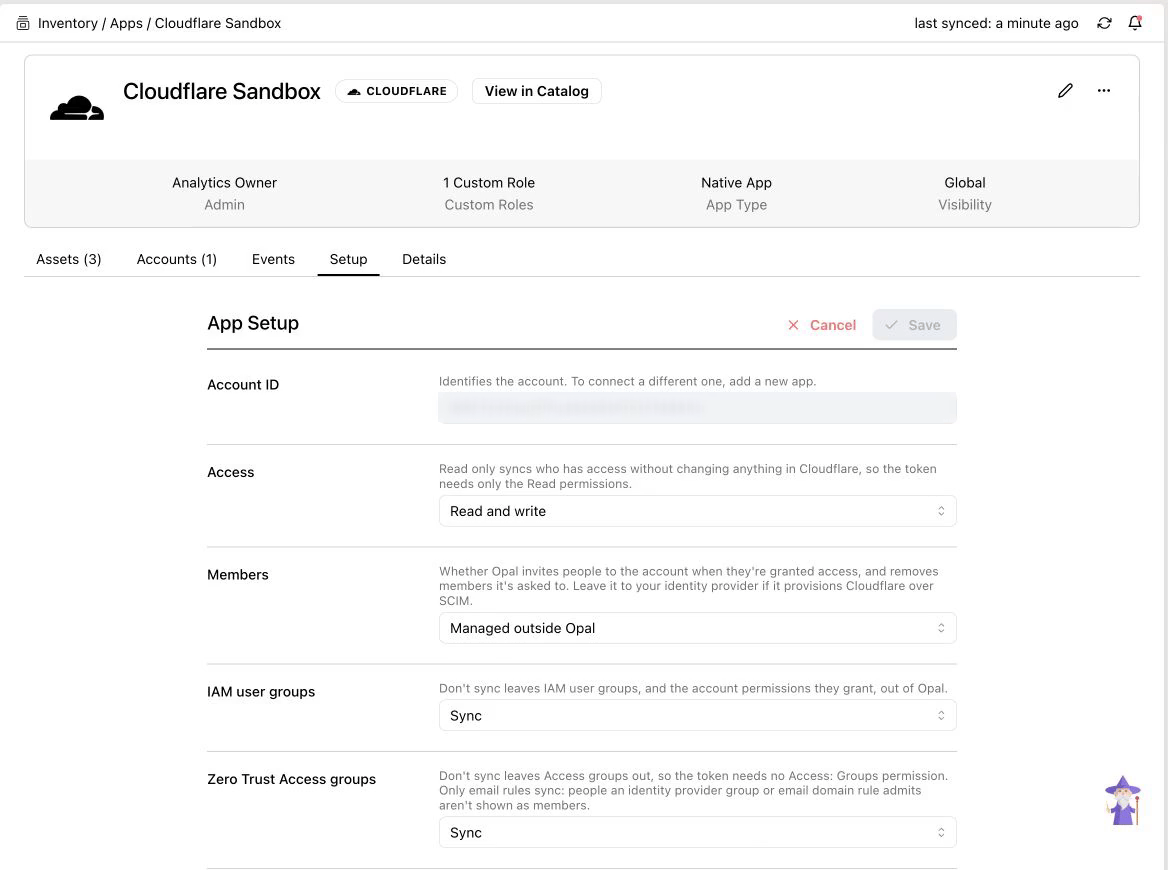
Opal checks the credentials when you save the app. You can change the sync settings later on the app’s Setup tab. A deselected kind makes no API calls and skips its validations.
4. Import assets
After you save the app, import the items you want to manage: on the app’s Assets tab, select Import assets, choose the account, user groups, Access groups, and Access applications, and turn on requests for the items people should be able to request. Opal pulls access only for imported items, so members appear after the next sync.