

If you have an existing Azure app in Opal that has not been configured to
manage infrastructure resources, you can enable infrastructure management
under the app’s Setup tab in Opal.
Requirements
You must have admin access to the Azure root management group.1. Create Opal Service Role
- In the Azure Portal, navigate to Tenant Root Management Group -> Access Control (IAM) -> Add -> Add custom role.
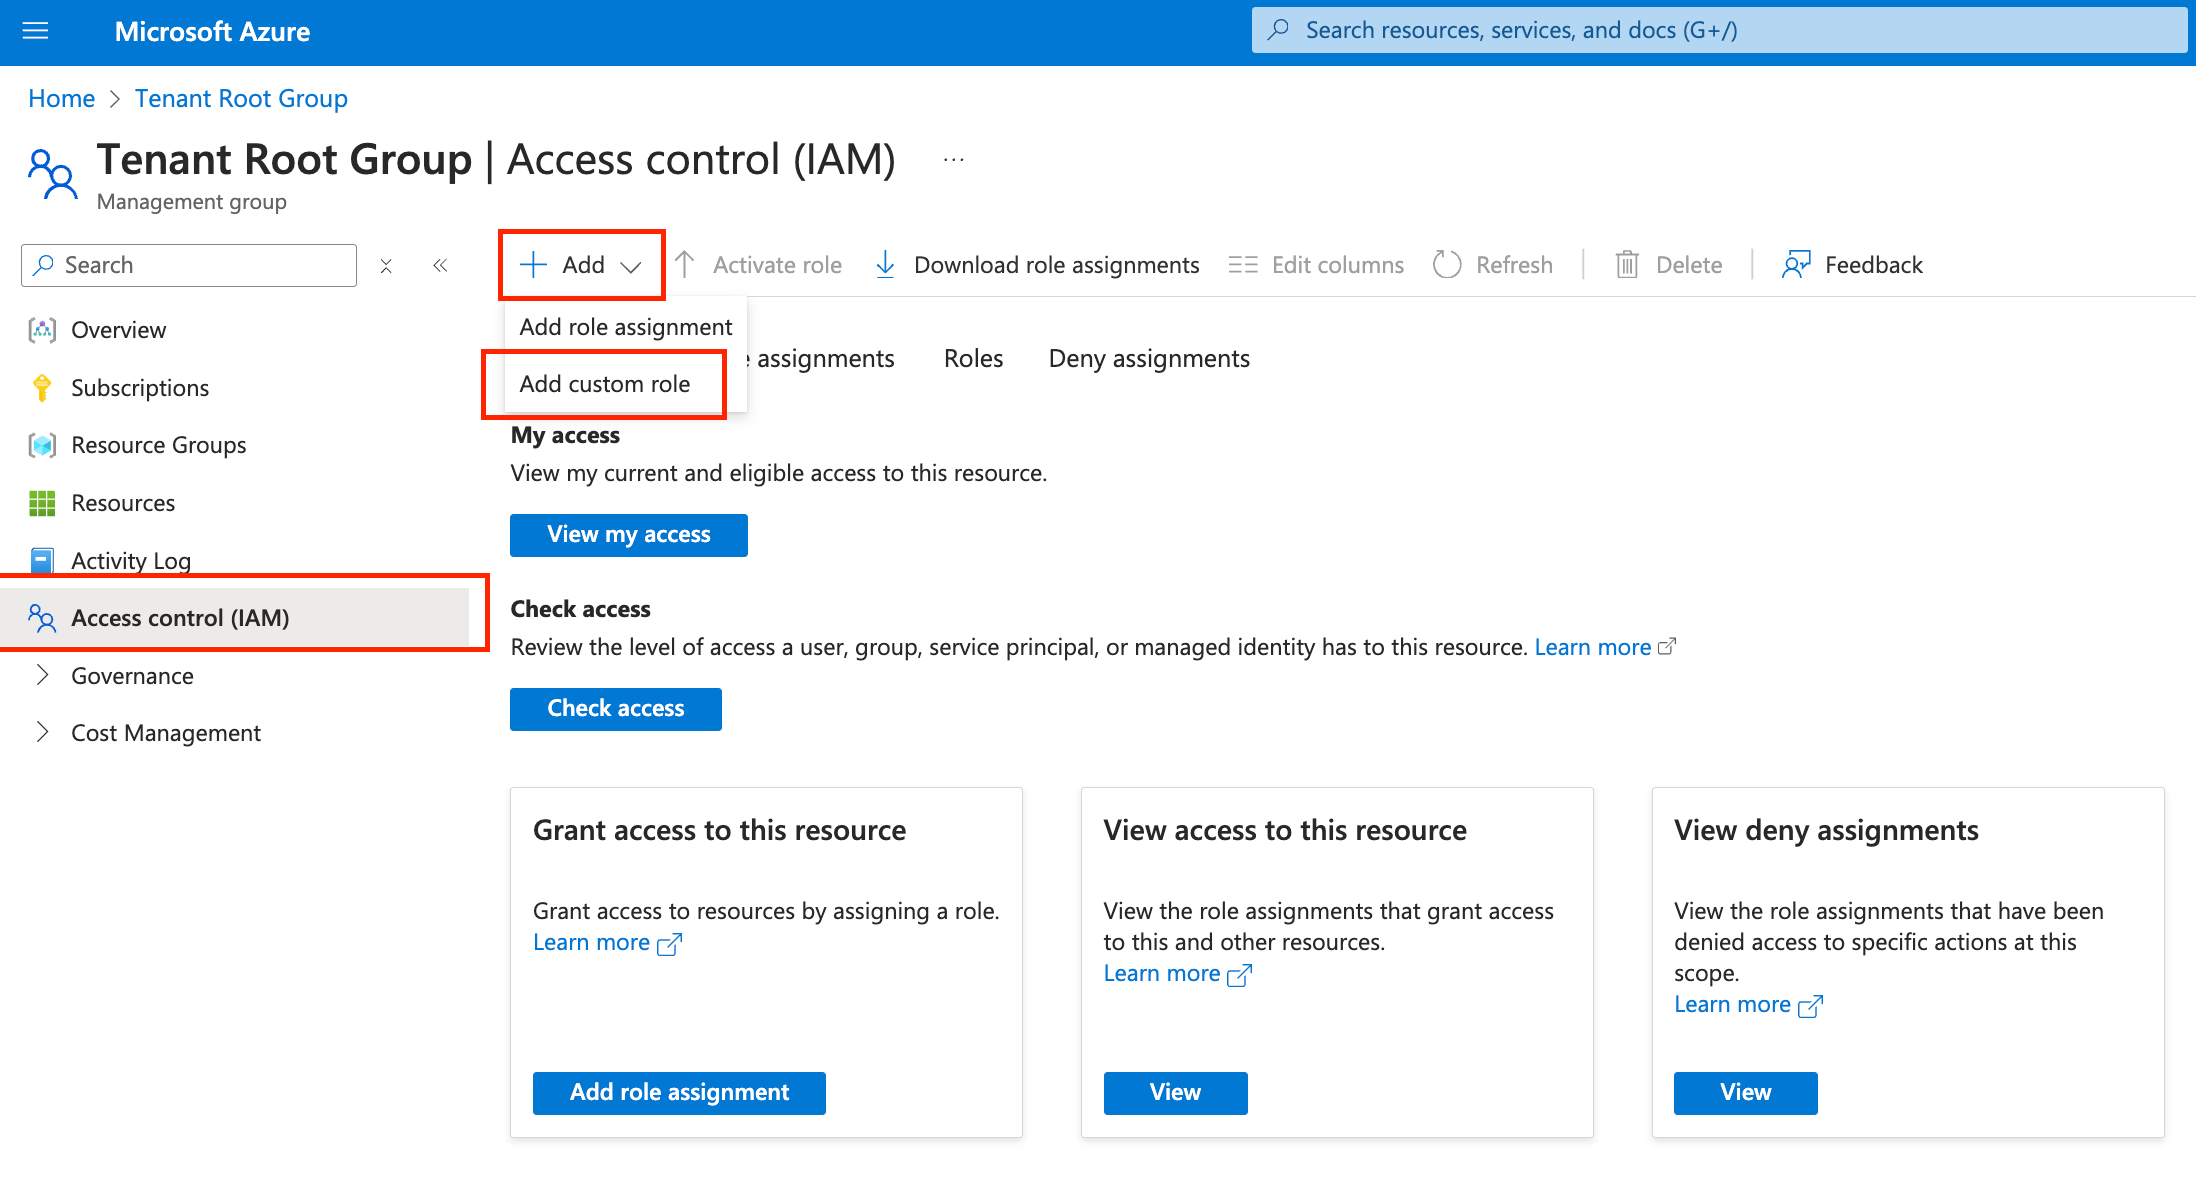
- Go to JSON > Edit. Replace the default definition with the following snippet in the Definition tab, substituting in your management group ID. Note: The
roleNamemust beOpal Service Role. Use the Explanation tab to see why permissions are required, and the Definition tab for a valid definition to copy and paste.
- Click Next, and then Create to create the role.
2. Create Role Assignment
- In the Azure portal, navigate to Tenant Root Management Group -> Access control (IAM) -> Add role assignment.
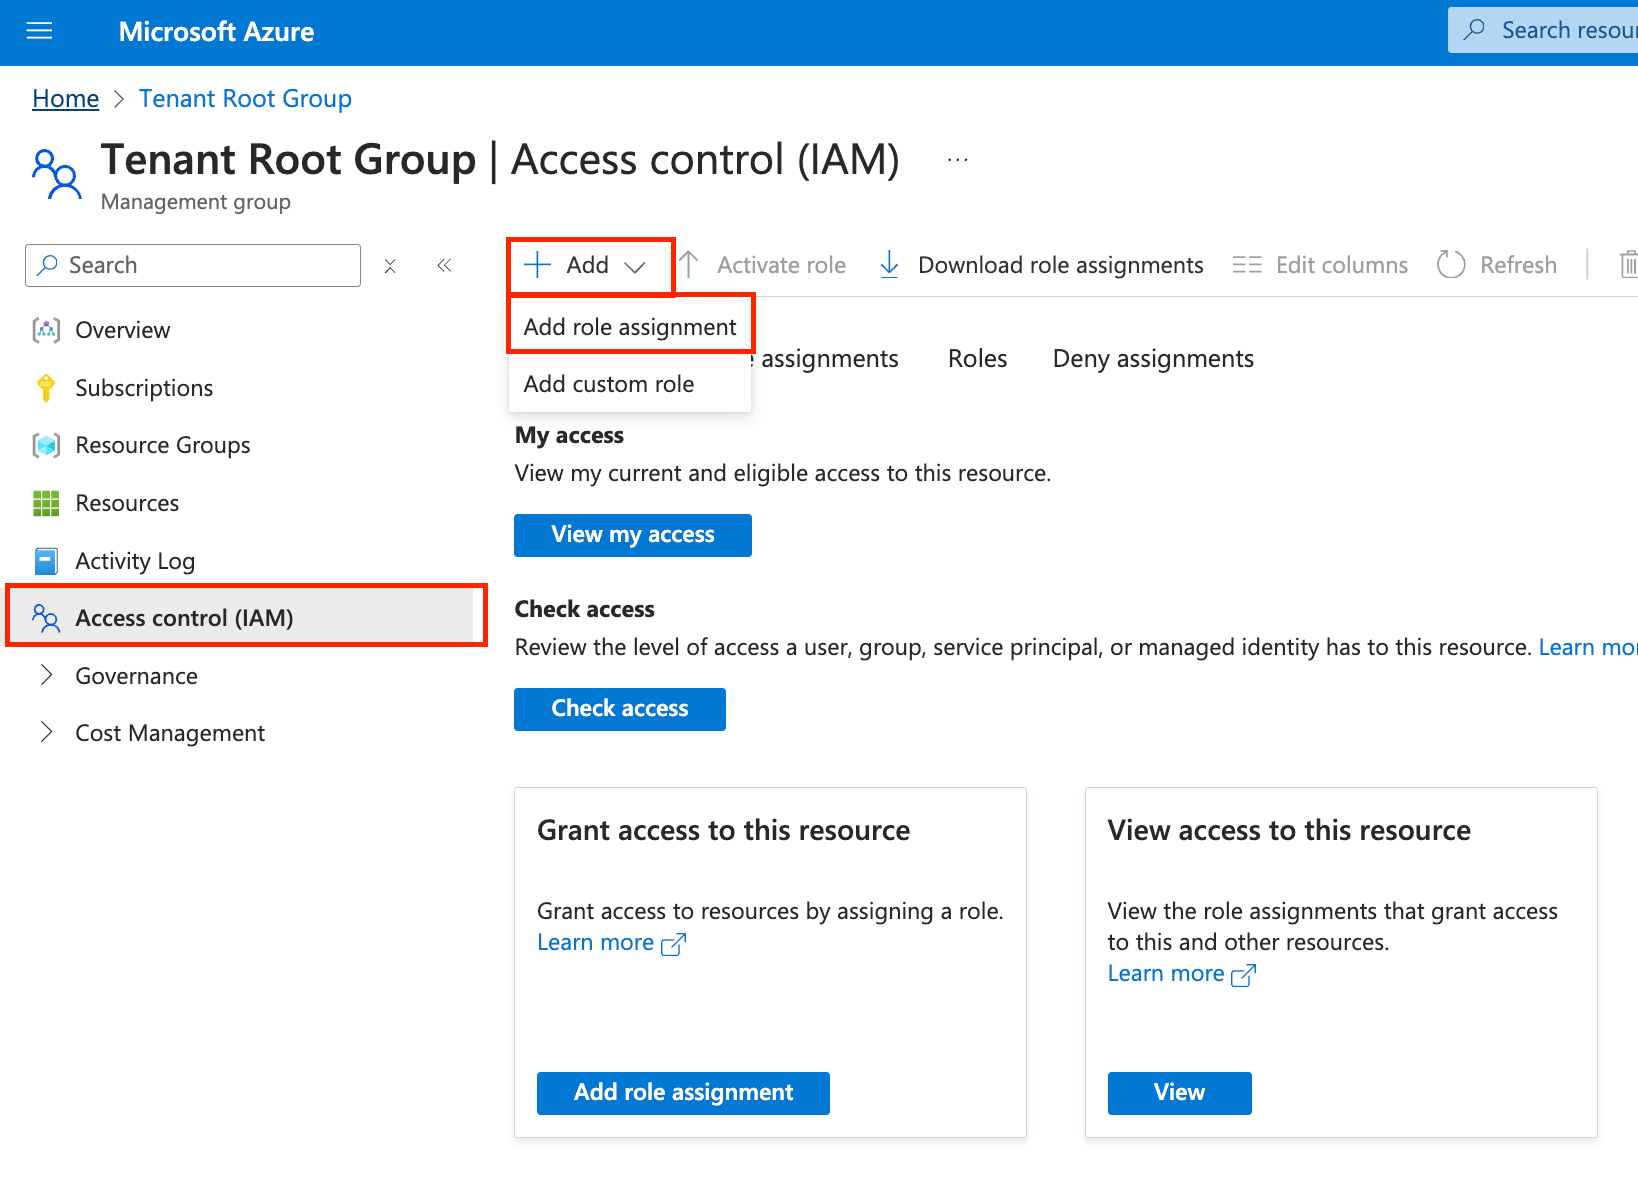
- Under Role, select the Opal Service Role (found under “Privileged administrator roles”).
- Select the Members tab. Add the Opal application as a member.
- Select the Conditions tab -> Select roles and principals.
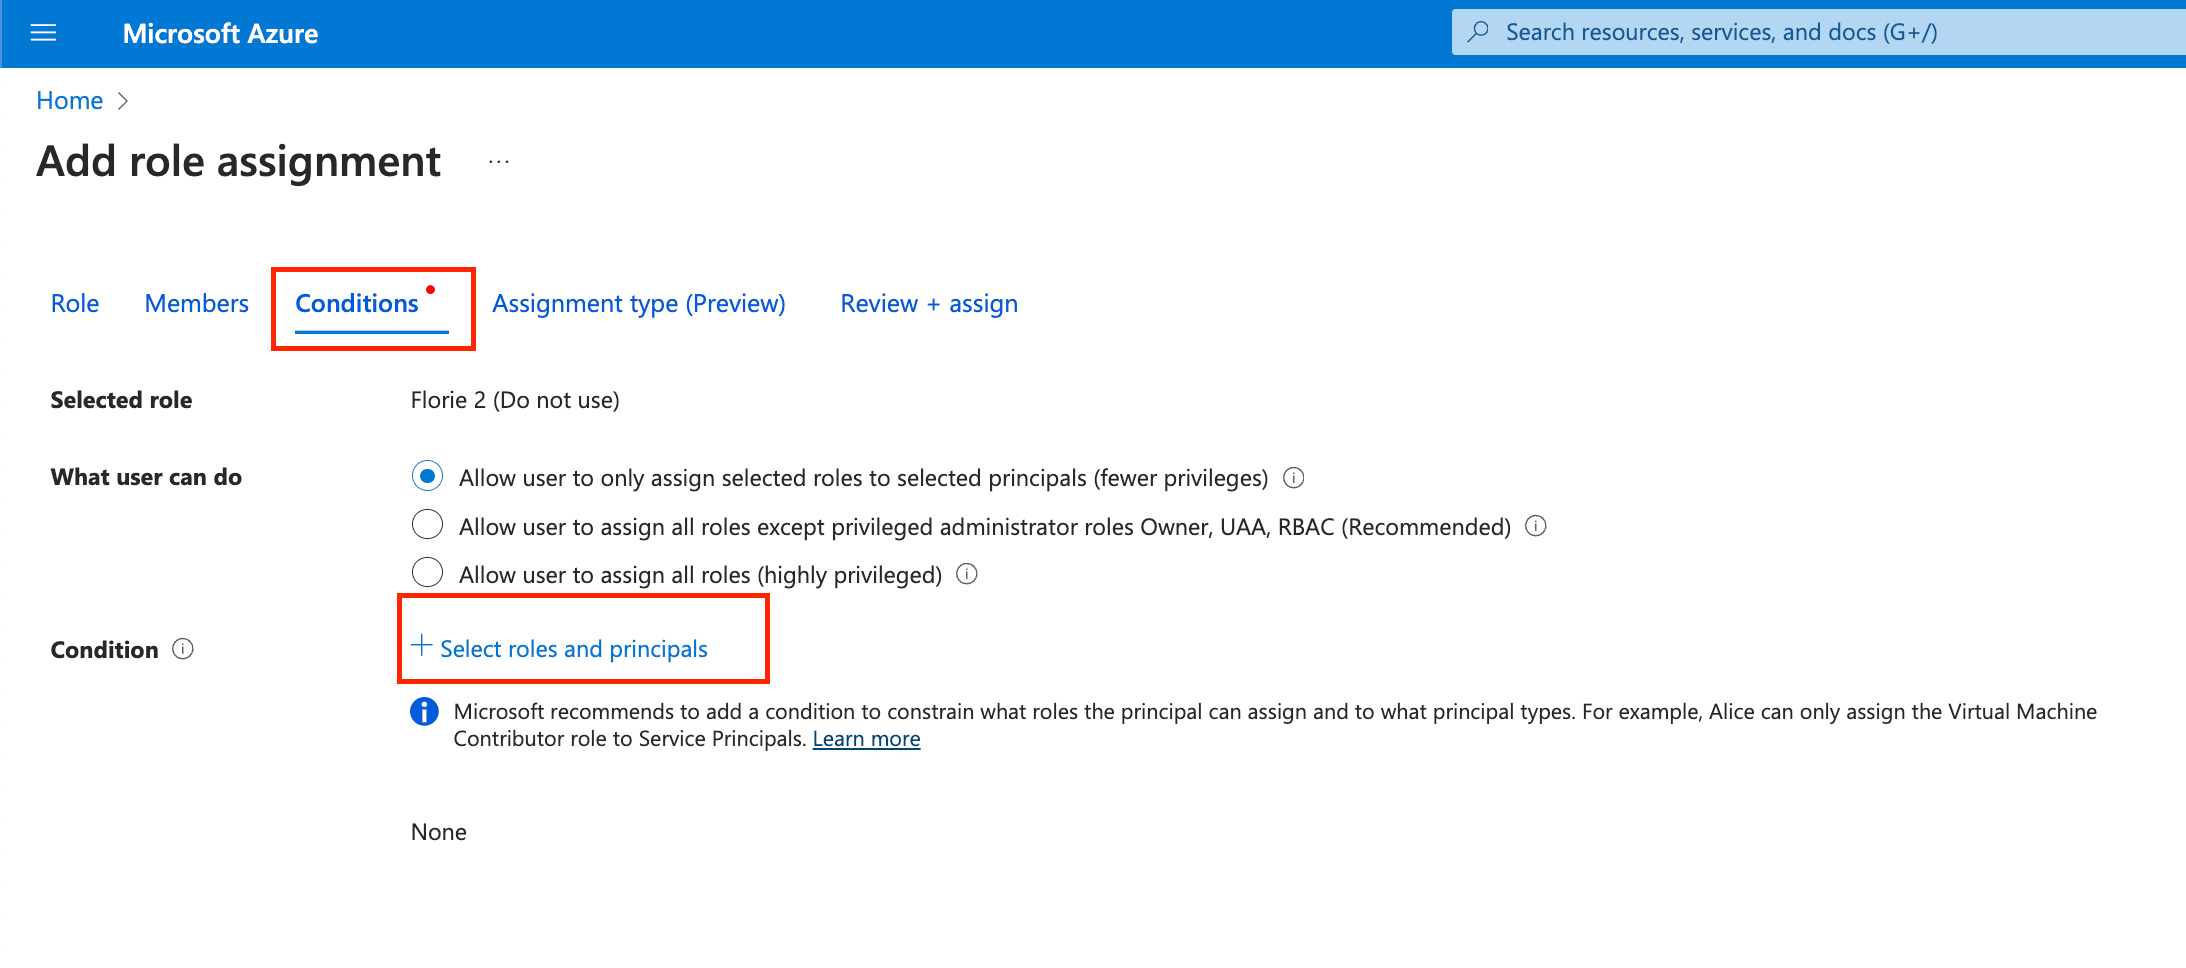
- Select Open advanced condition editor. Toggle Editor type from “Visual” to “Code”.
- Paste in the following code, substituting in your Opal app’s Object ID, and save. This condition prevents the Opal application from having the ability to escalate its own access by assigning roles to itself.
- Go to Review + assign. Complete assigning the role by clicking Review + assign.