> ## Documentation Index
> Fetch the complete documentation index at: https://docs.opal.dev/llms.txt
> Use this file to discover all available pages before exploring further.
# Overview
> Learn how to connect your Workday tenant to Opal.
Opal's integration with Workday lets you [leverage HRIS data](/integrations/workday-idphris-integration) as an additional source of truth for users, employee metadata, and their attributes. The integration also allows you to manage access to entitlements such as [Workday Security Groups and Roles](/integrations/workday-groups-and-roles).
## Supported resources
| Resource | Read | Grant and revoke access | Available in [Risk Center](/docs/least-privilege-posture-management) |
| ------------------------------------------- | ---- | ----------------------- | -------------------------------------------------------------------- |
| Workday Users and user attributes (as HRIS) | ✔️ | ✔️ | ✔️ |
| Workday User Security Groups | ✔️ | ✔️ | ✔️ |
| Workday Roles | ✔️ | ✔️ | ✔️ |
The Workday integration does not currently support syncing Workday service users.
## 1. Create an Opal app
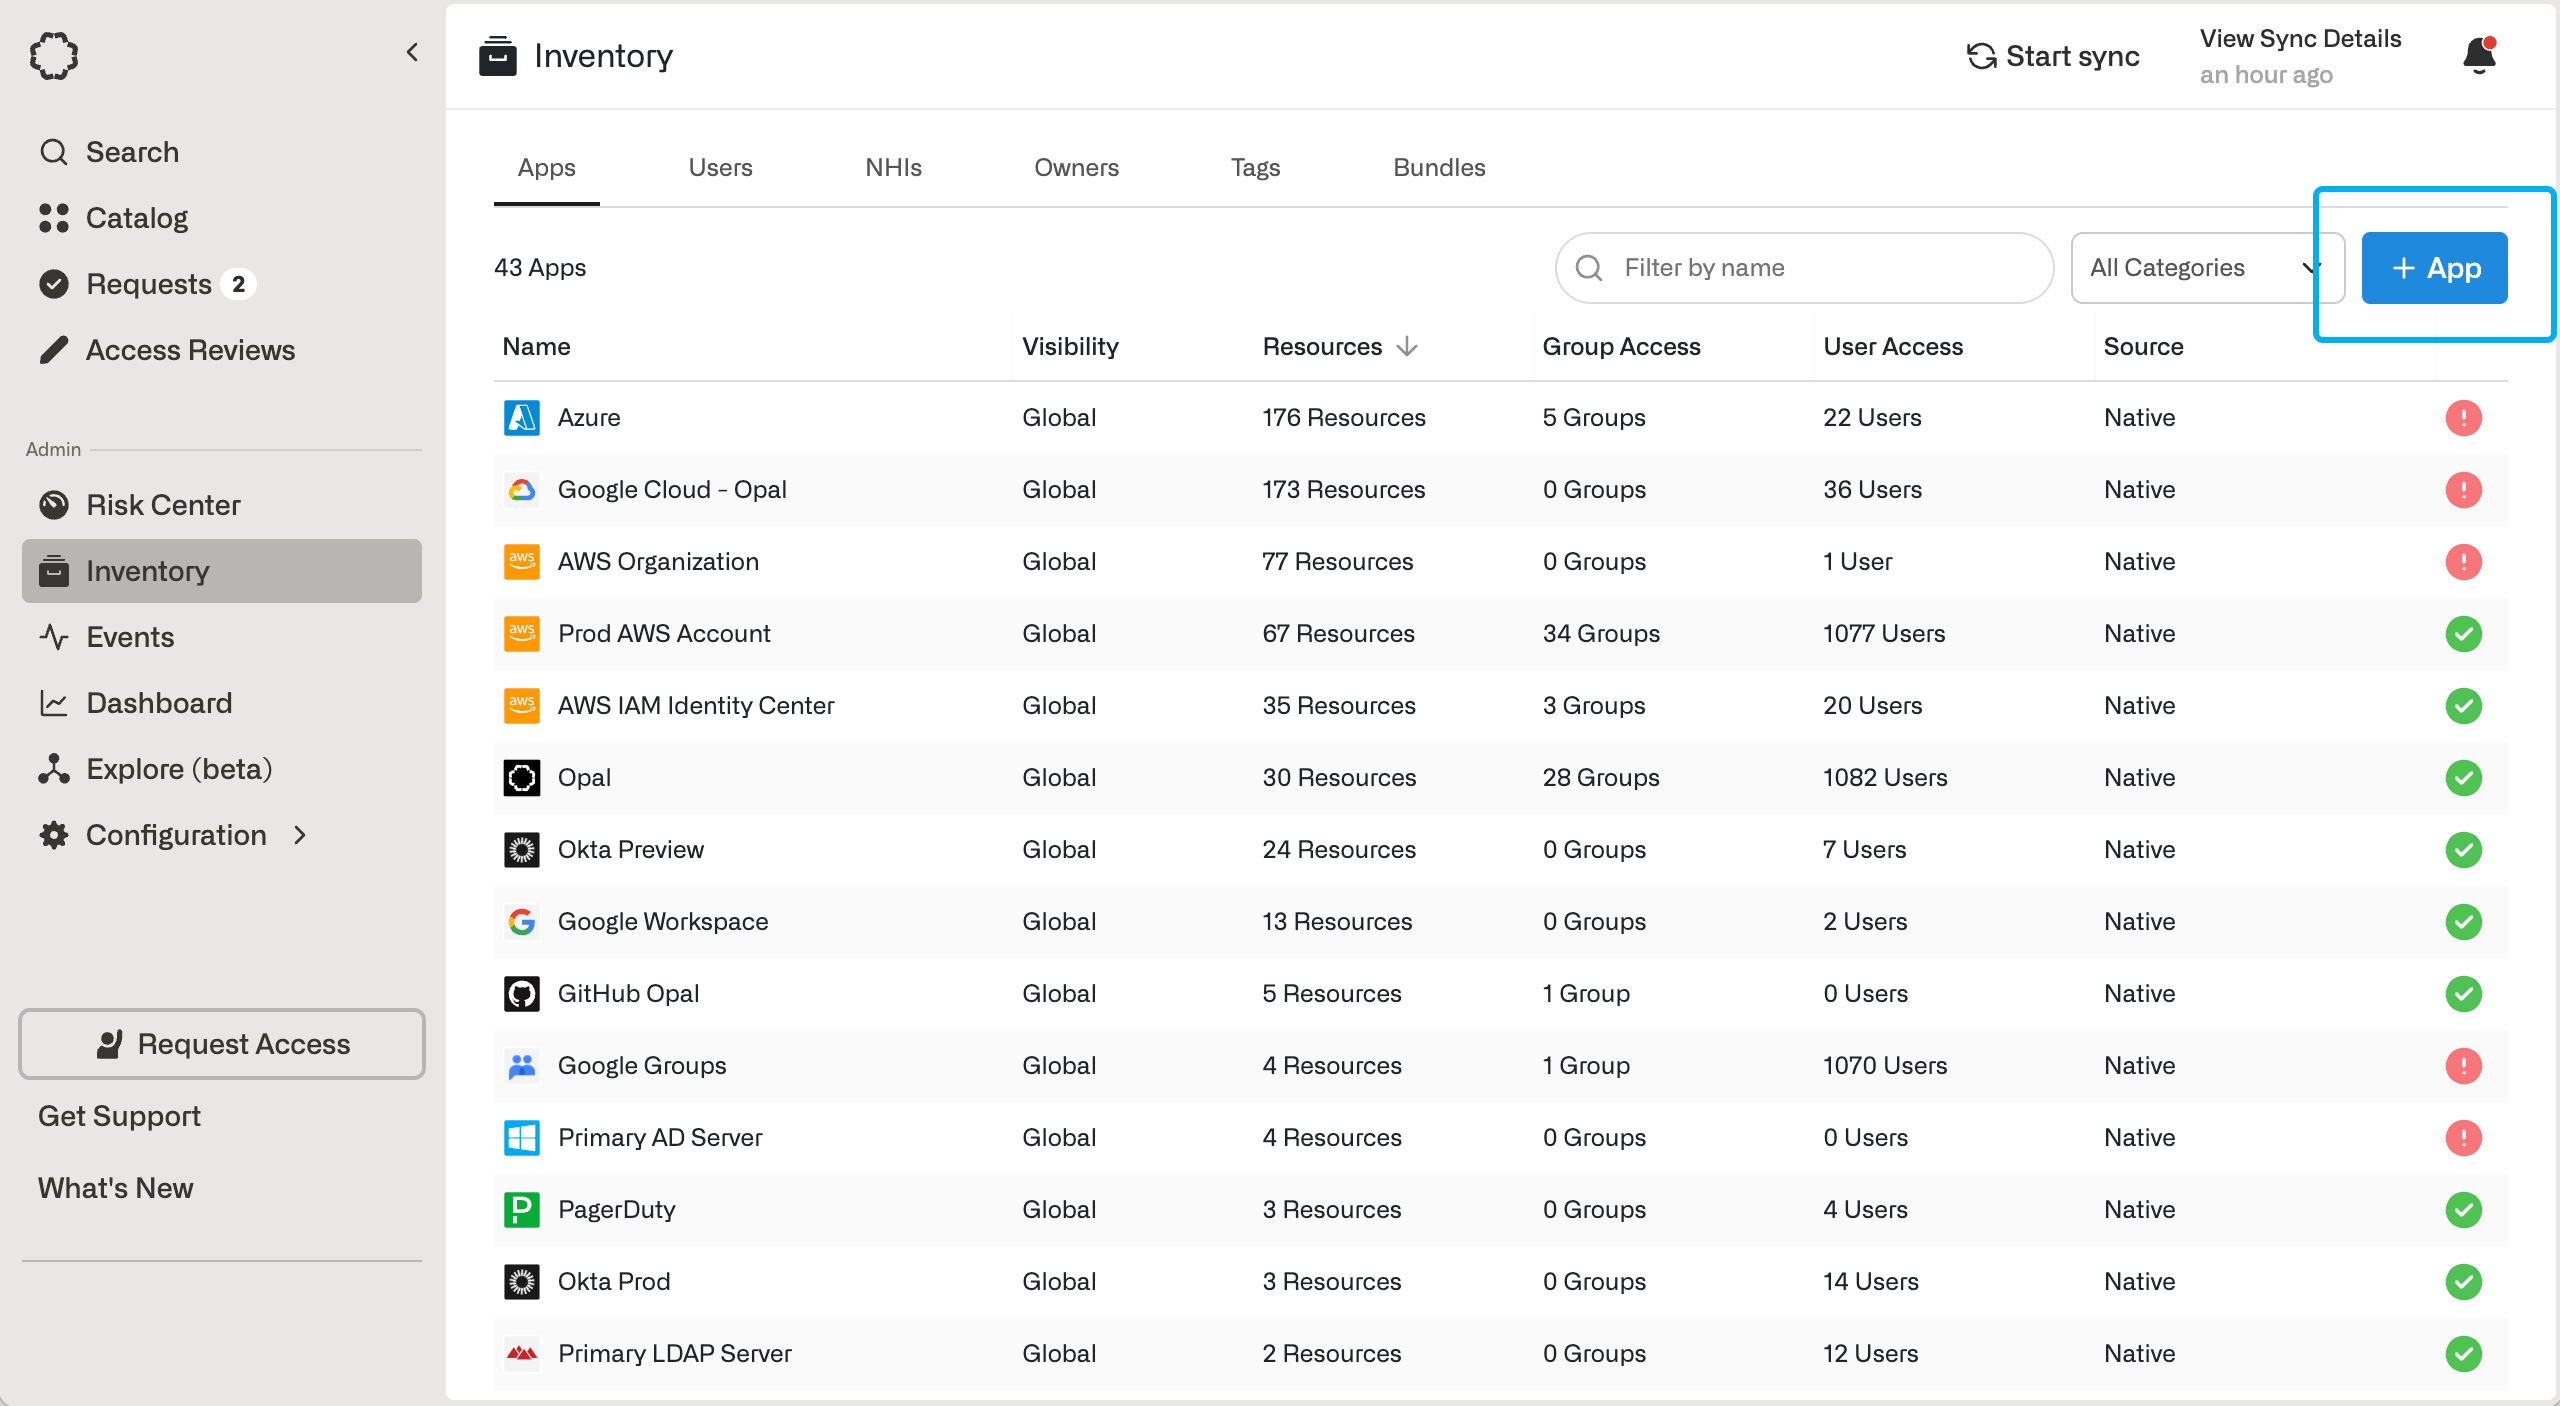
To get started, go to the **Inventory** > **Apps** page, select **+App** at the top right, and select **+Connect** under the **Workday** tile.
 Because Workday configures permissions on the field level, the set up process involves creating a **Workday Integration System User** and **Workday Integration Security Group** to ensure it has the necessary permissions.
## 2. Create an Integration System User (ISU)
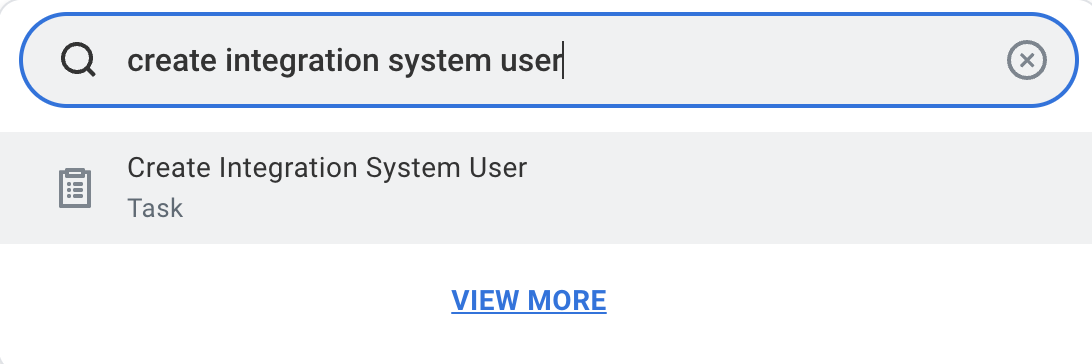
In the Workday Search bar, enter **Create Integration System User**, and select the corresponding **Task**.
Because Workday configures permissions on the field level, the set up process involves creating a **Workday Integration System User** and **Workday Integration Security Group** to ensure it has the necessary permissions.
## 2. Create an Integration System User (ISU)
In the Workday Search bar, enter **Create Integration System User**, and select the corresponding **Task**.
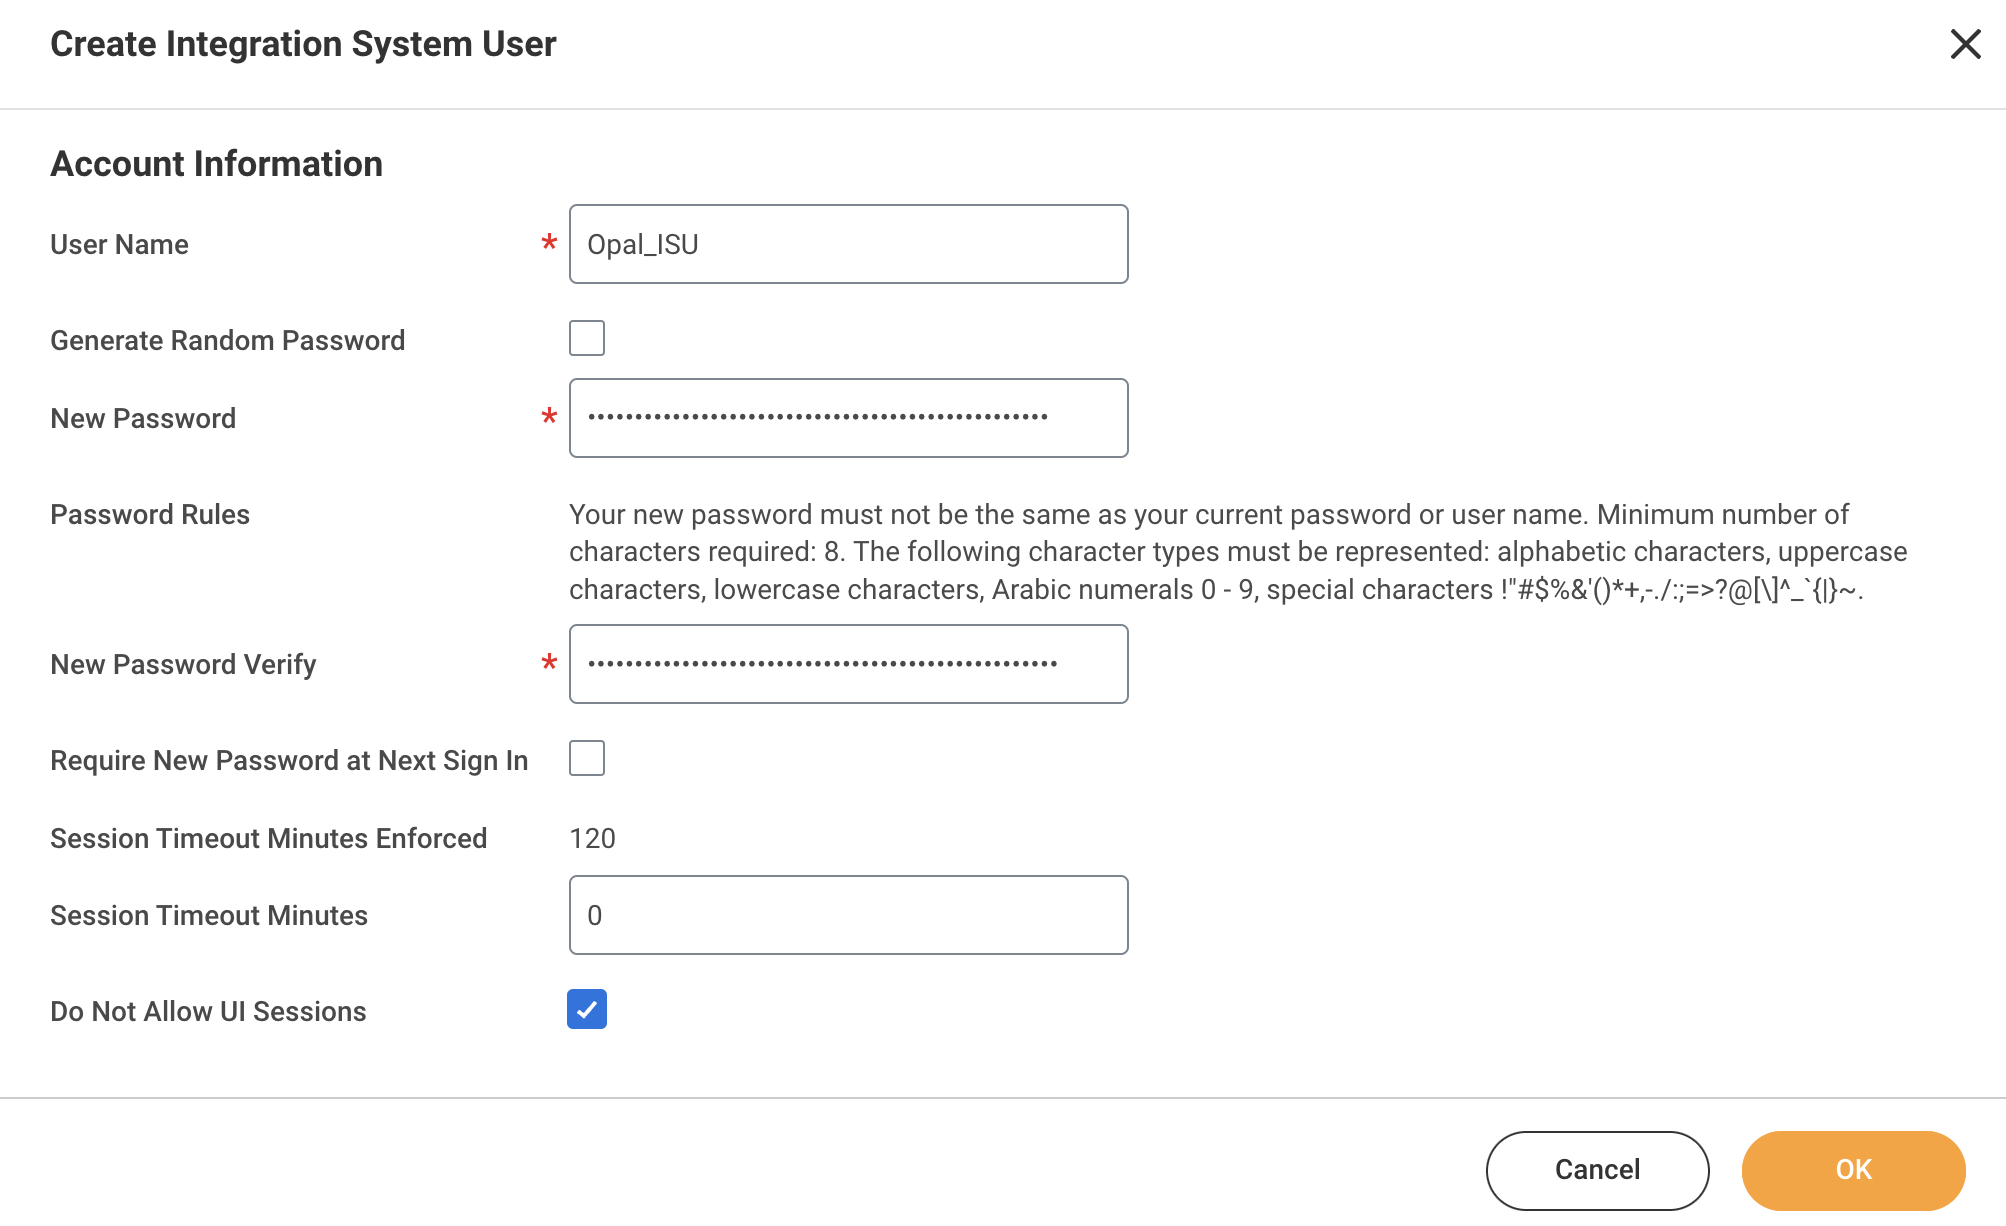
 In the **Create Integration System User** modal, enter the **Account Information**, including User Name, Password. Set the **Session Timeout Minutes** to 0 to prevent session expiry, as it may lead to the integration timing out before completion.
 ## 3. Create a Security Group and assign it an ISU
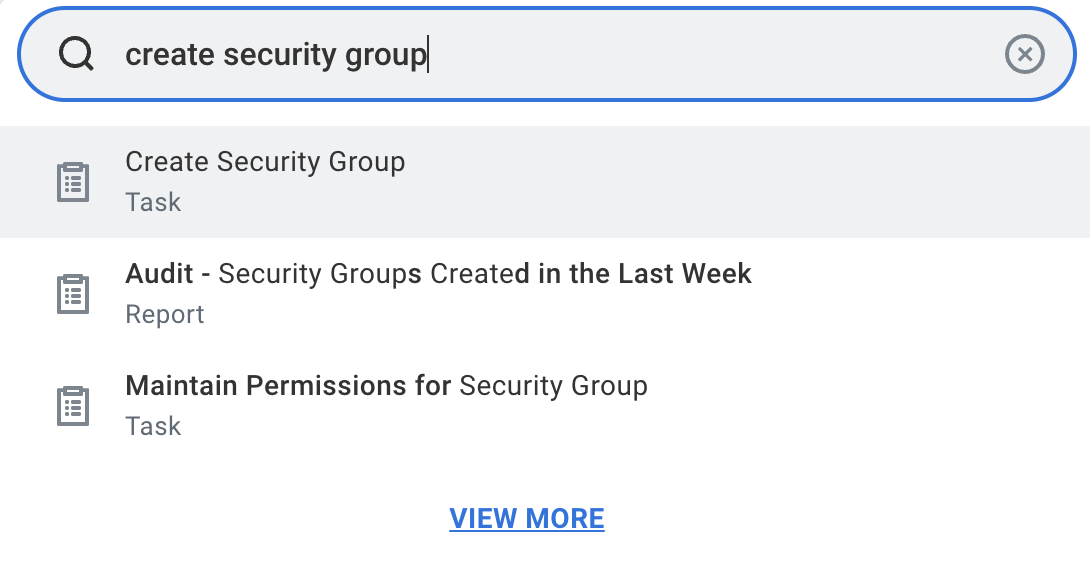
In the Workday Search bar, enter **Create Security Group**, and select the corresponding Task.
## 3. Create a Security Group and assign it an ISU
In the Workday Search bar, enter **Create Security Group**, and select the corresponding Task.
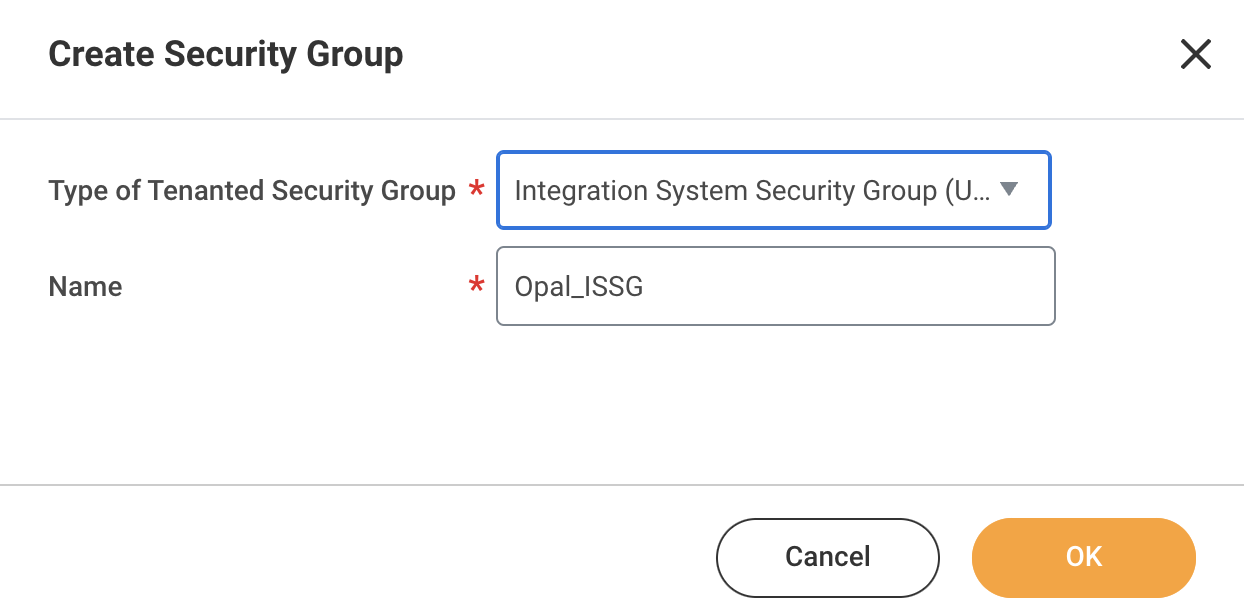
 In the Create Security Group modal, for the Type of Tenanted Security Group, select **Integration System Security Group (Unconstrained)** and enter a name to represent the ISU.
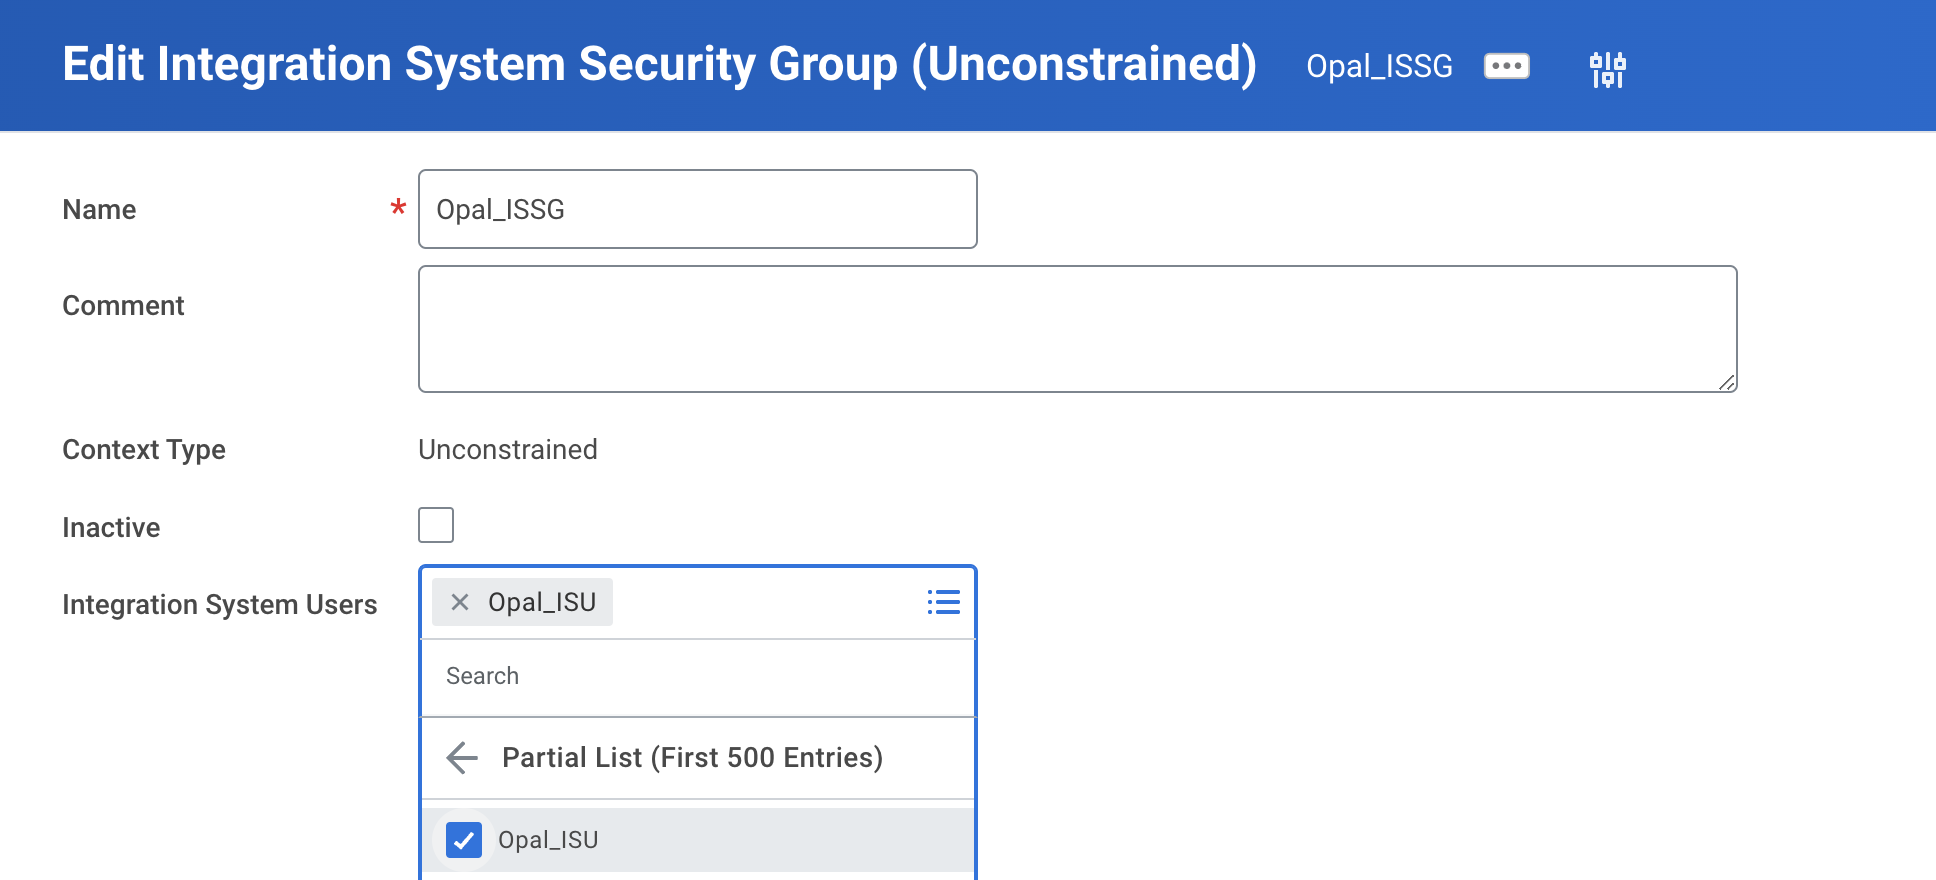
 Once created, Edit the Security Group to associate it with the **Integration System User** you created in Step 2.
 ## 4. Configure Domain Security Policy Permissions
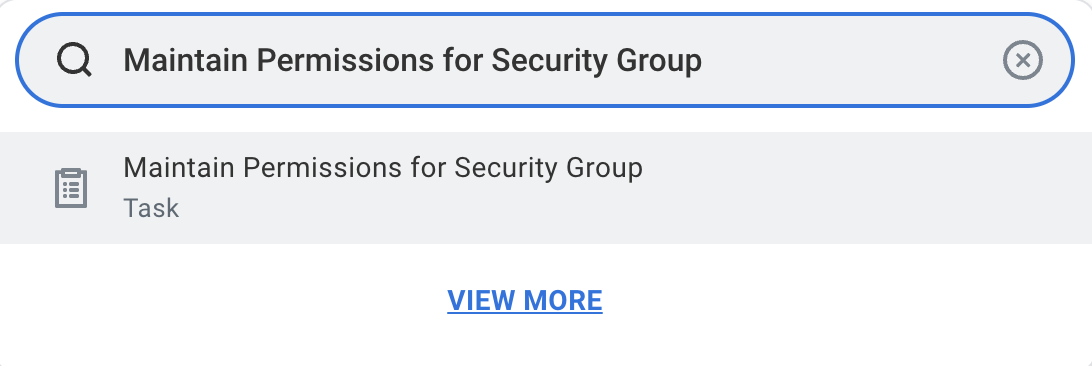
In the Workday Search bar, enter **Maintain Permissions for Security Group**, and select the corresponding Task.
## 4. Configure Domain Security Policy Permissions
In the Workday Search bar, enter **Maintain Permissions for Security Group**, and select the corresponding Task.
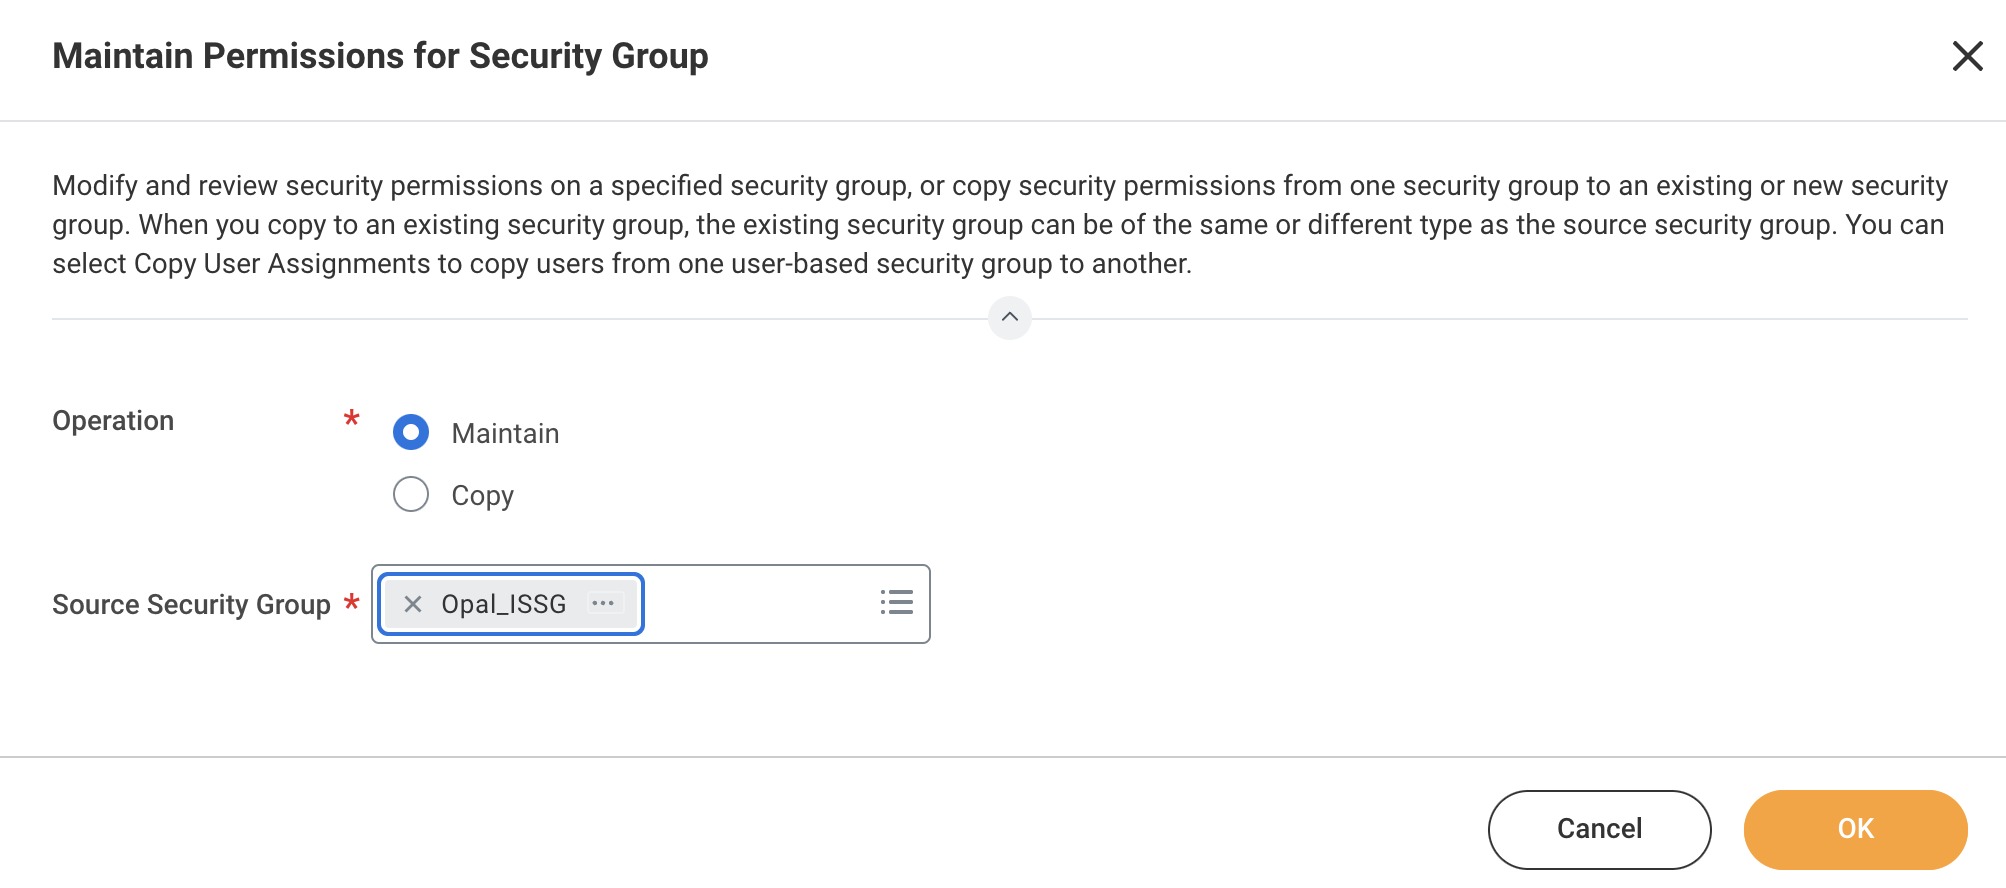
 In the task modal, first set the **Operation** to **Maintain** and set the **Source Security Group** to the Security Group you created in Step 3.
 Then, edit the **Domain Security Policy Permissions** and add the following GET ONLY operations:
| View/Modify Access | Domain Security Policy | Required | Reason |
| ------------------ | ----------------------------------------- | -------------------------------------------- | ------------------------------------- |
| GET ONLY | Worker Data: Public Worker Reports | Required | Used to import users within resources |
| GET ONLY | Worker Data: Workers | Required | Used to import users within resources |
| GET ONLY | Security Configuration | Required | Used to check for permissions |
| GET ONLY | Worker Data: Current Staffing Information | Required if you use Workday as your IDP/HRIS | Used to retrieve user statuses |
| GET ONLY | Integration Build | Required if you use Workday as your IDP/HRIS | Used to retrieve user statuses |
| GET ONLY | Worker Data: Employment Data | Required if you use Workday as your IDP/HRIS | Used to import user attributes |
| GET ONLY | Worker Data: All Positions | Required if you use Workday as your IDP/HRIS | Used to import user attributes |
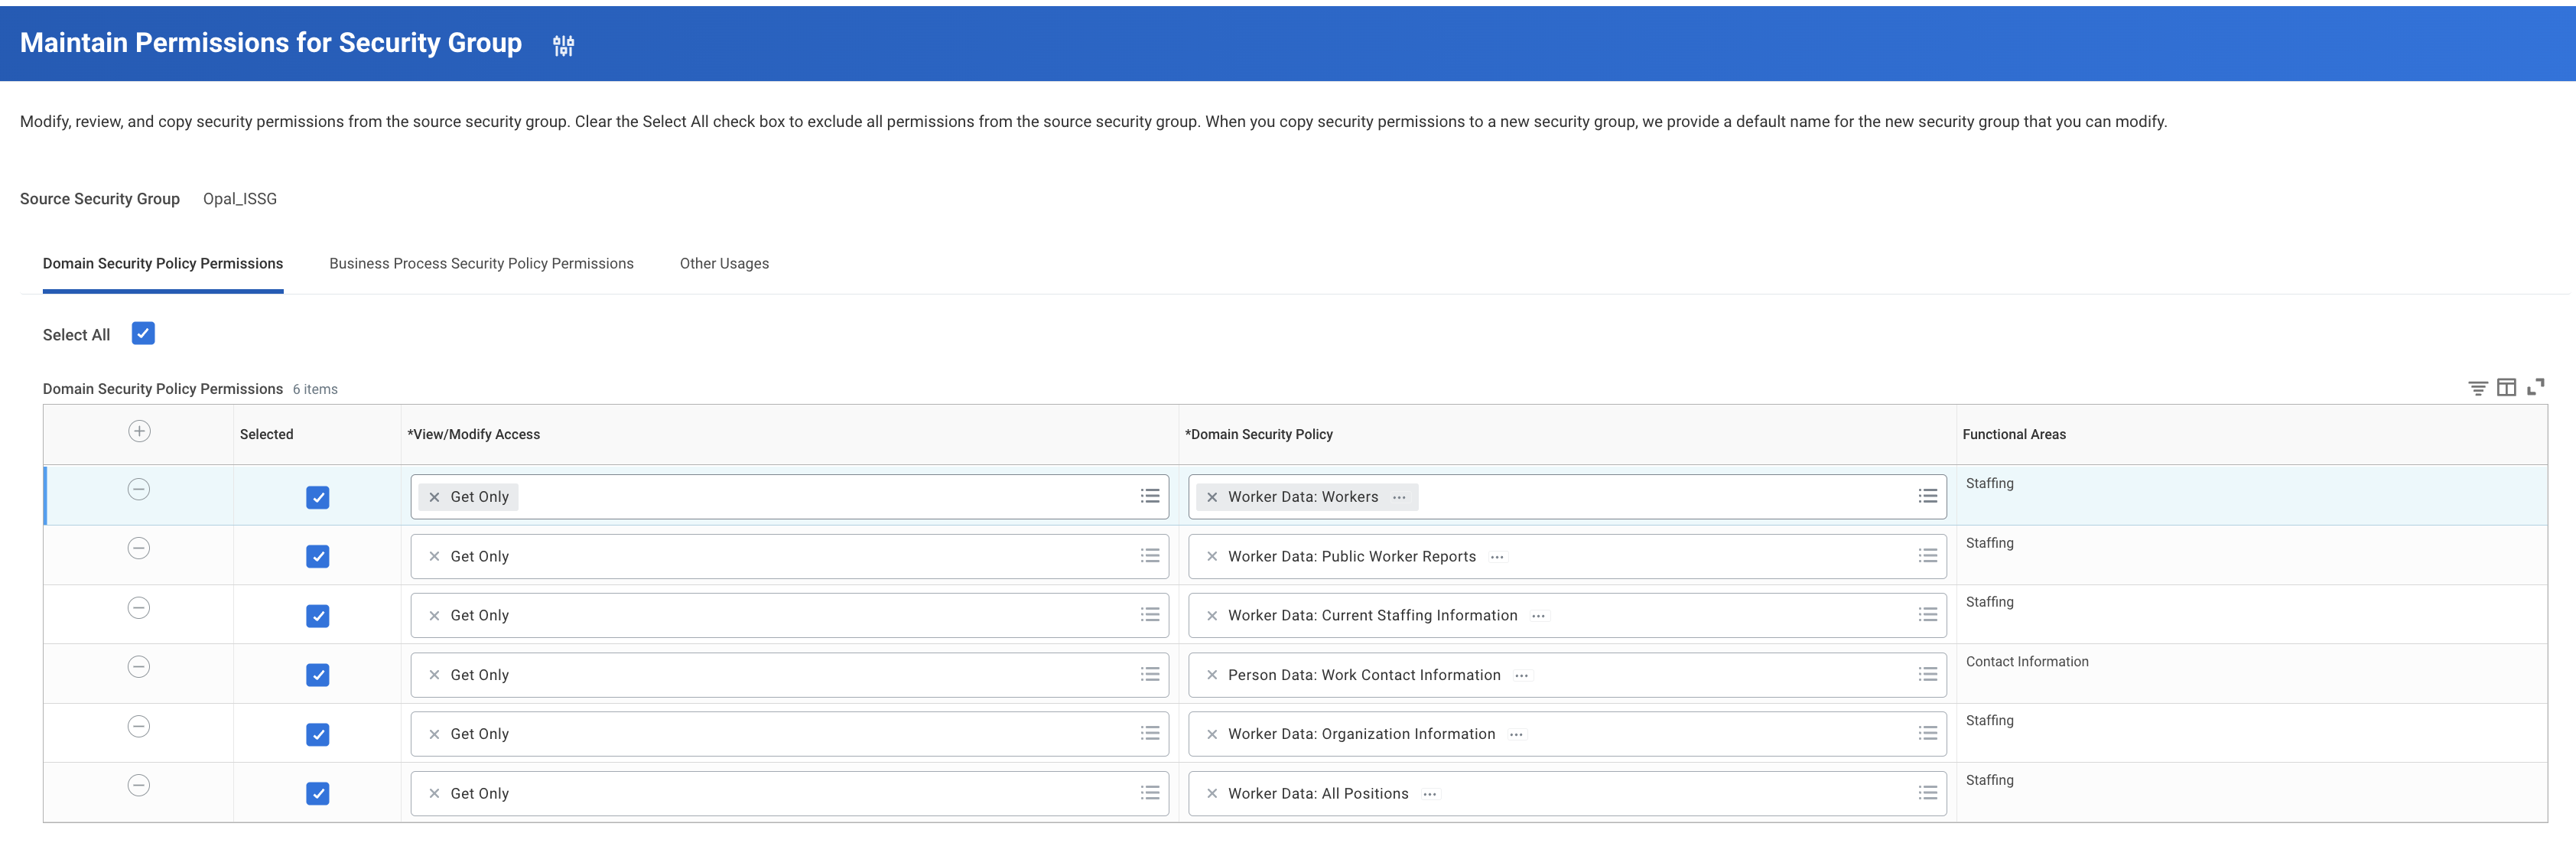
In Workday, you can add each by clicking on the **+** button on the top left of the table. For example:
Then, edit the **Domain Security Policy Permissions** and add the following GET ONLY operations:
| View/Modify Access | Domain Security Policy | Required | Reason |
| ------------------ | ----------------------------------------- | -------------------------------------------- | ------------------------------------- |
| GET ONLY | Worker Data: Public Worker Reports | Required | Used to import users within resources |
| GET ONLY | Worker Data: Workers | Required | Used to import users within resources |
| GET ONLY | Security Configuration | Required | Used to check for permissions |
| GET ONLY | Worker Data: Current Staffing Information | Required if you use Workday as your IDP/HRIS | Used to retrieve user statuses |
| GET ONLY | Integration Build | Required if you use Workday as your IDP/HRIS | Used to retrieve user statuses |
| GET ONLY | Worker Data: Employment Data | Required if you use Workday as your IDP/HRIS | Used to import user attributes |
| GET ONLY | Worker Data: All Positions | Required if you use Workday as your IDP/HRIS | Used to import user attributes |
In Workday, you can add each by clicking on the **+** button on the top left of the table. For example:
 ## 5. Activate Security Policy Changes
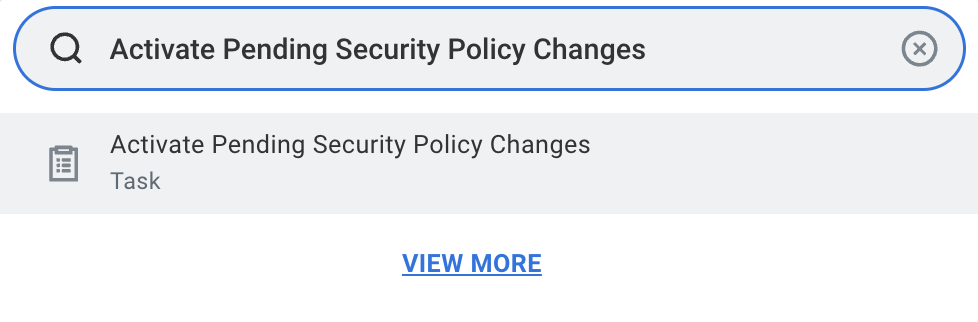
In the Workday Search bar, enter **Activate Pending Security Policy Changes**, and select the corresponding Task.
## 5. Activate Security Policy Changes
In the Workday Search bar, enter **Activate Pending Security Policy Changes**, and select the corresponding Task.
 Review and check the **Confirm** box to activate the Security Policy Changes.
 ## 6. Manage Authentication Policies
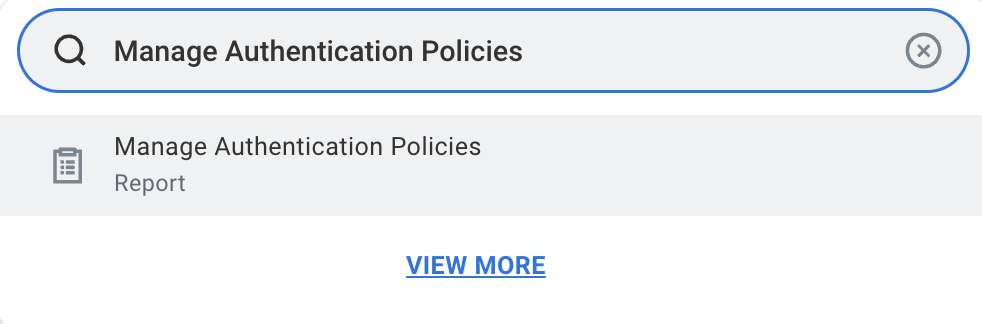
In the Workday Search bar, enter **Manage Authentication Policies**, and select the corresponding Report.
## 6. Manage Authentication Policies
In the Workday Search bar, enter **Manage Authentication Policies**, and select the corresponding Report.
 Depending on your policy set up, you can choose to edit an existing policy or create a new one.
To create a new one:
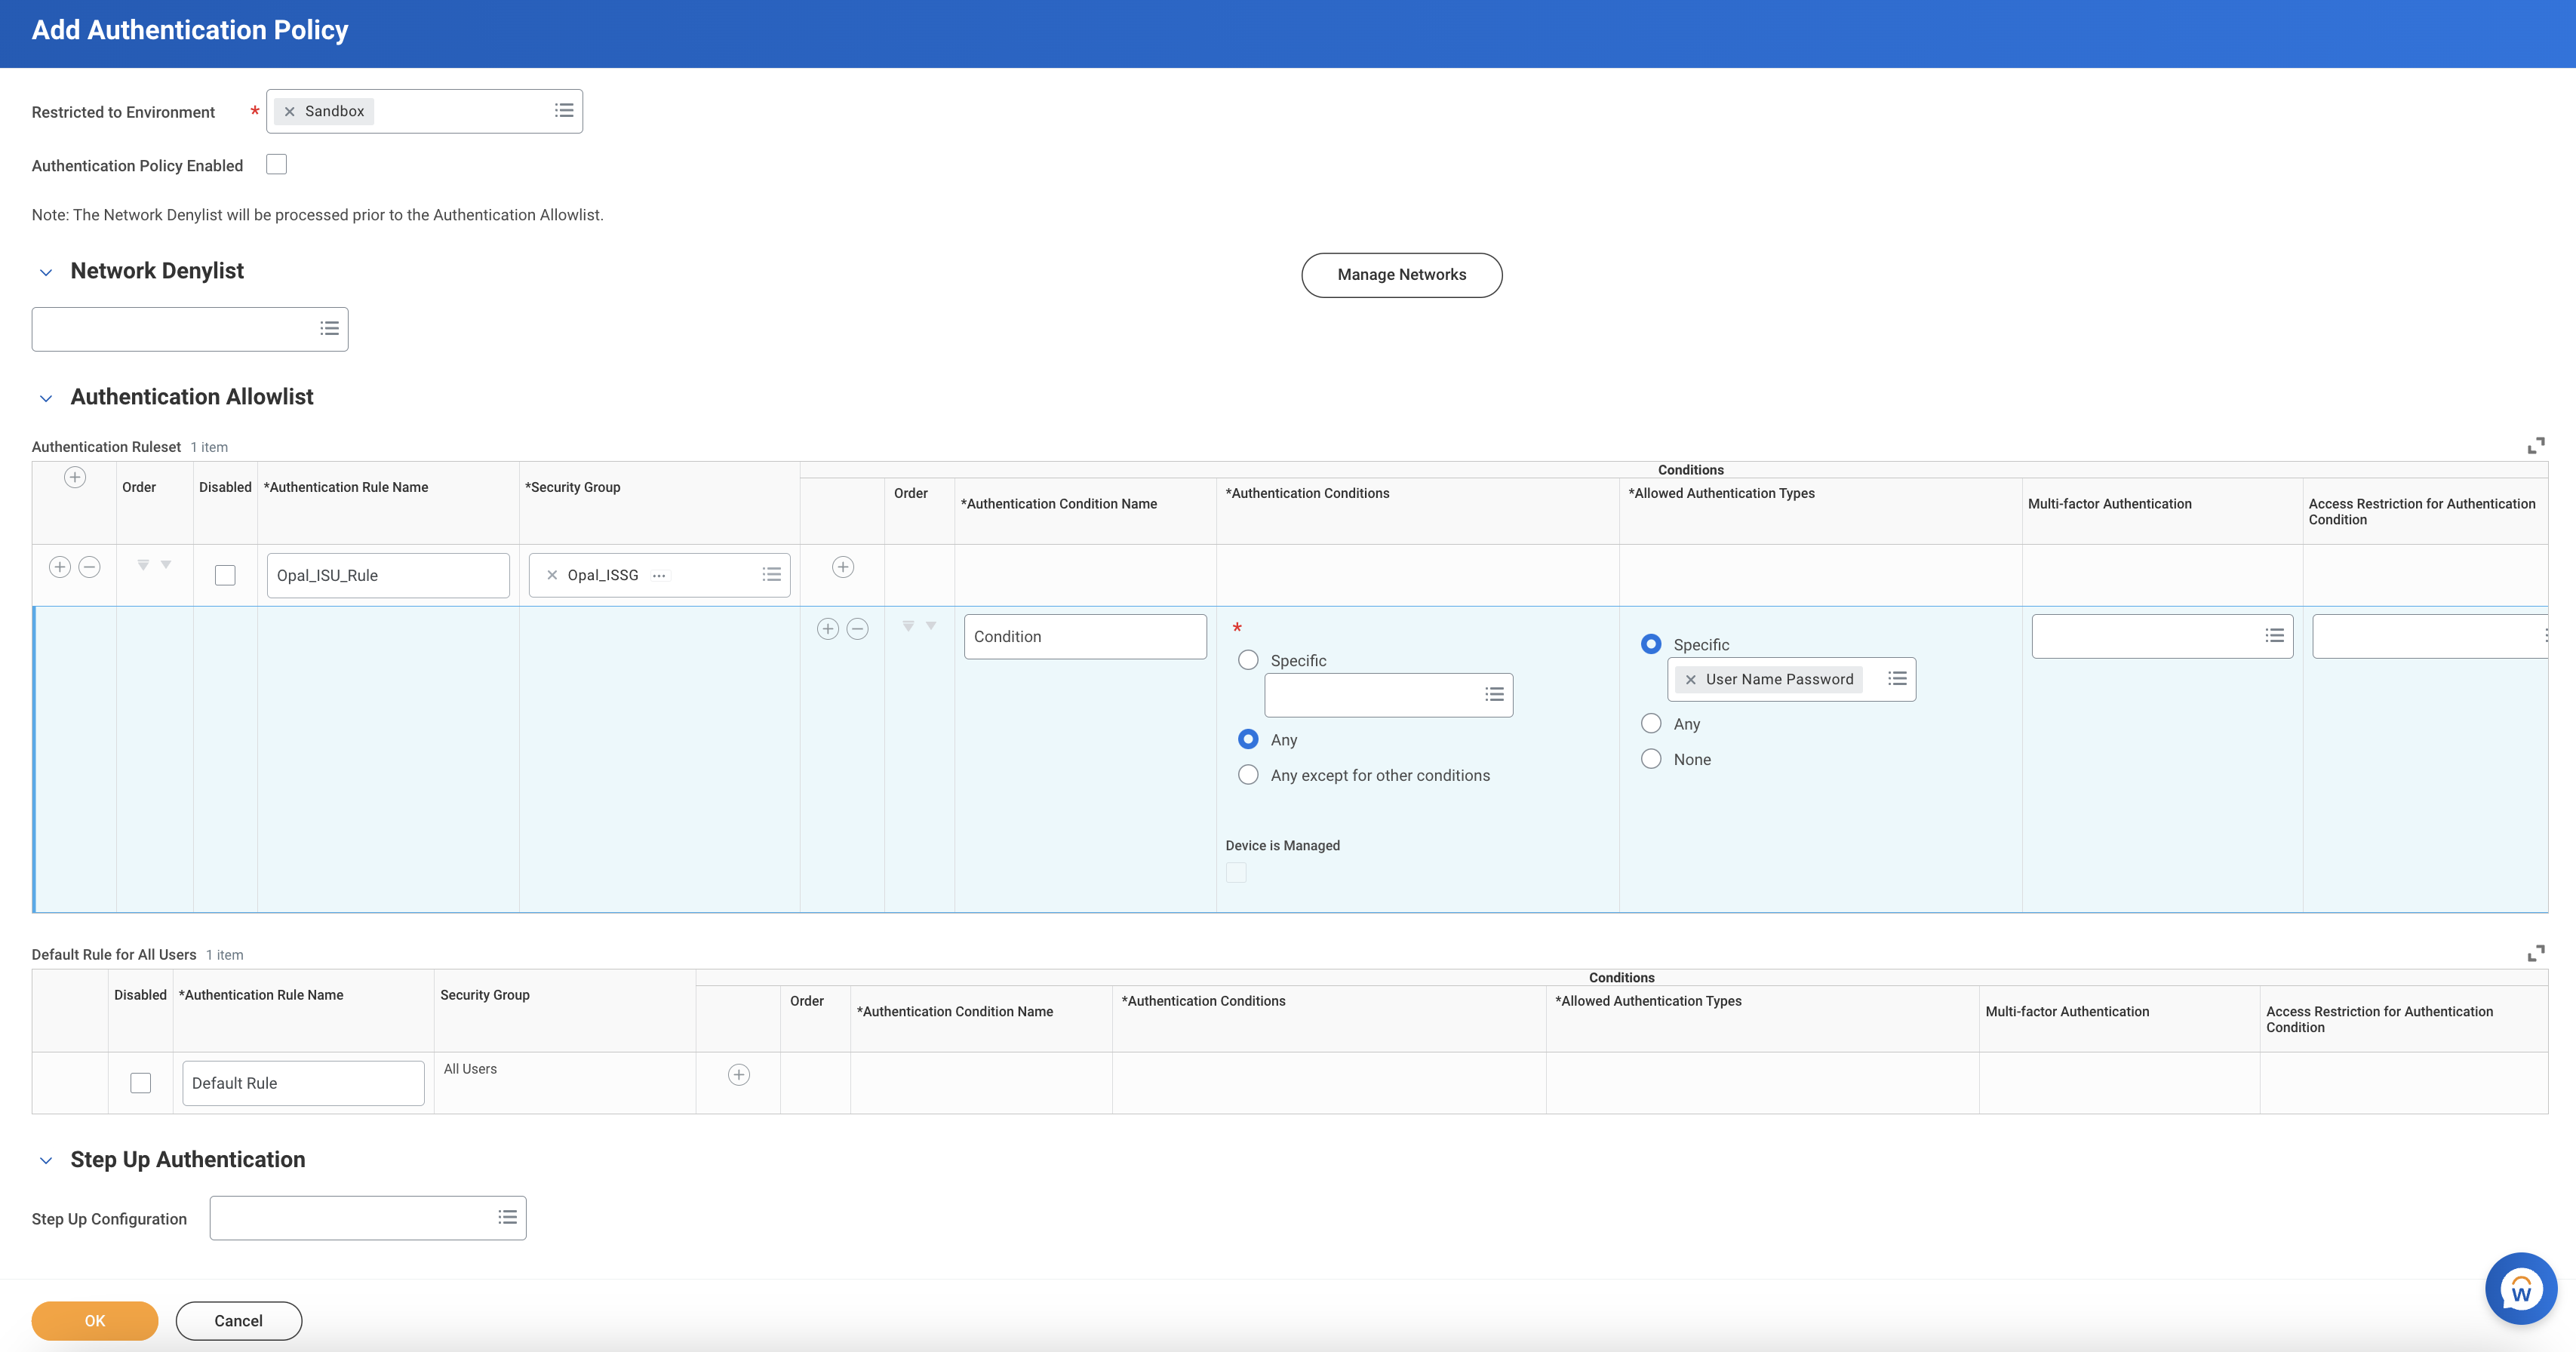
1. select **Add Authentication Policy** on the page.
2. Select from the dropdown the corresponding **Environment** you would like the policy to apply to.
3. In the table below, add an **Authentication Ruleset** by selecting the **+** button on the top left.
4. Provide an **Authentication Rule Name** and set the **Security Group** to the one you created in Step 2. For the **Authentication Conditions**, select **Any**. For **Allowed Authentication Types**, select **User Name Password**.
Depending on your policy set up, you can choose to edit an existing policy or create a new one.
To create a new one:
1. select **Add Authentication Policy** on the page.
2. Select from the dropdown the corresponding **Environment** you would like the policy to apply to.
3. In the table below, add an **Authentication Ruleset** by selecting the **+** button on the top left.
4. Provide an **Authentication Rule Name** and set the **Security Group** to the one you created in Step 2. For the **Authentication Conditions**, select **Any**. For **Allowed Authentication Types**, select **User Name Password**.
 ## 7. Activate All Pending Authentication Policy Changes
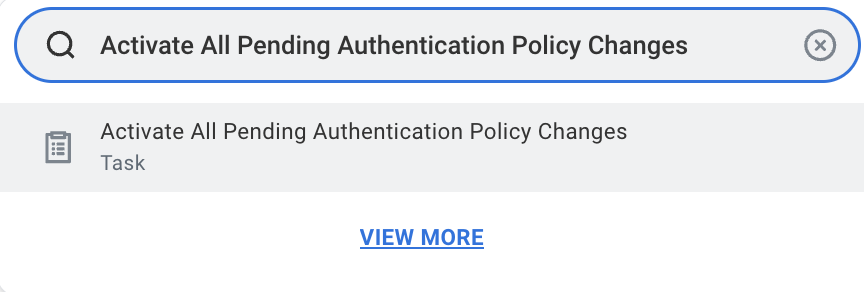
In the Workday Search bar, enter **Activate All Pending Authentication Policy Changes**, and select the corresponding Task.
## 7. Activate All Pending Authentication Policy Changes
In the Workday Search bar, enter **Activate All Pending Authentication Policy Changes**, and select the corresponding Task.
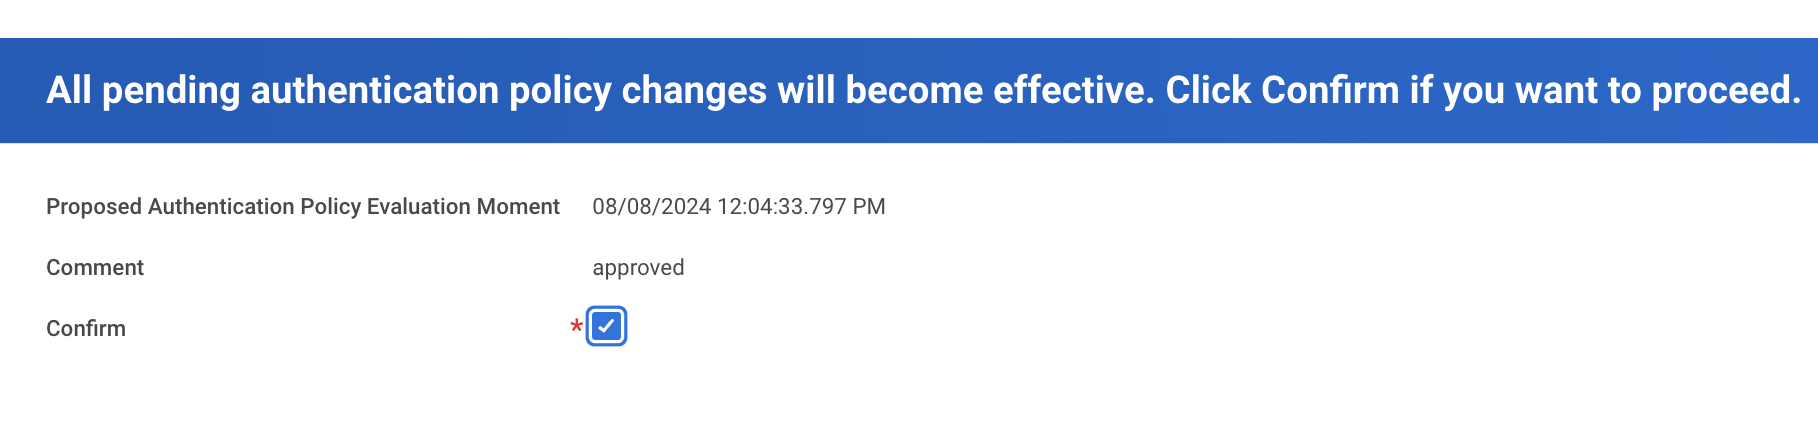
 Add any comments, review, and check the **Confirm** box to activate the Authentication Policy Changes
 ## 8. Obtain the Web Services Endpoint for tenant
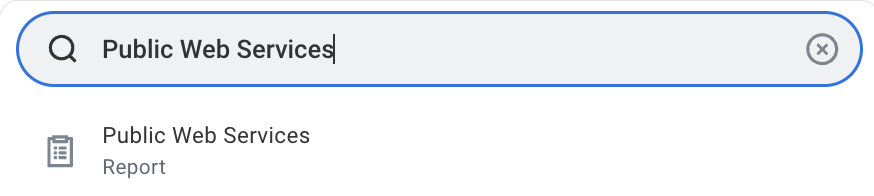
In the Workday Search bar, enter **Public Web Services**, and select the corresponding Report.
## 8. Obtain the Web Services Endpoint for tenant
In the Workday Search bar, enter **Public Web Services**, and select the corresponding Report.
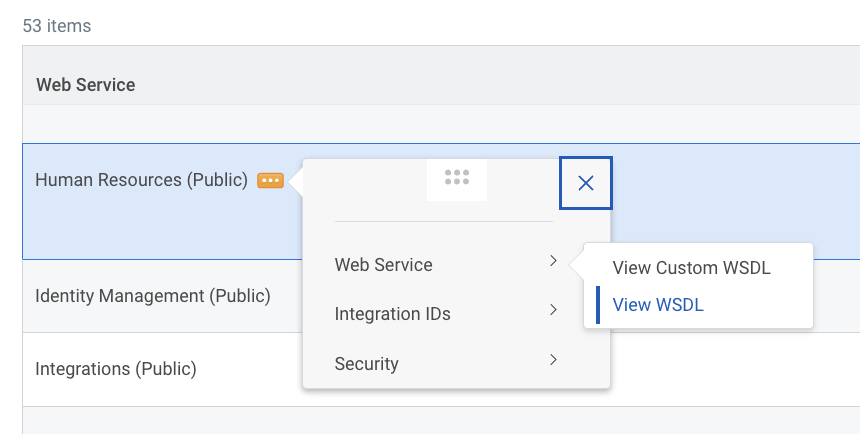
 In the table, locate the **Human Resources (Public)** Web Service, hover over it and click on the **...** to the right of the text. Under **Web Service**, select **View WSDL**. This will open another page in the browser.
 In the new page containing the document tree, you can use Cmd + F / Ctrl + F to find `/service`, and you should see a URL address that looks like the following:
 The corresponding highlighted URL segment up to the `/service` path is your **Workday Web Services Endpoint**. Note that each tenant may have a different endpoint, so a new endpoint would need to be created for each environment you would like to connect. The text directly after `/service` should represent your **Workday Tenant Name**. As an example, if your Workday log in URL is `https://impl.workday.com/HelloWorld`, your Workday Tenant Name would be `HelloWorld`.
## 9. Complete the Opal form to connect Workday
In Opal, enter the details based on the Workday items you configured in the previous steps:
* Workday Integration System User username (Step 2)
* Workday Integration System User password (Step 2)
* Workday tenant URL subdomain (Step 8)
* Workday tenant name
The corresponding highlighted URL segment up to the `/service` path is your **Workday Web Services Endpoint**. Note that each tenant may have a different endpoint, so a new endpoint would need to be created for each environment you would like to connect. The text directly after `/service` should represent your **Workday Tenant Name**. As an example, if your Workday log in URL is `https://impl.workday.com/HelloWorld`, your Workday Tenant Name would be `HelloWorld`.
## 9. Complete the Opal form to connect Workday
In Opal, enter the details based on the Workday items you configured in the previous steps:
* Workday Integration System User username (Step 2)
* Workday Integration System User password (Step 2)
* Workday tenant URL subdomain (Step 8)
* Workday tenant name
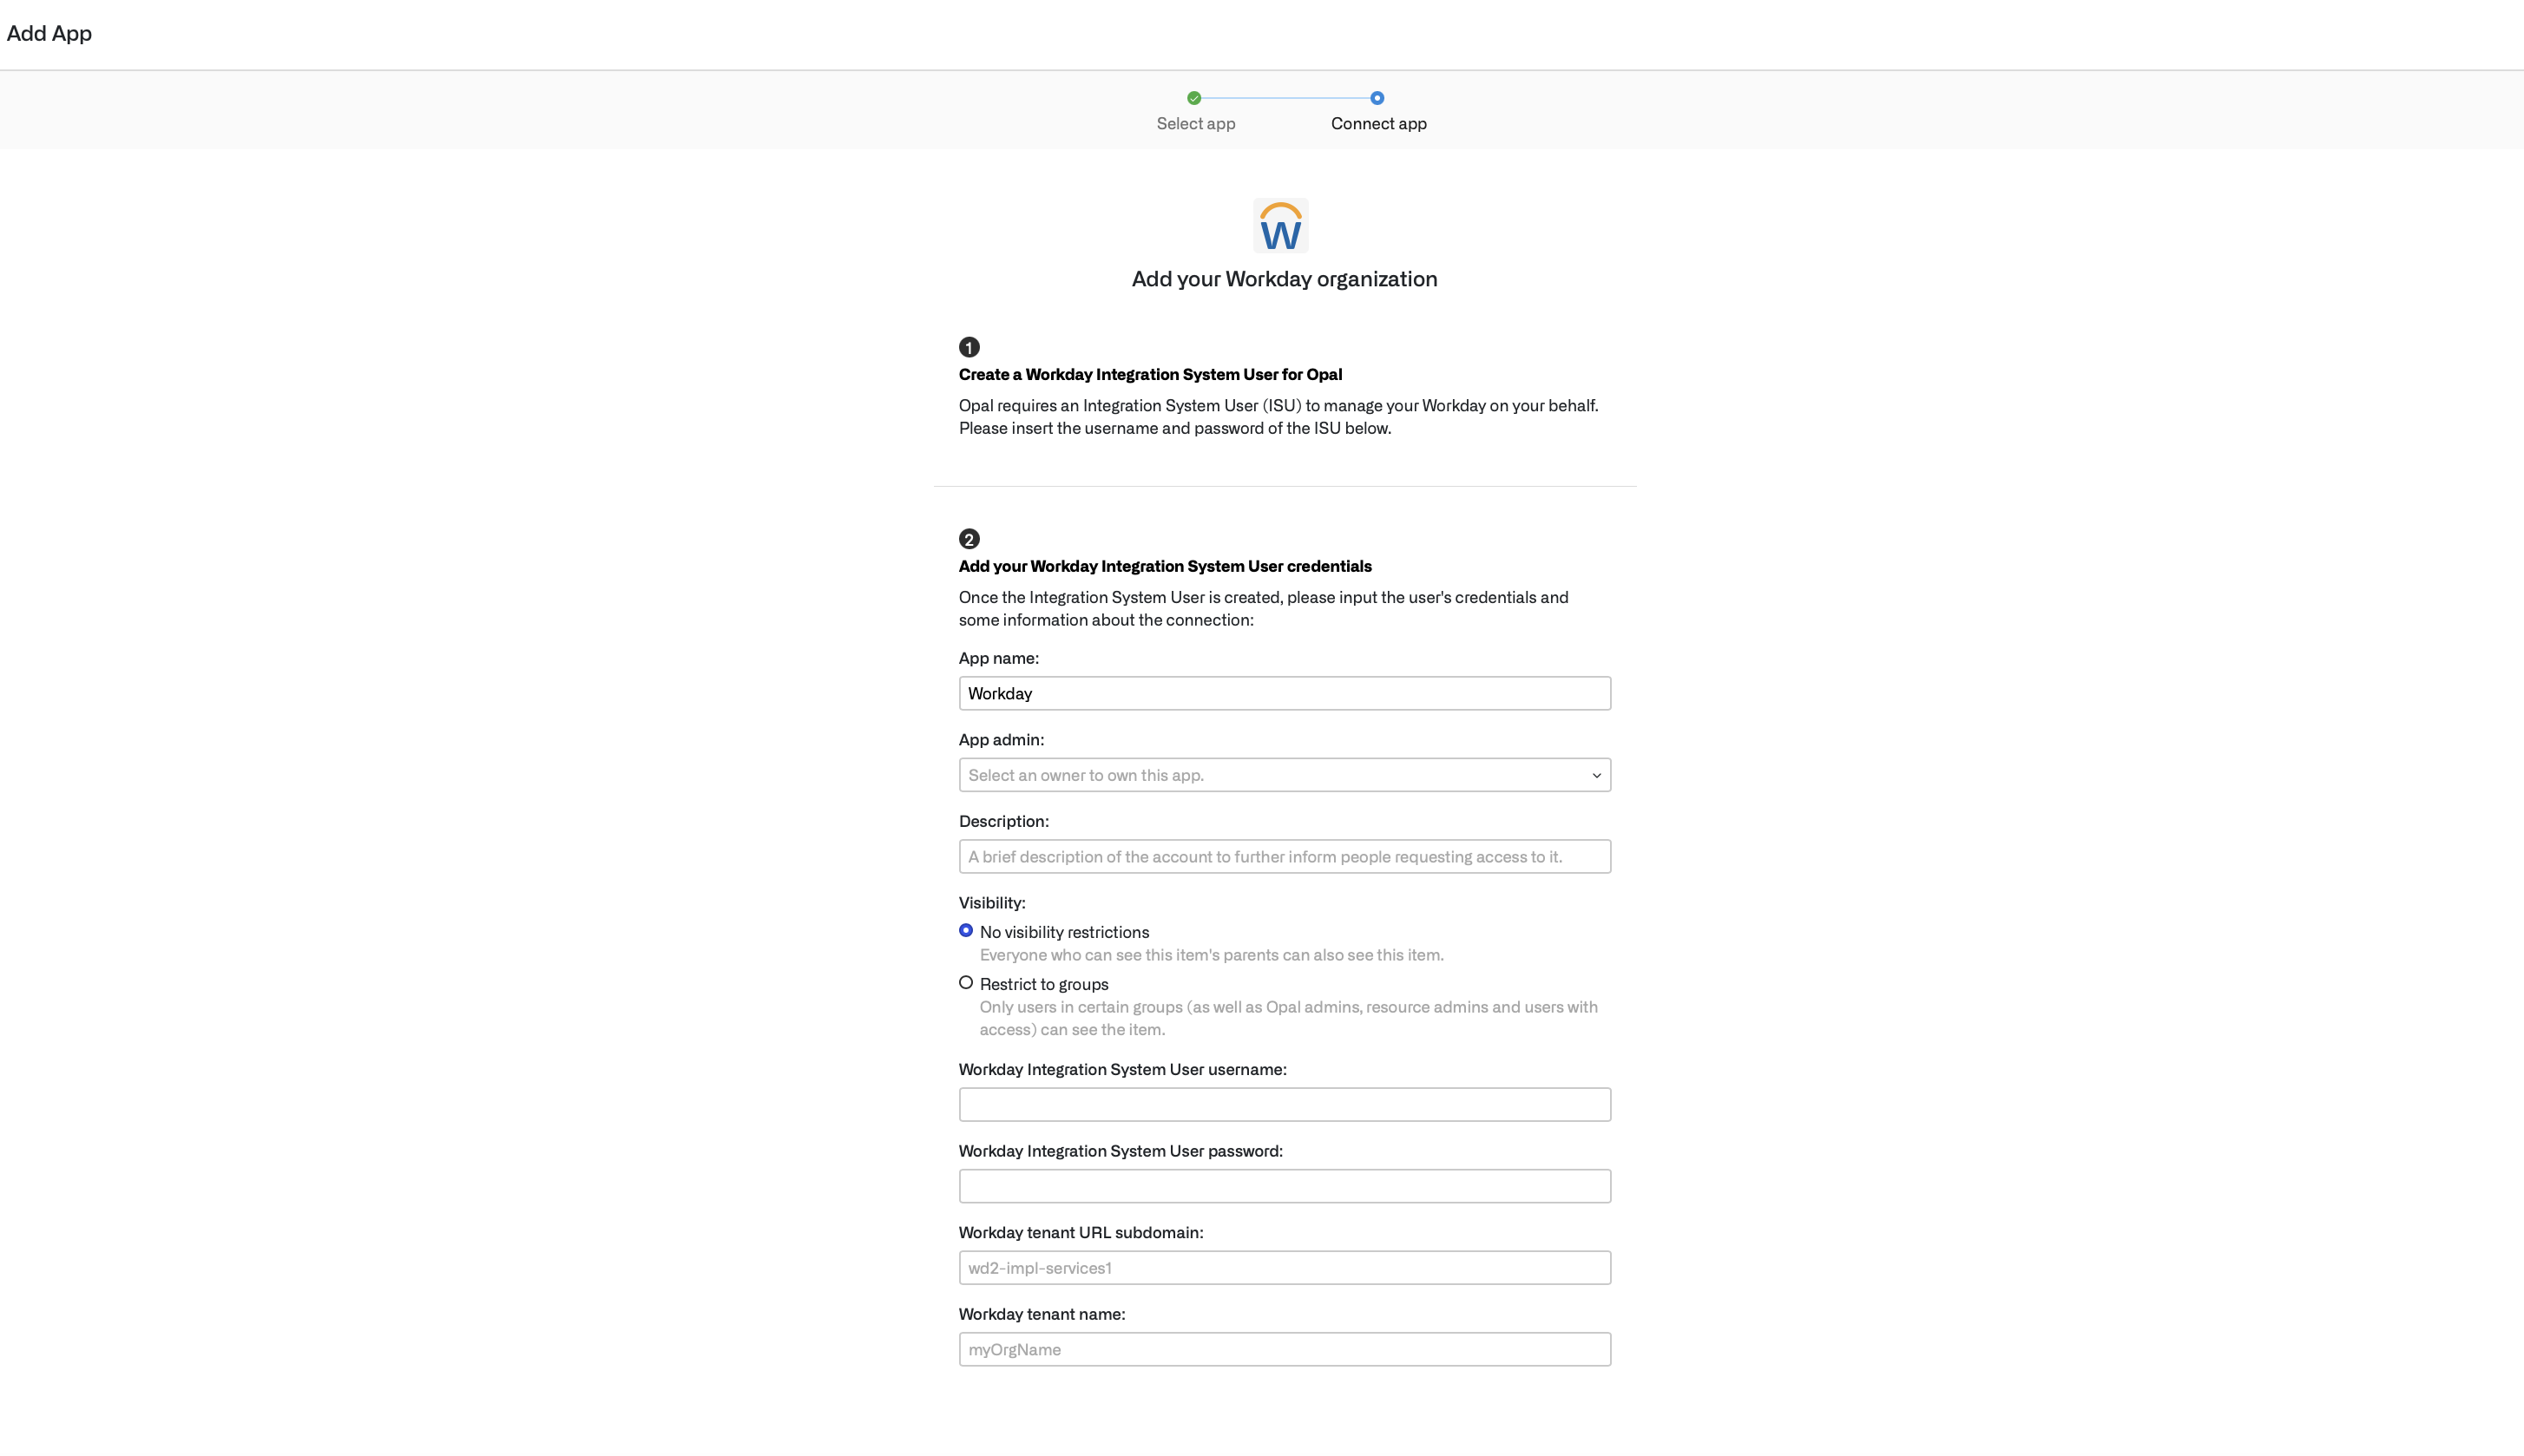 Once you've completed the form, select **Create**, and your connection should be set up and running.
See [Workday Groups and Rules](/integrations/workday-groups-and-roles) to learn how to manage access to Workday entities such as User Security Groups and Organization Roles, and the [Workday IDP/HRIS Integration](/integrations/workday-idphris-integration) guide to learn how to sync Workday entities and attributes.
## Run app validation checks
After you save your app, you can view existing sync issues from the **Setup** tab on the app detail page. Missing permissions and sync issues show in the **App Validations** section. Select the refresh icon to rerun validation checks.
Once you've completed the form, select **Create**, and your connection should be set up and running.
See [Workday Groups and Rules](/integrations/workday-groups-and-roles) to learn how to manage access to Workday entities such as User Security Groups and Organization Roles, and the [Workday IDP/HRIS Integration](/integrations/workday-idphris-integration) guide to learn how to sync Workday entities and attributes.
## Run app validation checks
After you save your app, you can view existing sync issues from the **Setup** tab on the app detail page. Missing permissions and sync issues show in the **App Validations** section. Select the refresh icon to rerun validation checks.
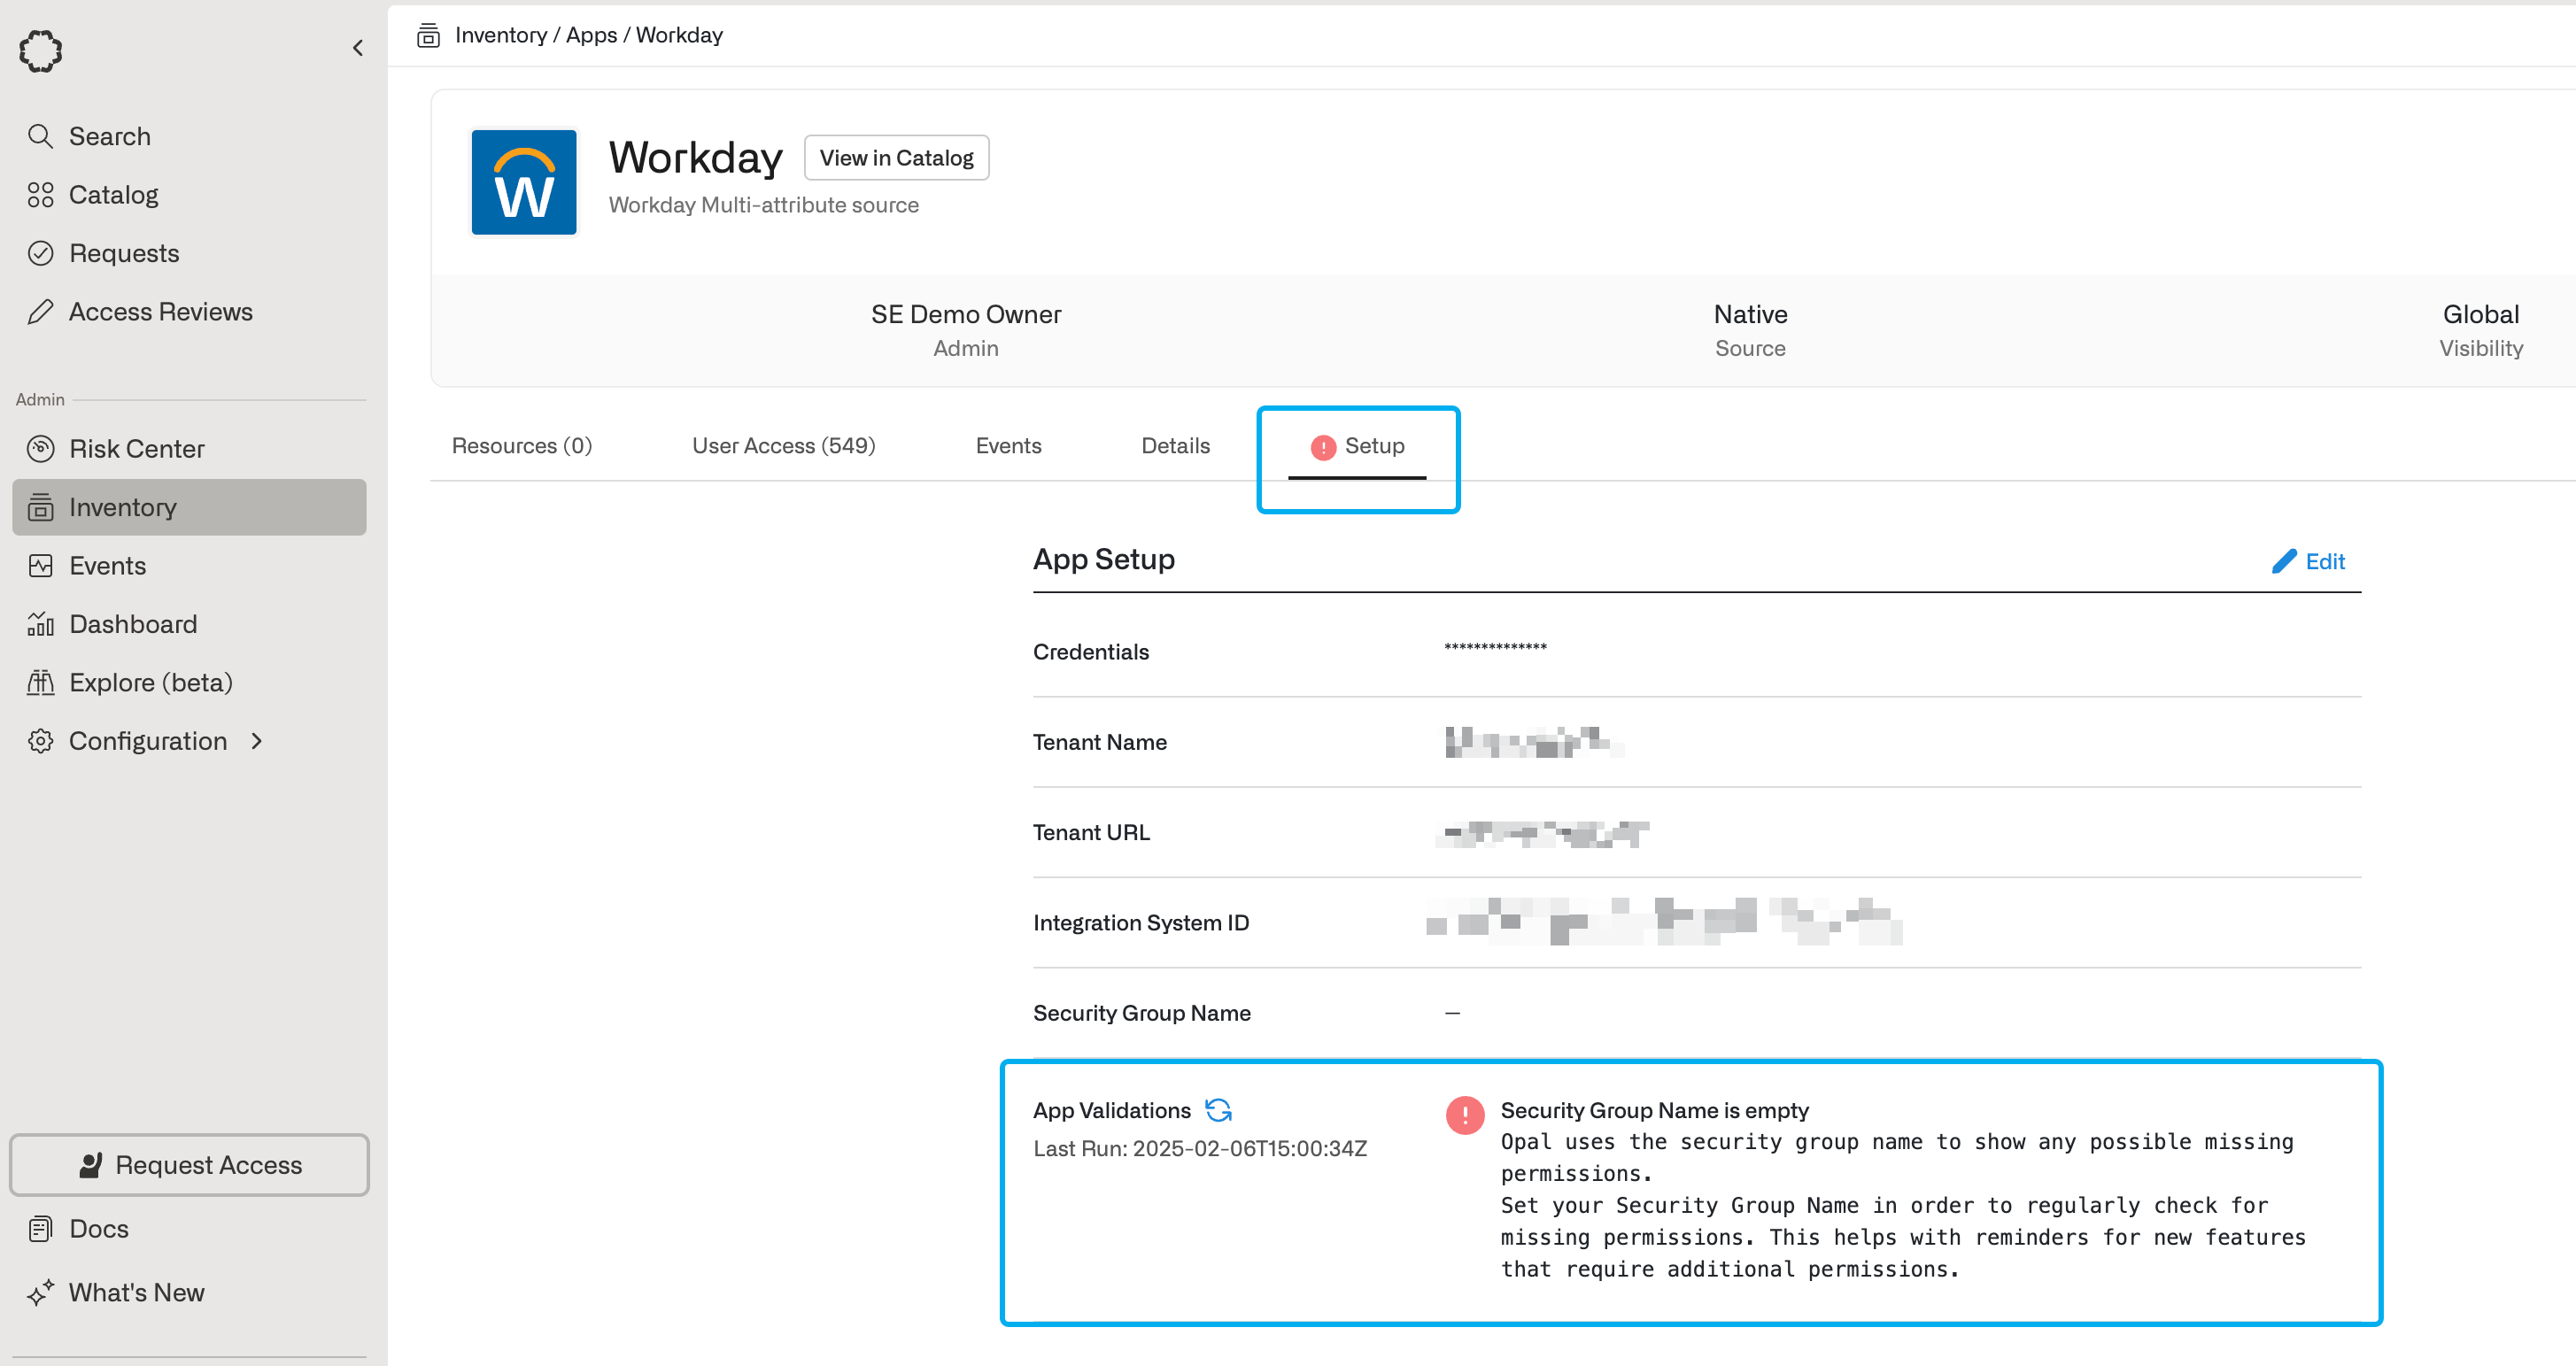 You can hover over the validation icons to learn why Opal needs a given permission. To correctly sync your app to Opal, ensure you address any sync errors, marked with the red ! icon. Inspect warnings on a case-by-case basis: warnings might impact features you’re not using and may be safely ignored, but this depends on your use case.