> ## Documentation Index
> Fetch the complete documentation index at: https://docs.opal.dev/llms.txt
> Use this file to discover all available pages before exploring further.
# Snowflake
> Learn how to connect your Snowflake account and use Opal to manage and review access.
Opal's **Snowflake** App lets you manage access to your Snowflake Roles and manage a Role's access to Securable Objects such as Databases, Schemas, and Tables.
You can:
* Import, sync, and manage access to *Snowflake Roles* and *Securable Objects*
* View granular privileges granted to each user and role
* Perform User Access Reviews (UARs) to assign managers or group admins to periodically review users with access to Snowflake Roles
* Audit Event logs for any access changes on managed Snowflake Resources
* Allow users to request JIT time-bound access to Snowflake Roles
To learn more about the feature set, see the [Opal Snowflake Integration blog](https://www.opal.dev/blog/introducing-opal-snowflake-integration-managing-granular-access-to-critical-data) .
There is a limit to 10,000 users, roles, databases, schemas, and tables each. If you would like to increase this, please [reach out](mailto:support@opal.dev).
## Supported functionality
| Resource | Read | Grant and revoke access | Available in Risk Center |
| ------------------- | ---- | ----------------------- | ------------------------ |
| Snowflake Roles | ✔️ | ✔️ | ✔️ |
| Snowflake Tables | ✔️ | | ✔️ |
| Snowflake Schemas | ✔️ | | ✔️ |
| Snowflake Databases | ✔️ | | ✔️ |
In Opal, you can grant users access to Snowflake Roles, and add and remove Snowflake Tables, Schemas, and Databases to Snowflake Roles.
The integration also supports user account [provisioning and deprovisioning](/docs/user-provisioning).
## Requirements
To configure Snowflake, you must be an [Opal Admin](/docs/roles-in-opal) and have appropriate permissions in Snowflake.
## 1. Configure your Snowflake Service Account
In order for Opal to manage access to your Snowflake Roles, you must first configure a Snowflake User that uses key pair authentication. In Snowflake,
1. Create a public/private key pair. Follow [Snowflake’s Key Pair Authentication instructions](https://docs.snowflake.com/en/user-guide/key-pair-auth).
2. Create a Snowflake User and Role in Snowflake. You can use the below script as a sample:
```sql sql theme={null}
USE ROLE ACCOUNTADMIN;
CREATE ROLE OPALSERVICE COMMENT = 'This role is for the Opal Snowflake integration and should not be modified';
-- Allow role to update a user/role's grants
GRANT MANAGE GRANTS ON ACCOUNT TO ROLE OPALSERVICE;
-- Allow role to view query history for usage insights
GRANT DATABASE ROLE SNOWFLAKE.GOVERNANCE_VIEWER TO ROLE OPALSERVICE;
-- Add to the Role Hierarchy as recommended by Snowflake
GRANT ROLE OPALSERVICE TO ROLE SECURITYADMIN;
-- Grant warehouse to role
-- should be replaced with your warehouse
GRANT USAGE ON WAREHOUSE TO ROLE OPALSERVICE;
-- Create the service account
CREATE USER OPALADMIN
DEFAULT_ROLE = 'OPALSERVICE'
DEFAULT_WAREHOUSE = ''
-- Replace with the value from the previous step
RSA_PUBLIC_KEY = ''
COMMENT = 'Service account used by Opal Security to sync user roles';
-- Grant the role to the service account
GRANT ROLE OPALSERVICE TO USER OPALADMIN;
```
## 2. Fill out Opal form to connect to Snowflake
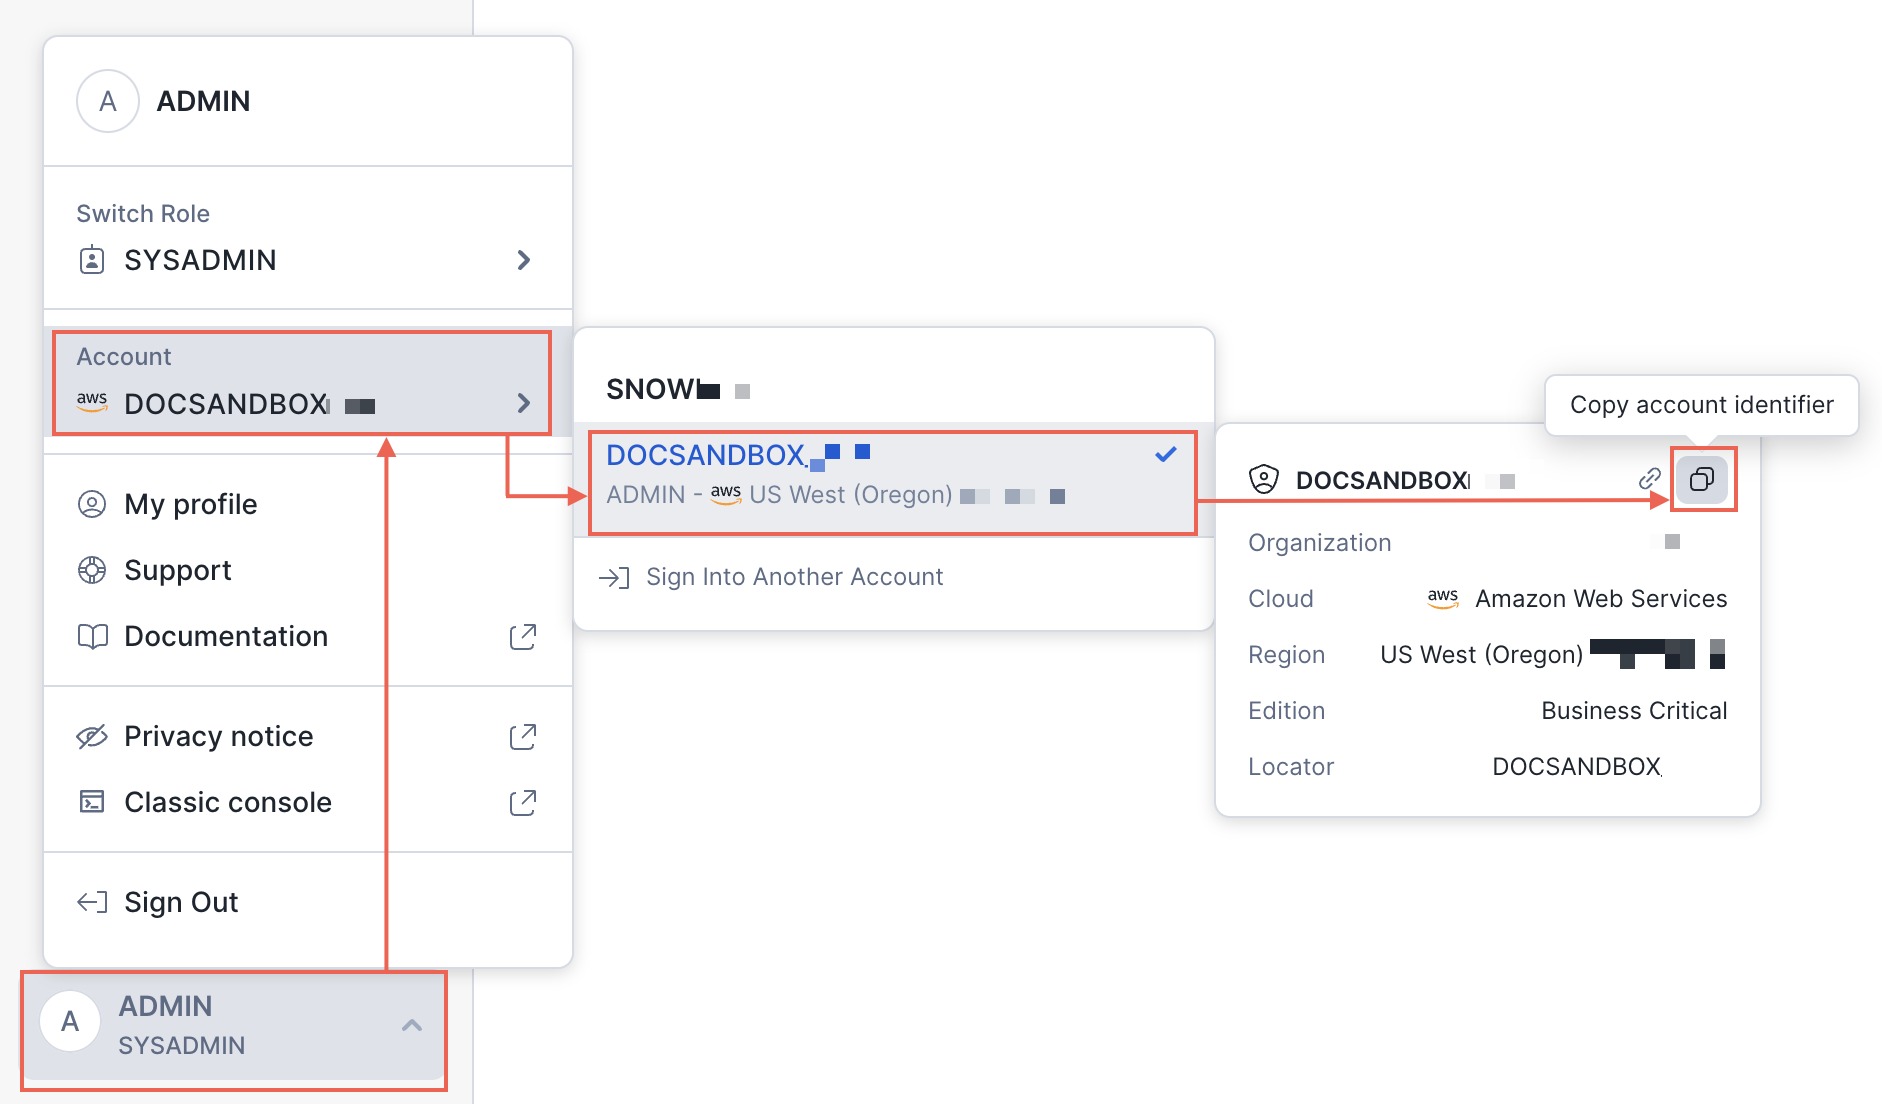
In Opal, go to the **Inventory**, select the **+App** button on the top right, then select the Snowflake tile. Fill in the details of your Snowflake configuration. You need the following information:
* `Organization`
* `Account`
* `Locator`
* `Account identifier`
* `Snowflake URL`
* `Public key`
* `Private key`
* `Private key password`
Reference [Snowflake's documentation](https://docs.snowflake.com/en/user-guide/admin-account-identifier#finding-the-organization-and-account-name-for-an-account) for help finding the above values.
 ## 3. Import Snowflake Roles and Securable Objects
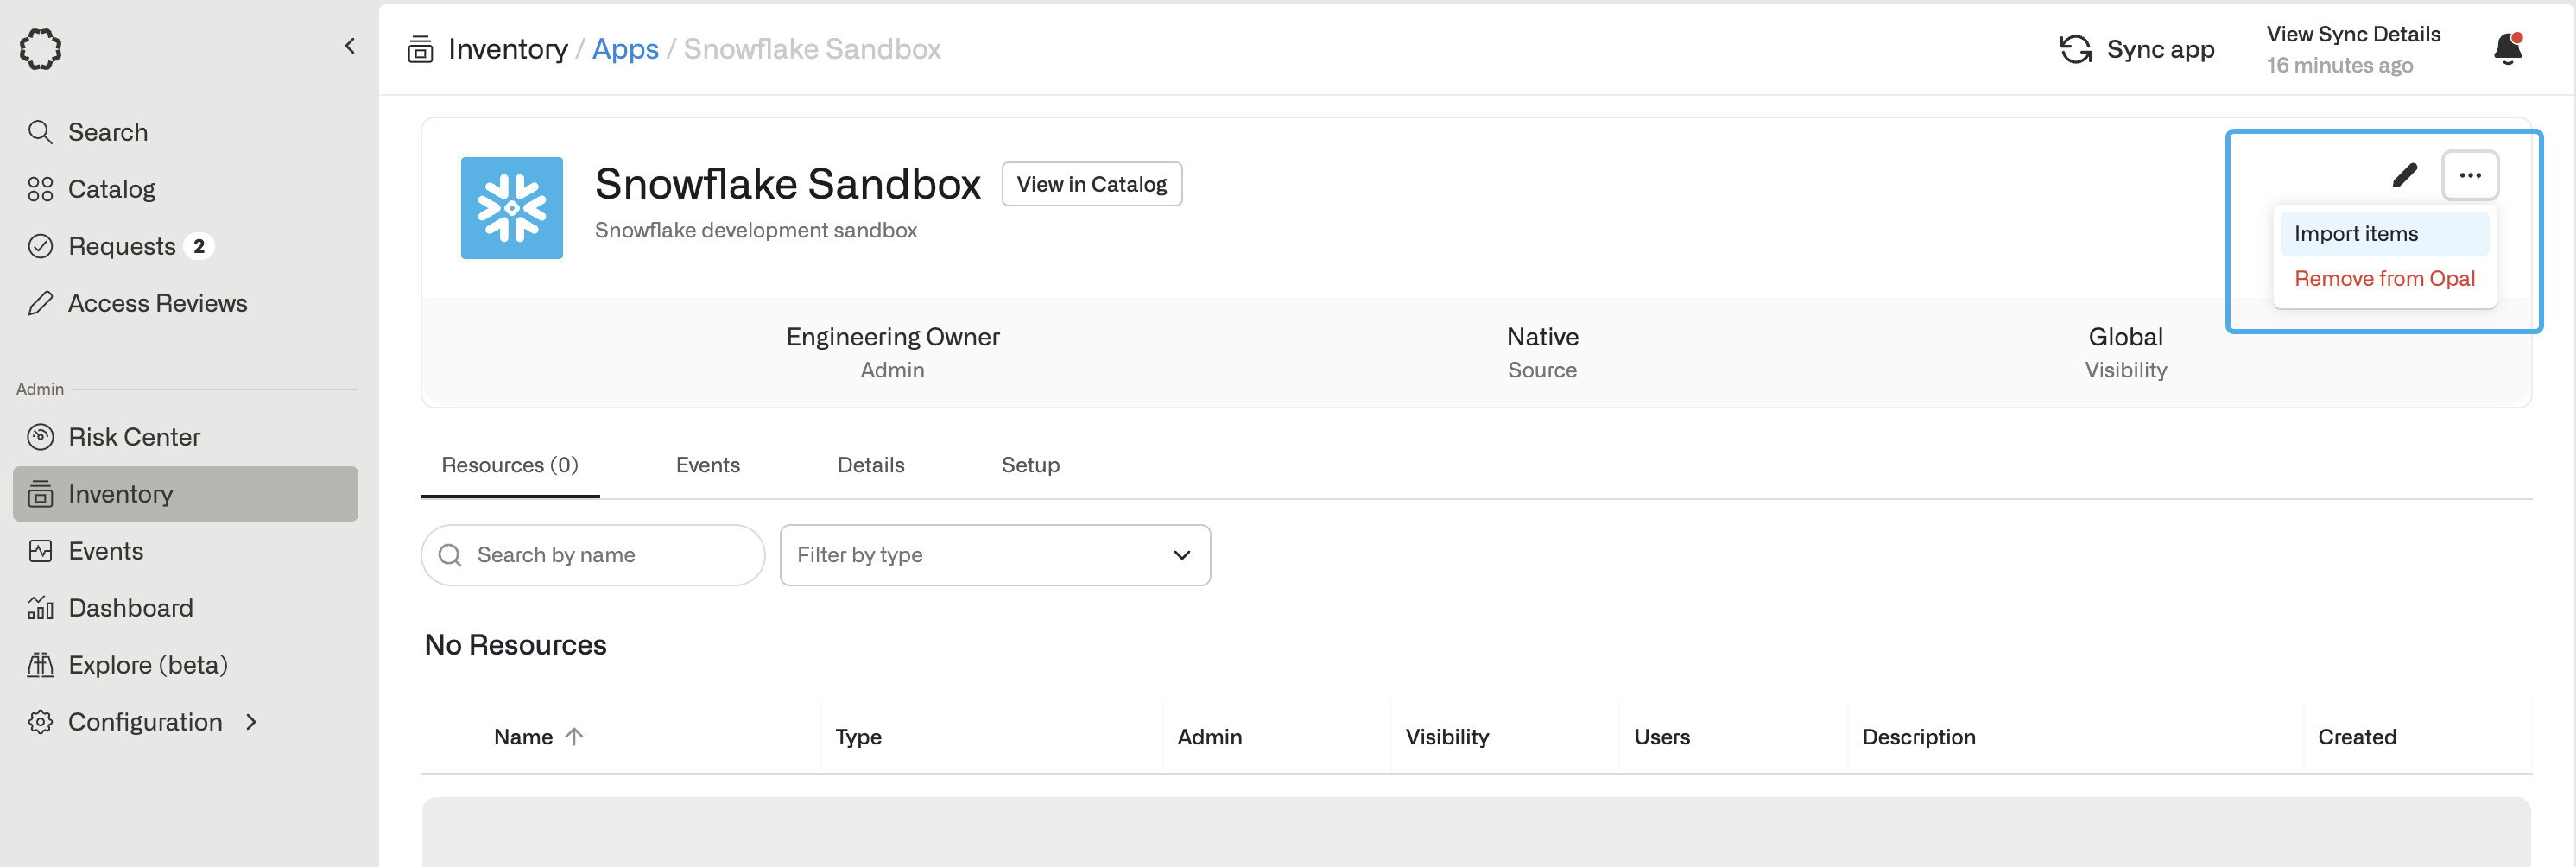
After the Snowflake App is set up, select **Import items** under the `...` on the top right to see a list of available Snowflake Roles and Securable Objects you can import and manage in Opal.
## 3. Import Snowflake Roles and Securable Objects
After the Snowflake App is set up, select **Import items** under the `...` on the top right to see a list of available Snowflake Roles and Securable Objects you can import and manage in Opal.
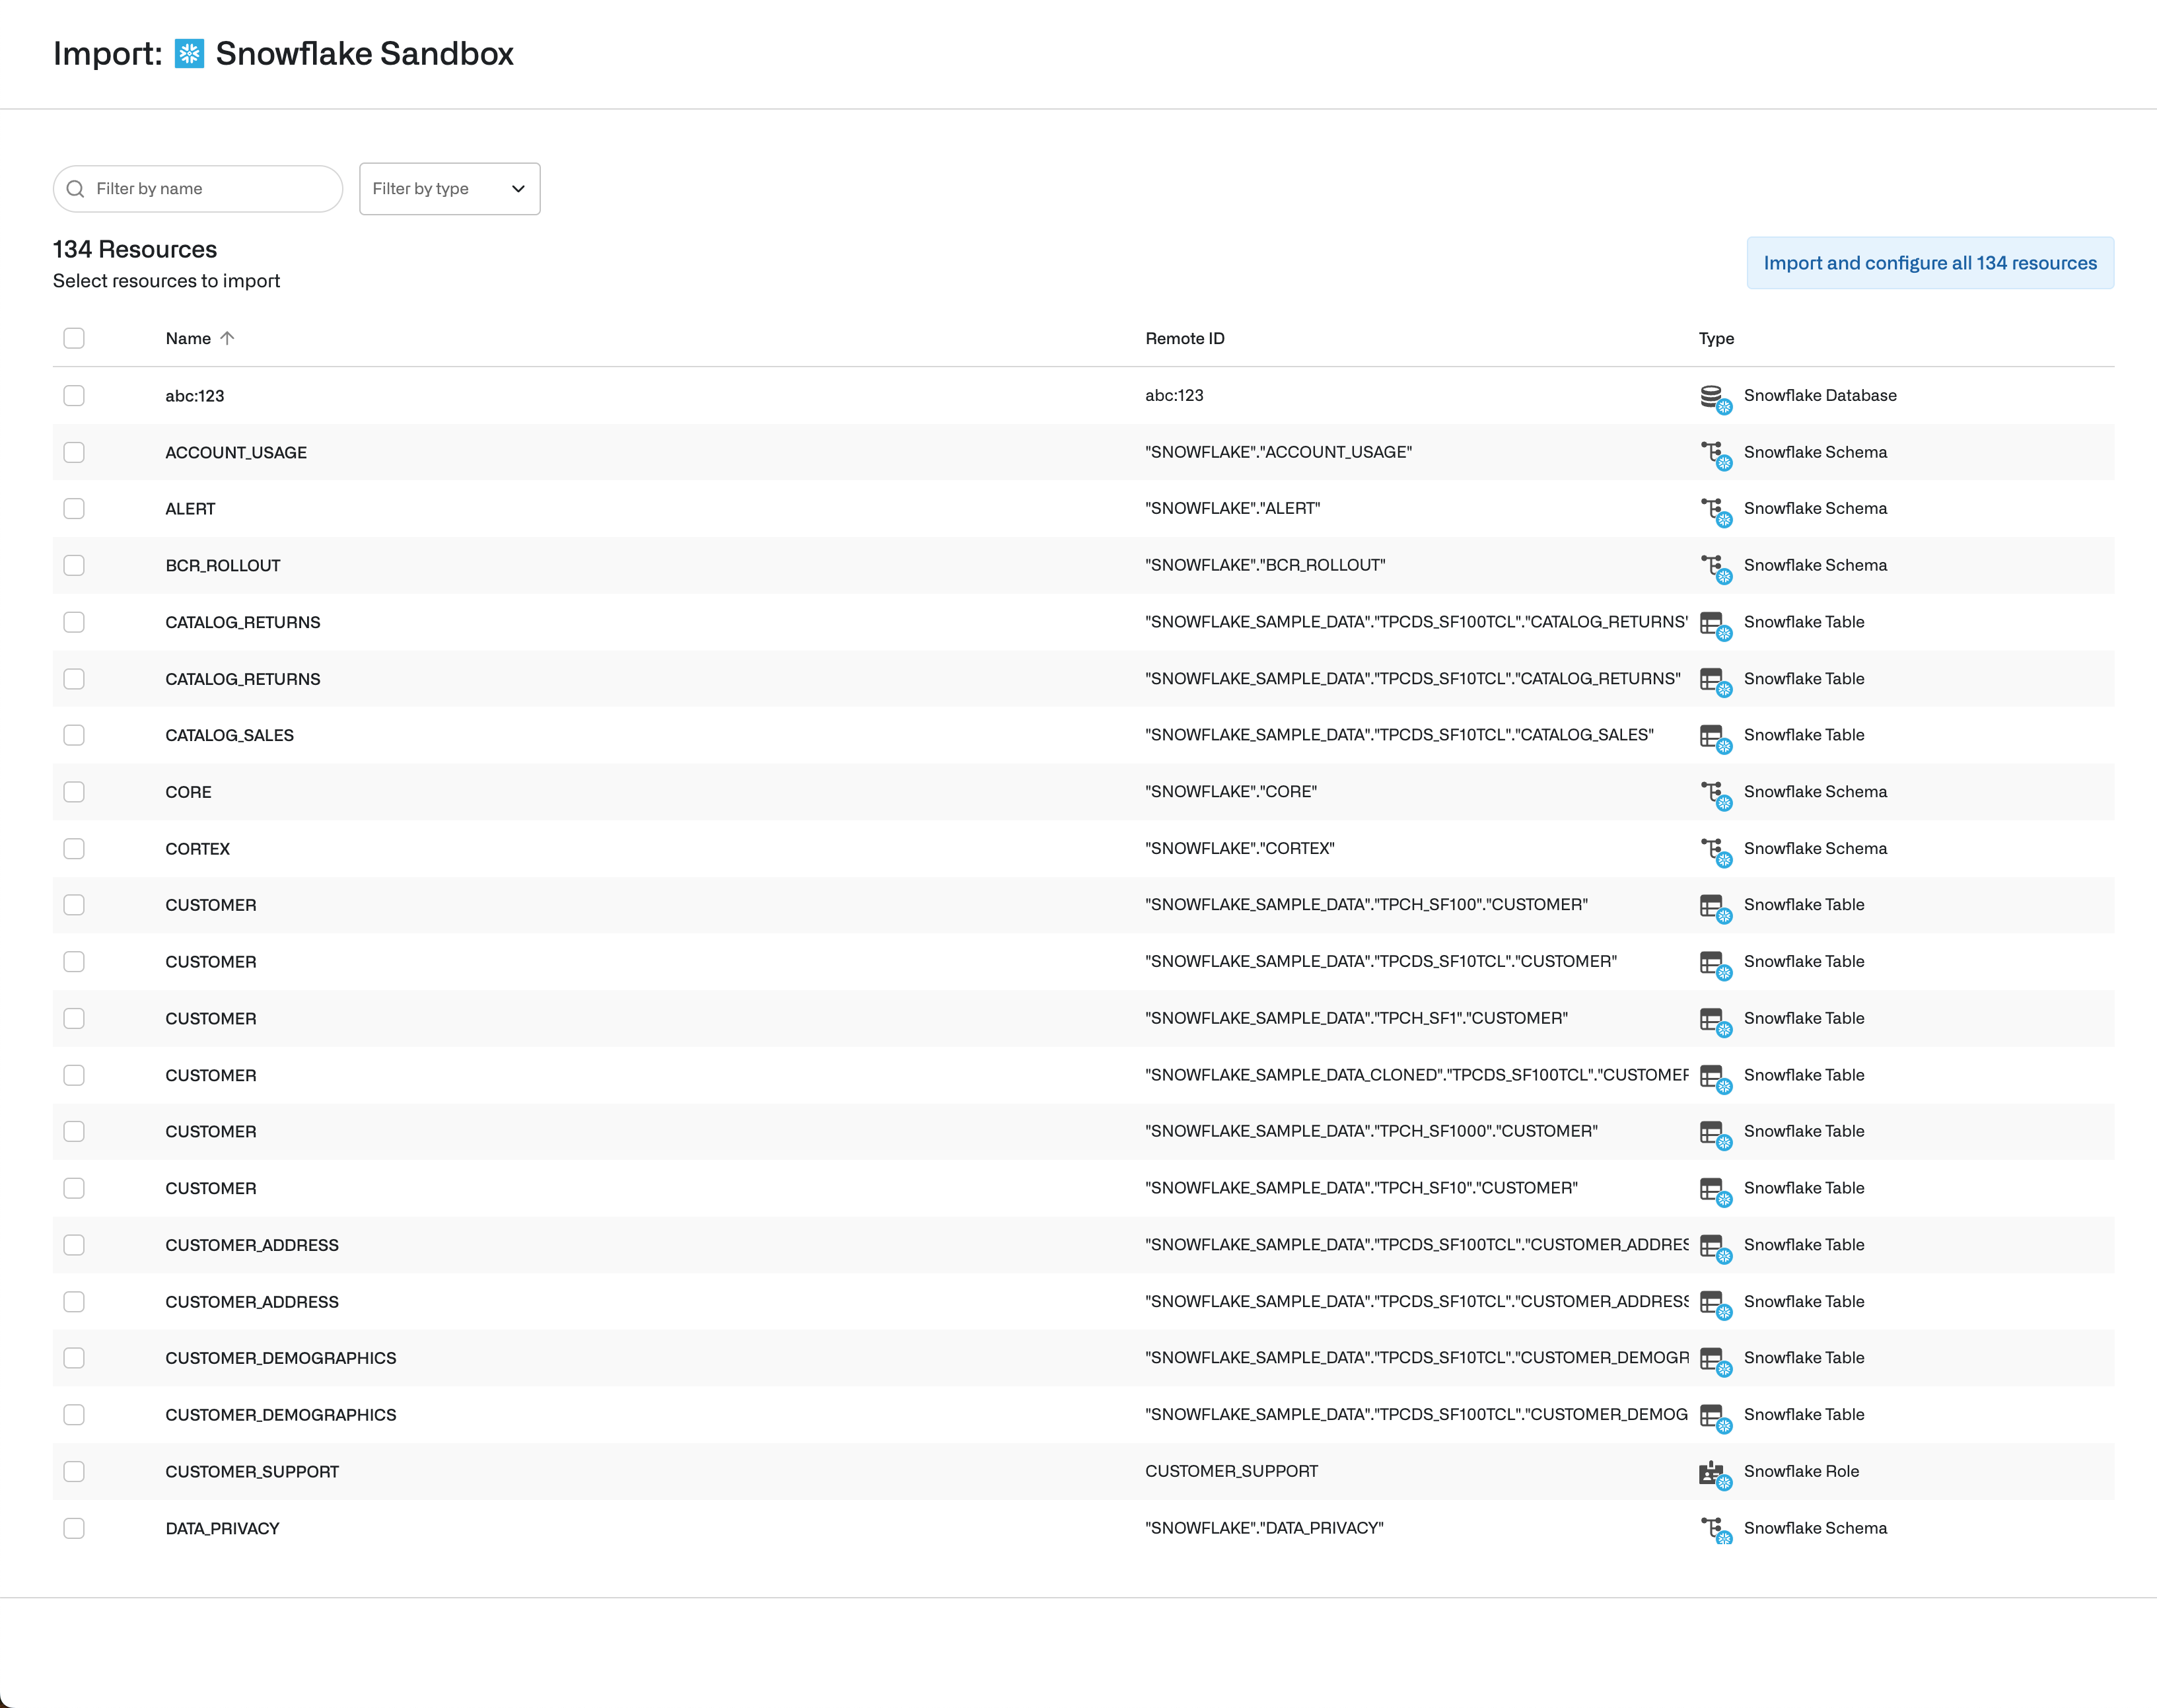
 > Admins can choose to import only a select Snowflake Role, or automatically import it along with all the Securable Objects it can access. Importing a Securable Object, such as a Table, automatically creates a resource hierarchy, making it easy to visualize the parent Schema and Database in Opal.
 ## 4. View and manage Snowflake resources
After you import Snowflake Roles and Securable Objects you want to manage in Opal, you can:
* Navigate to each role and learn which users and groups have access to it, and which Securable Objects it has access to
* Add or remove users to and from the Snowflake Roles
* Add or remove Securable Objects to and from Snowflake Roles
## 4. View and manage Snowflake resources
After you import Snowflake Roles and Securable Objects you want to manage in Opal, you can:
* Navigate to each role and learn which users and groups have access to it, and which Securable Objects it has access to
* Add or remove users to and from the Snowflake Roles
* Add or remove Securable Objects to and from Snowflake Roles
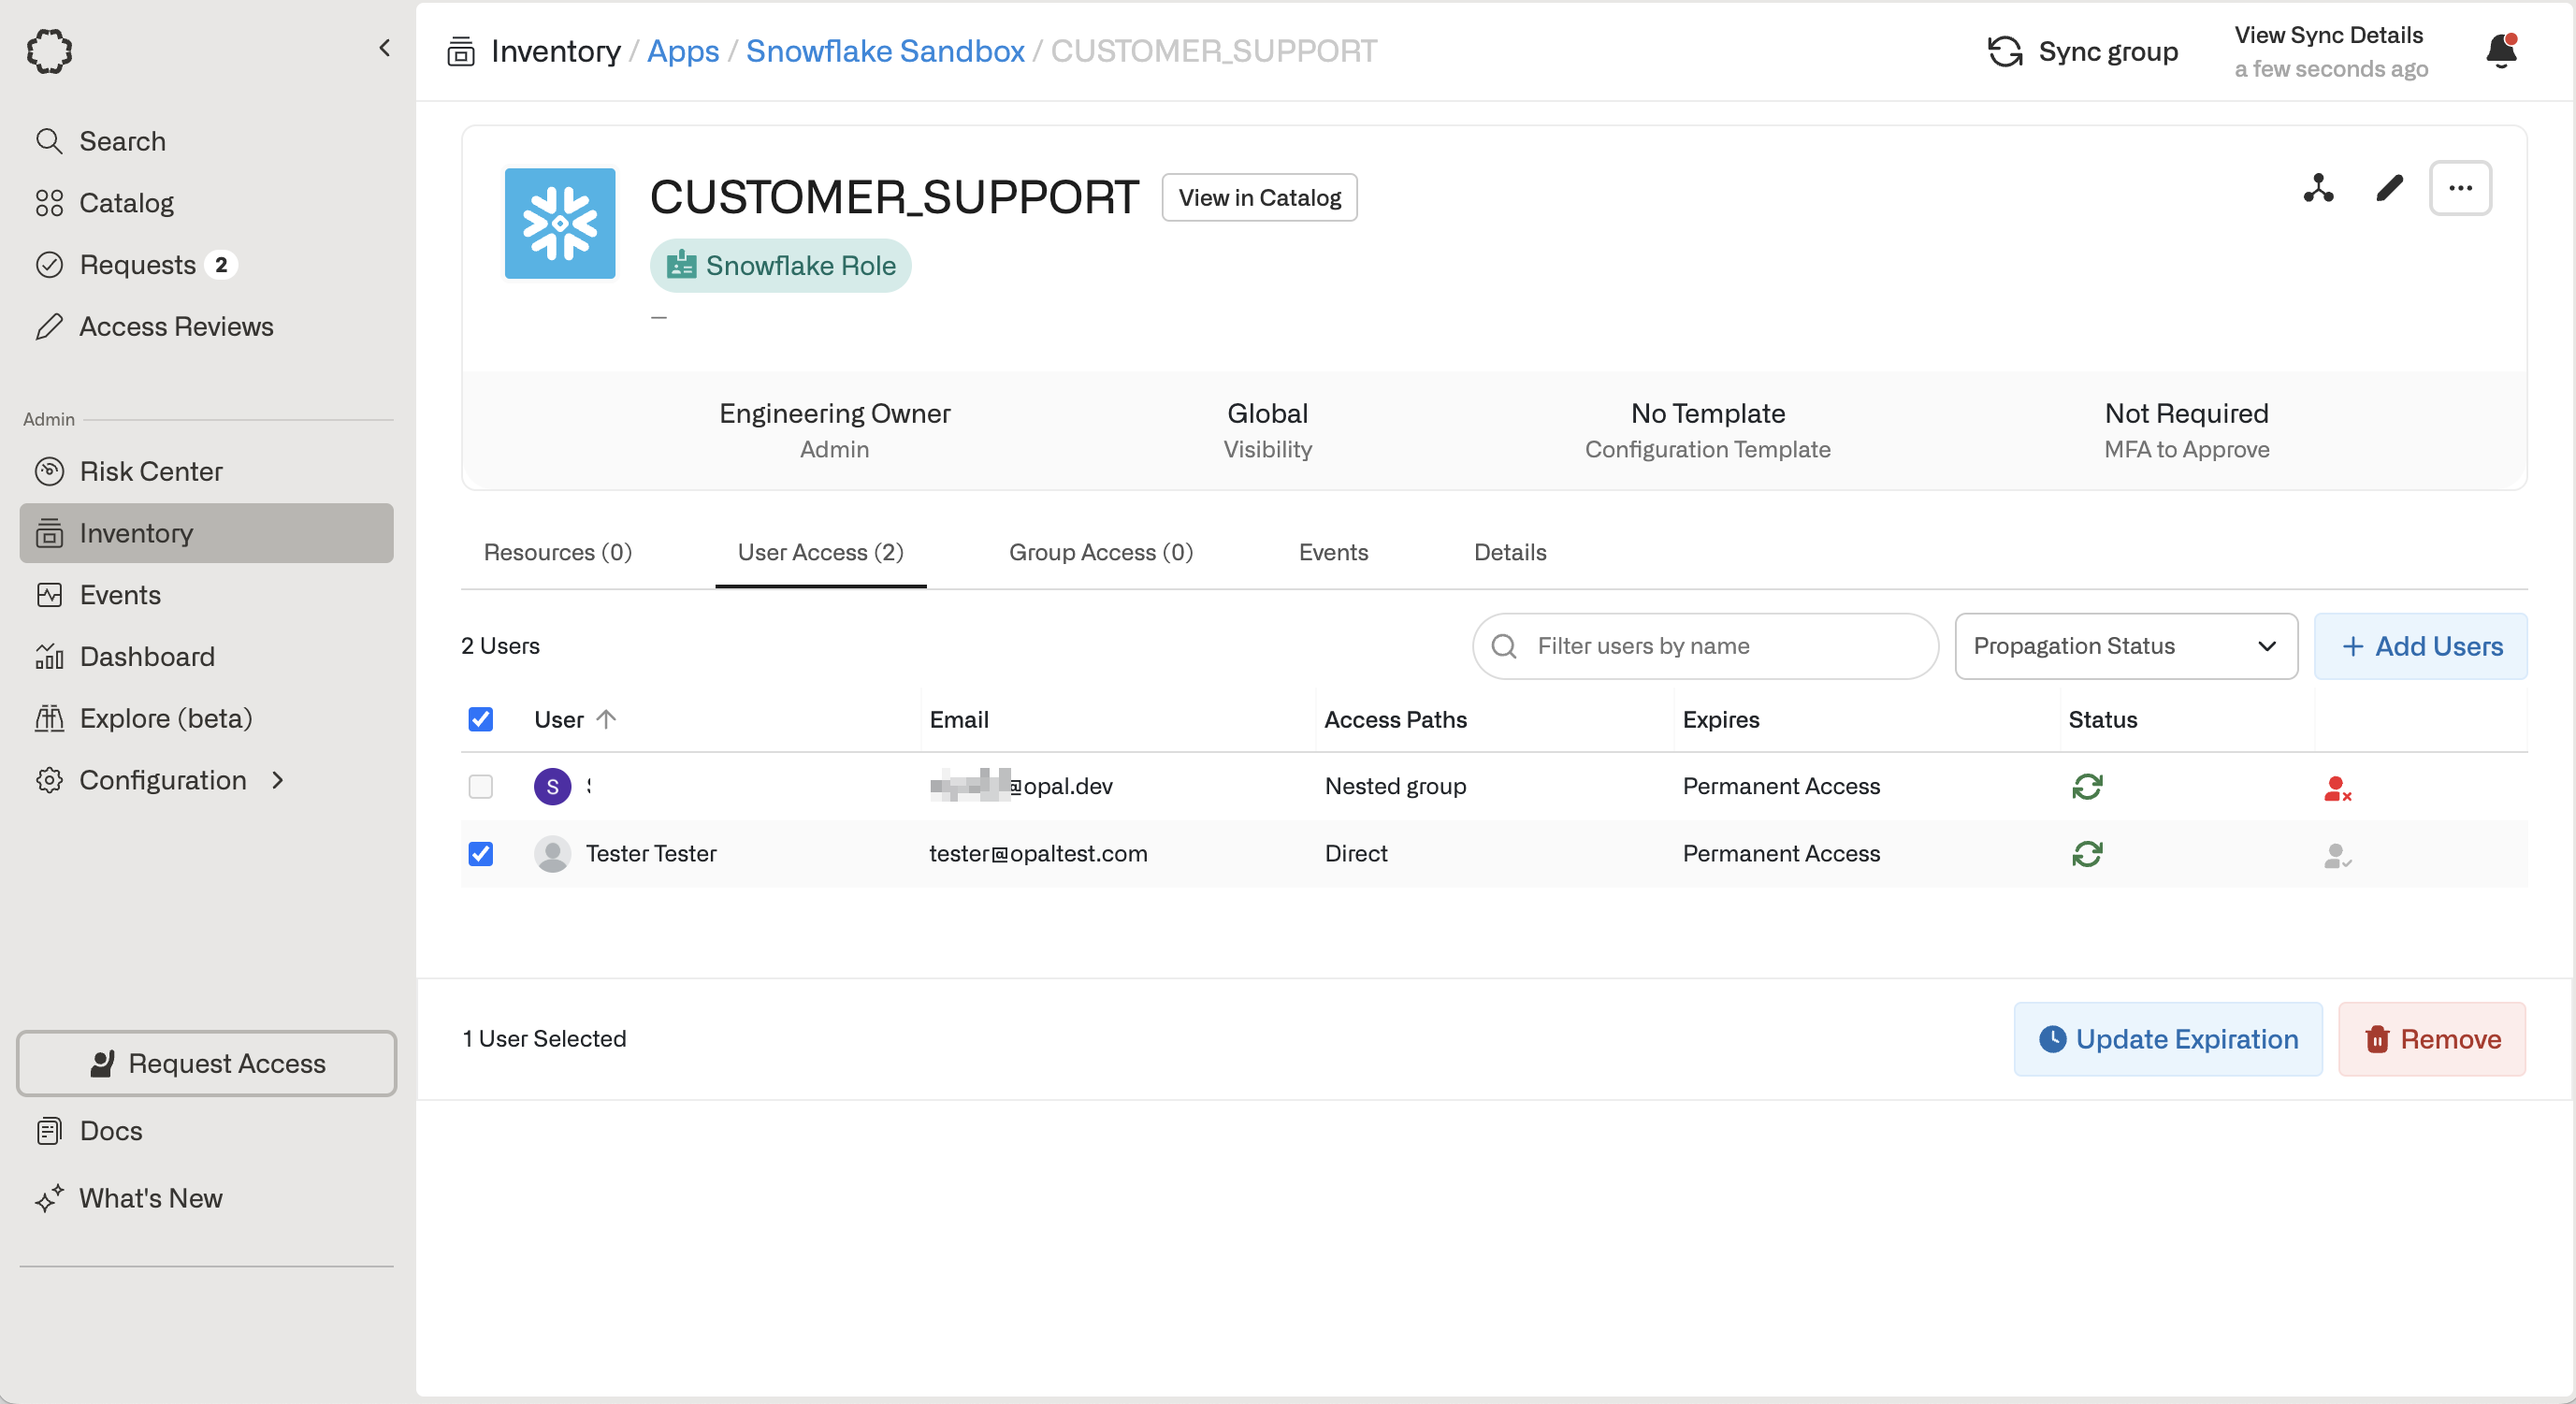 > The **Customer Support** Snowflake Role has two users with access, no groups with access to it, and it does not have access to any Securable Object resources. Selecting **Remove** in this example revokes Tester's access to the role.
***
> The **Customer Support** Snowflake Role has two users with access, no groups with access to it, and it does not have access to any Securable Object resources. Selecting **Remove** in this example revokes Tester's access to the role.
***