> ## Documentation Index
> Fetch the complete documentation index at: https://docs.opal.dev/llms.txt
> Use this file to discover all available pages before exploring further.
# Slack
> Learn how to connect your Opal instance to Slack.
You can configure Opal to integrate with your Slack workspace in order to send notifications to requesters and reviewers about permission and group access requests. Opal supports using a single Slack workspace or using multiple workspaces through [Slack Enterprise Grid](https://slack.com/enterprise). See the section below for [installing to an enterprise grid](#setup---enterprise-grid).
## Requirements
You must be an Opal administrator and a Slack workspace administrator to set up the Slack integration.
## Get started
1. Log into the Slack workspace you want to integrate with Opal.
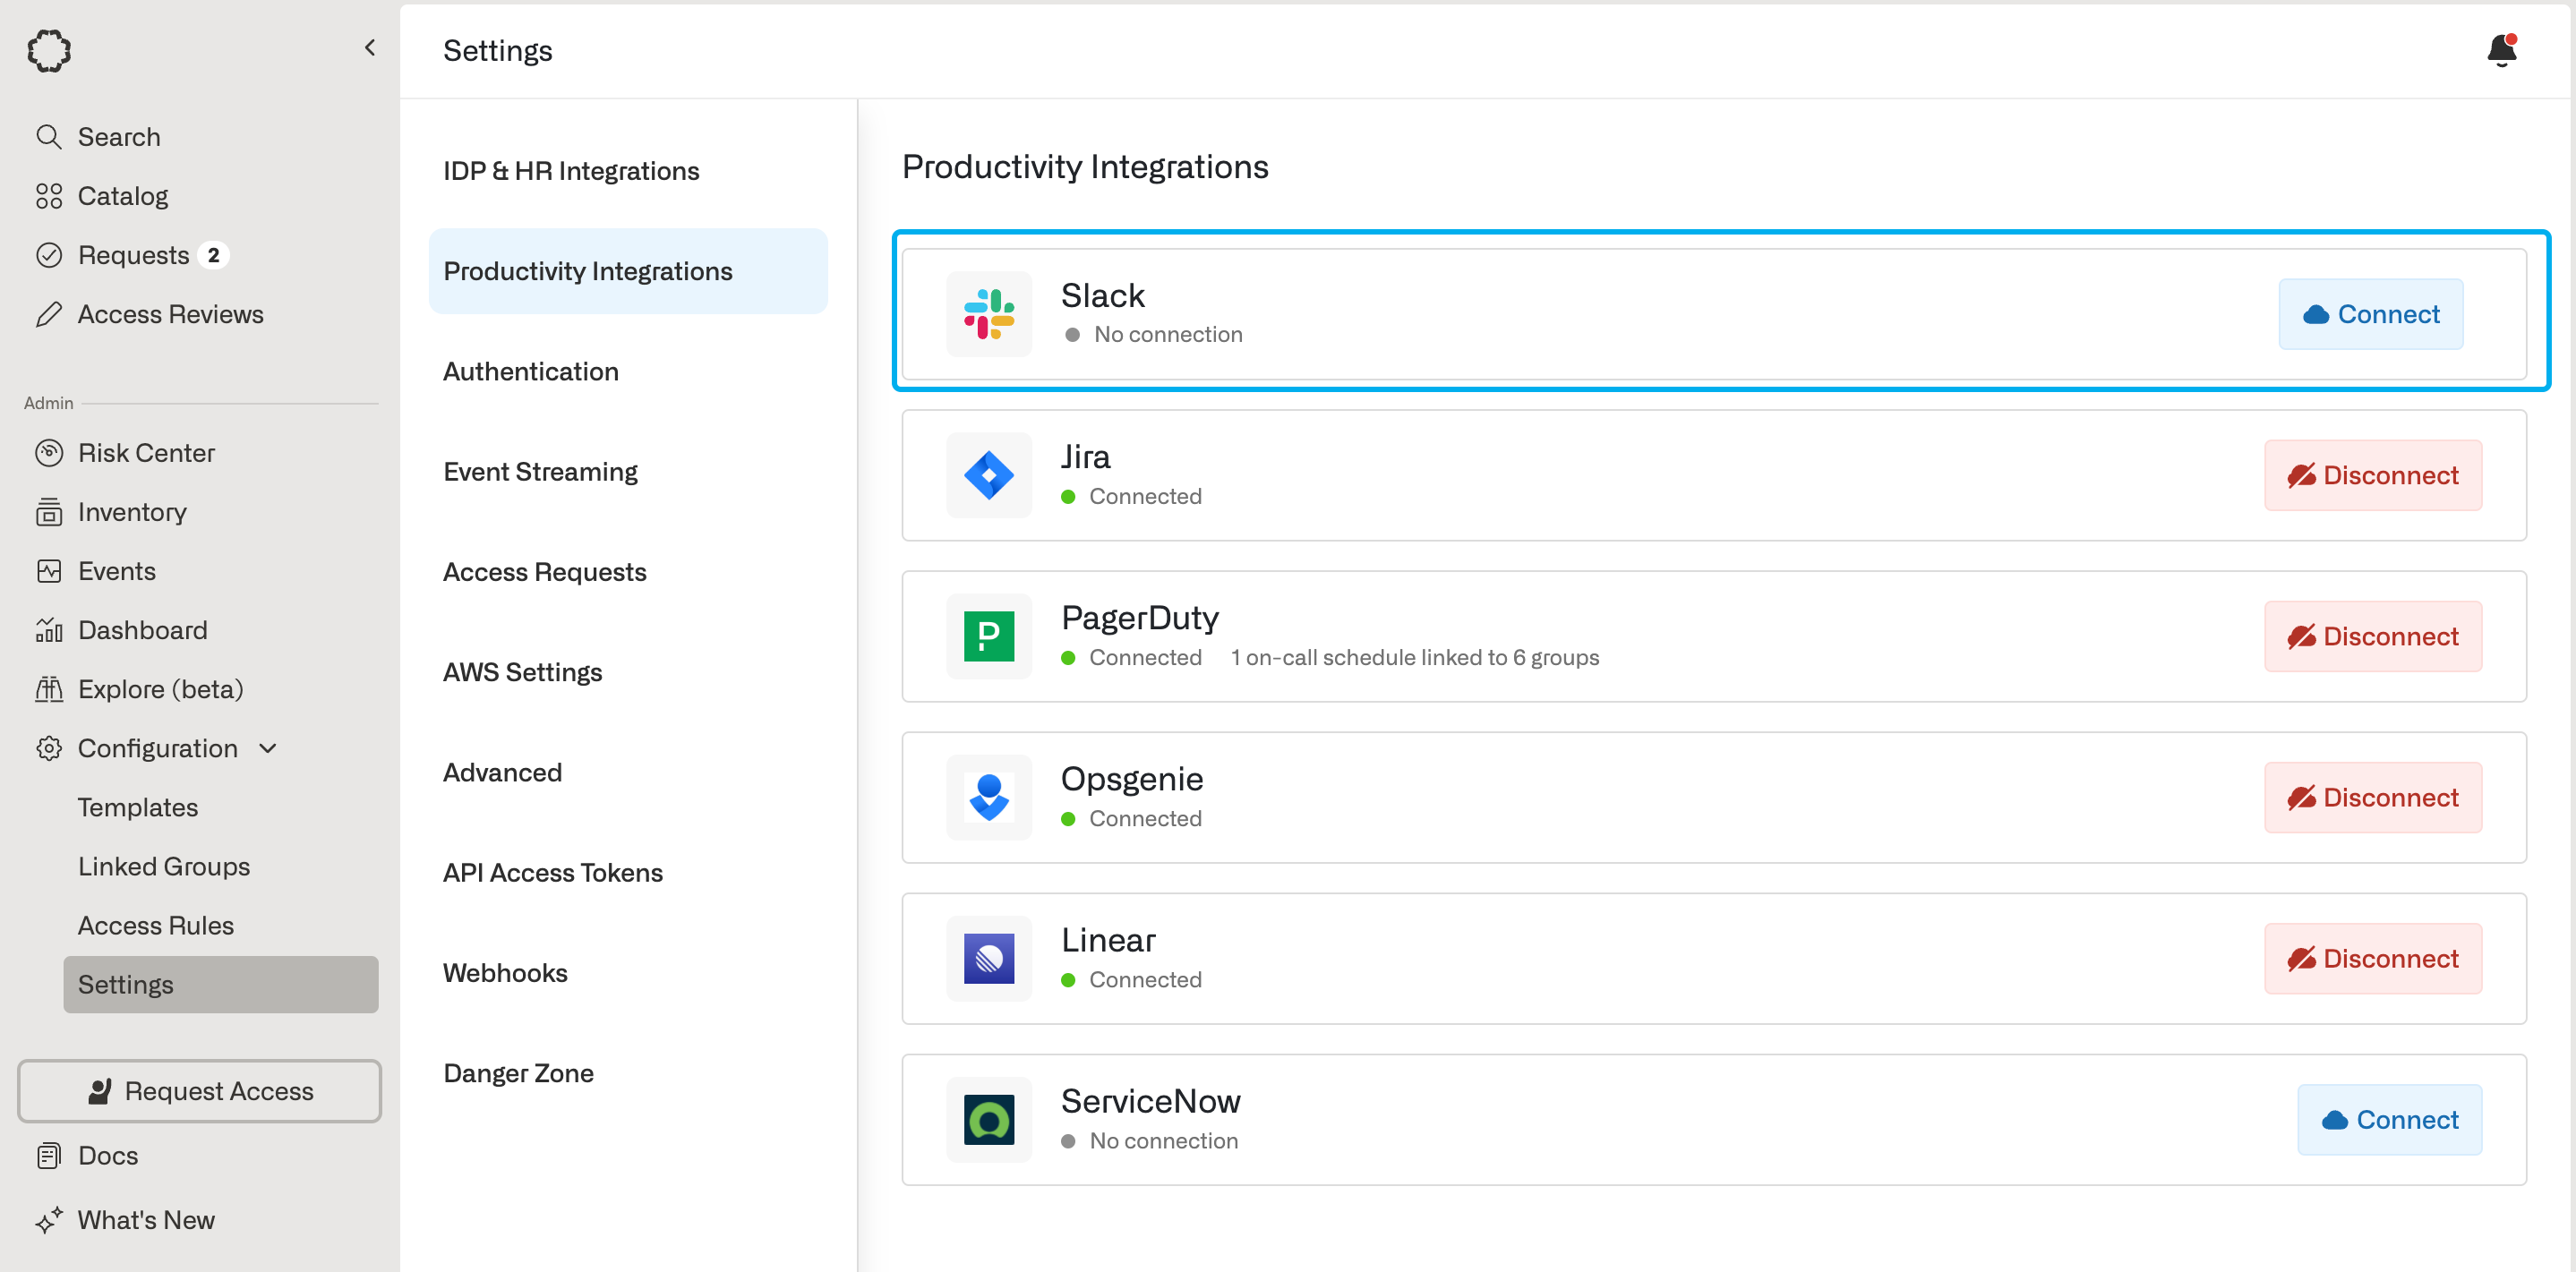
2. In the Opal dashboard, go to **Configuration** > **Settings** > **Productivity Integrations**.
 Installation varies between the Cloud Opal app and self-hosted instances.
## For Opal Cloud instances
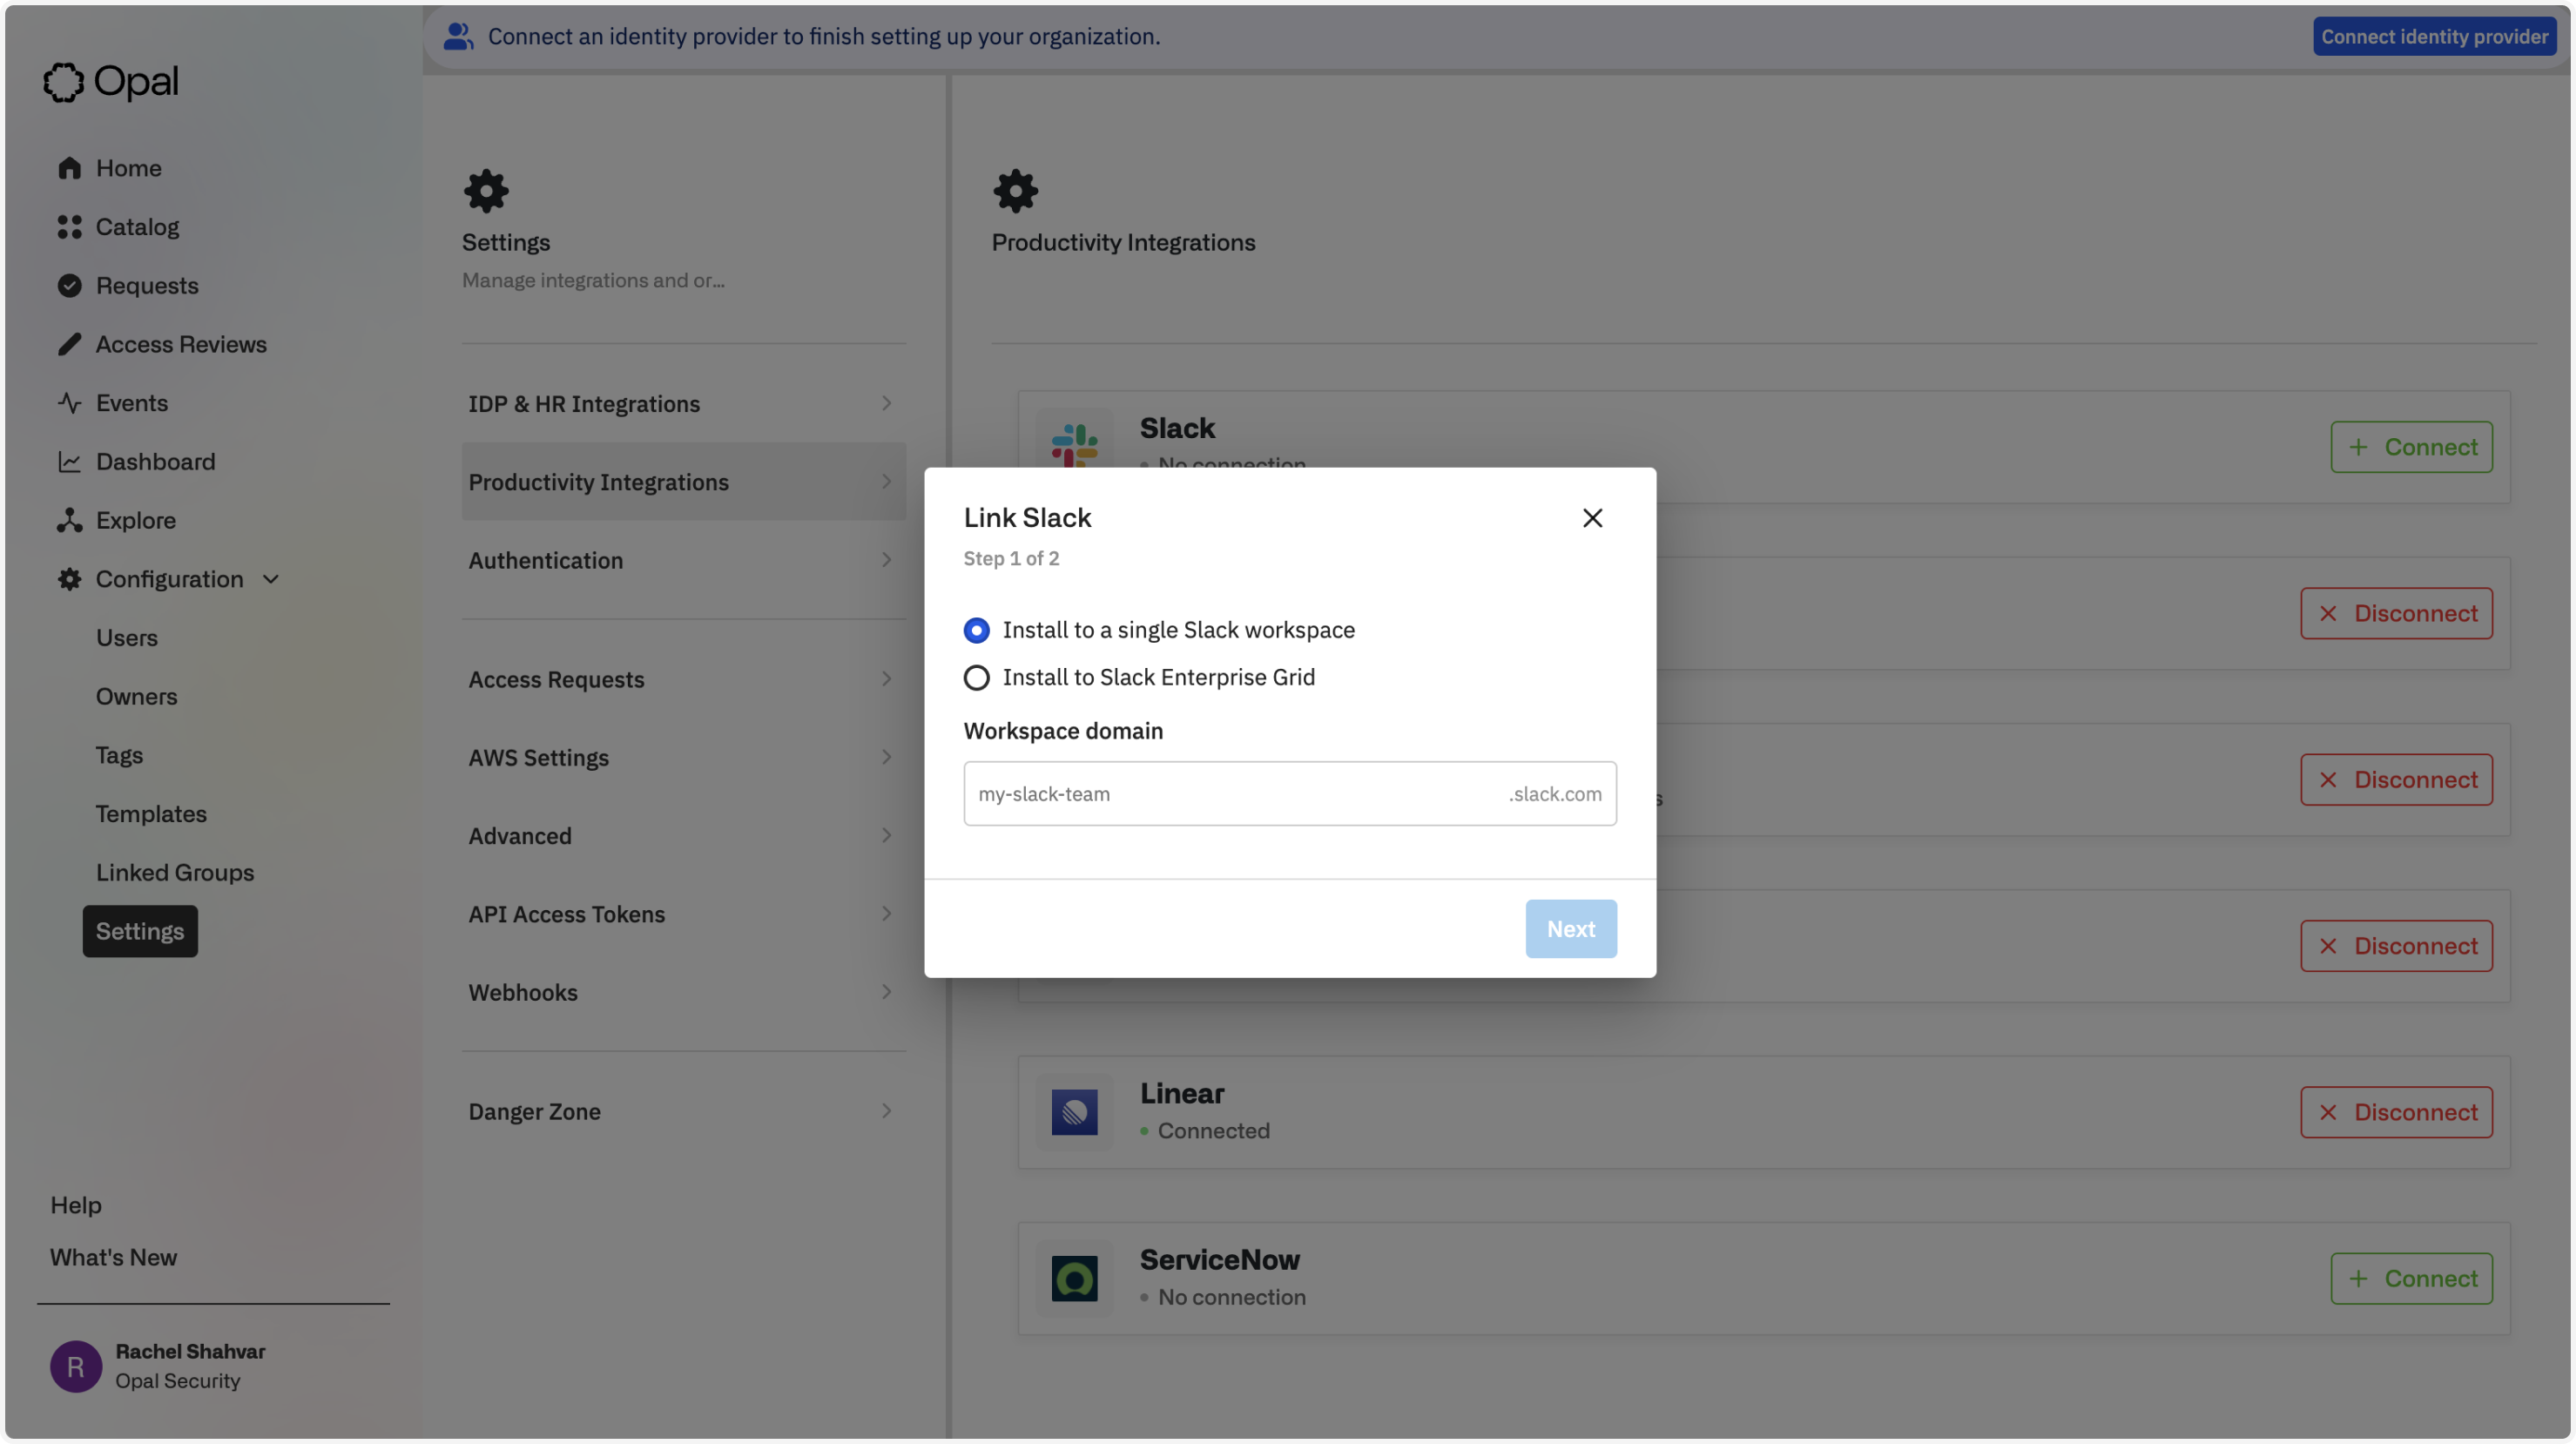
1. Click **Connect** on the Slack integration on the **Productivity Integrations** page.
2. Choose to install to a single workspace or multiple workspaces via [Slack Enterprise Grid](https://slack.com/enterprise). Note that you can still install to a single workspace even if that workspace belongs to an Enterprise grid.
Installation varies between the Cloud Opal app and self-hosted instances.
## For Opal Cloud instances
1. Click **Connect** on the Slack integration on the **Productivity Integrations** page.
2. Choose to install to a single workspace or multiple workspaces via [Slack Enterprise Grid](https://slack.com/enterprise). Note that you can still install to a single workspace even if that workspace belongs to an Enterprise grid.
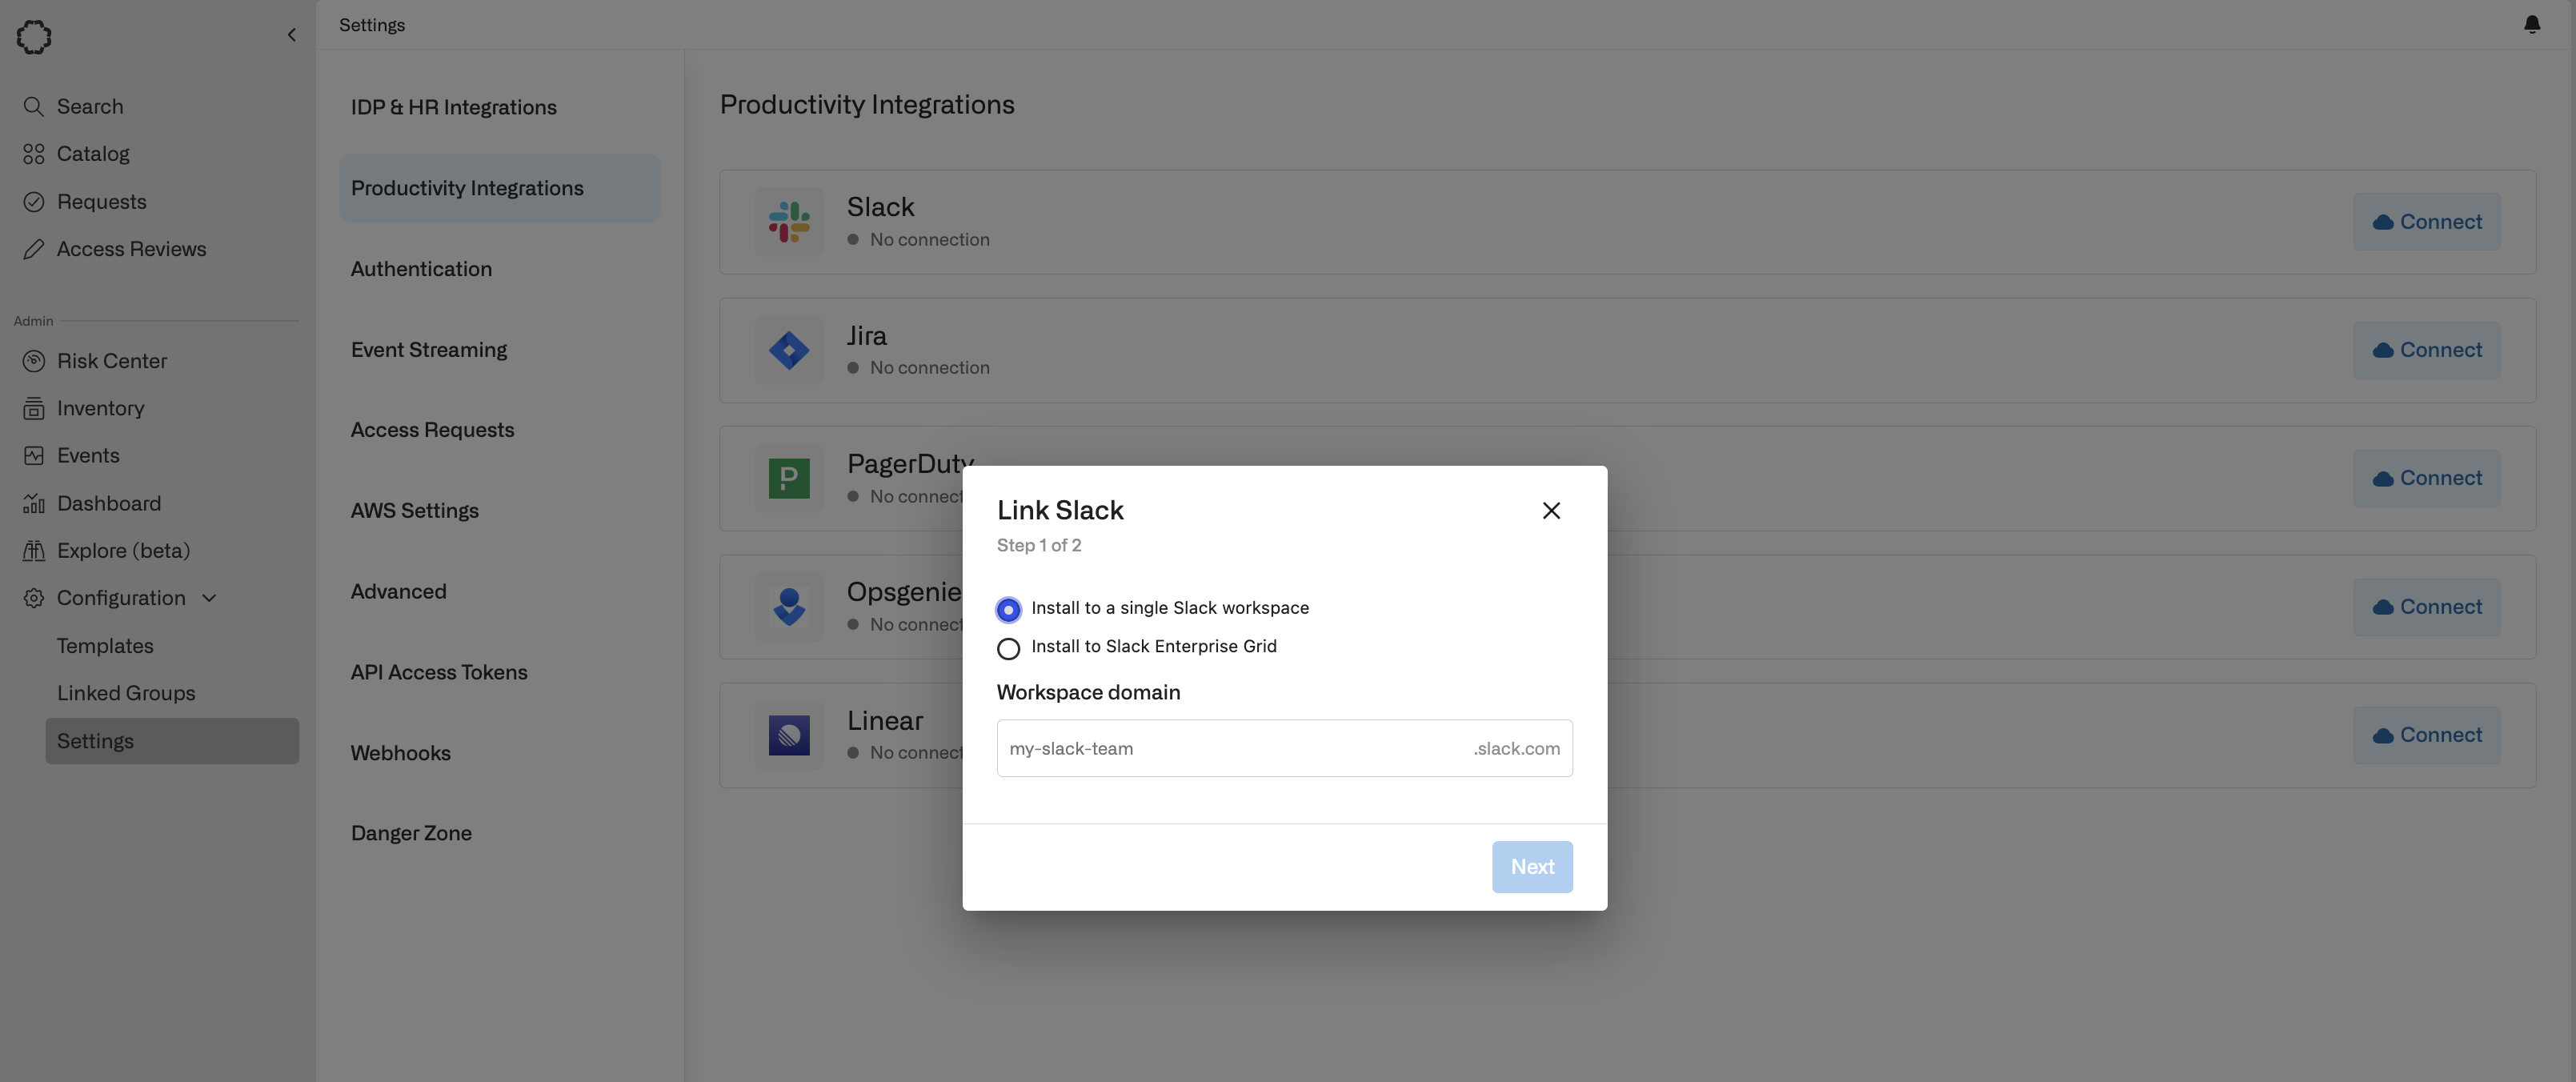 If you are installing to a single workspace, enter the Slack workspace's domain in the **Workspace domain** field. For example, if your workspace is called `opal-test-workspace`, with the associated URL `opal-test-workspace.slack.com`, enter `opal-test-workspace`.
3. Next, you will be redirected to the Slack authorization page asking you to grant the Opal Slack app permissions to access your workspace or organization. See the later section for [installing to an enterprise grid](#setup-for-enterprise-grid).
## For self-hosted instances
For self-hosted Opal instances, you first must create a new Slack app representing the Opal app.
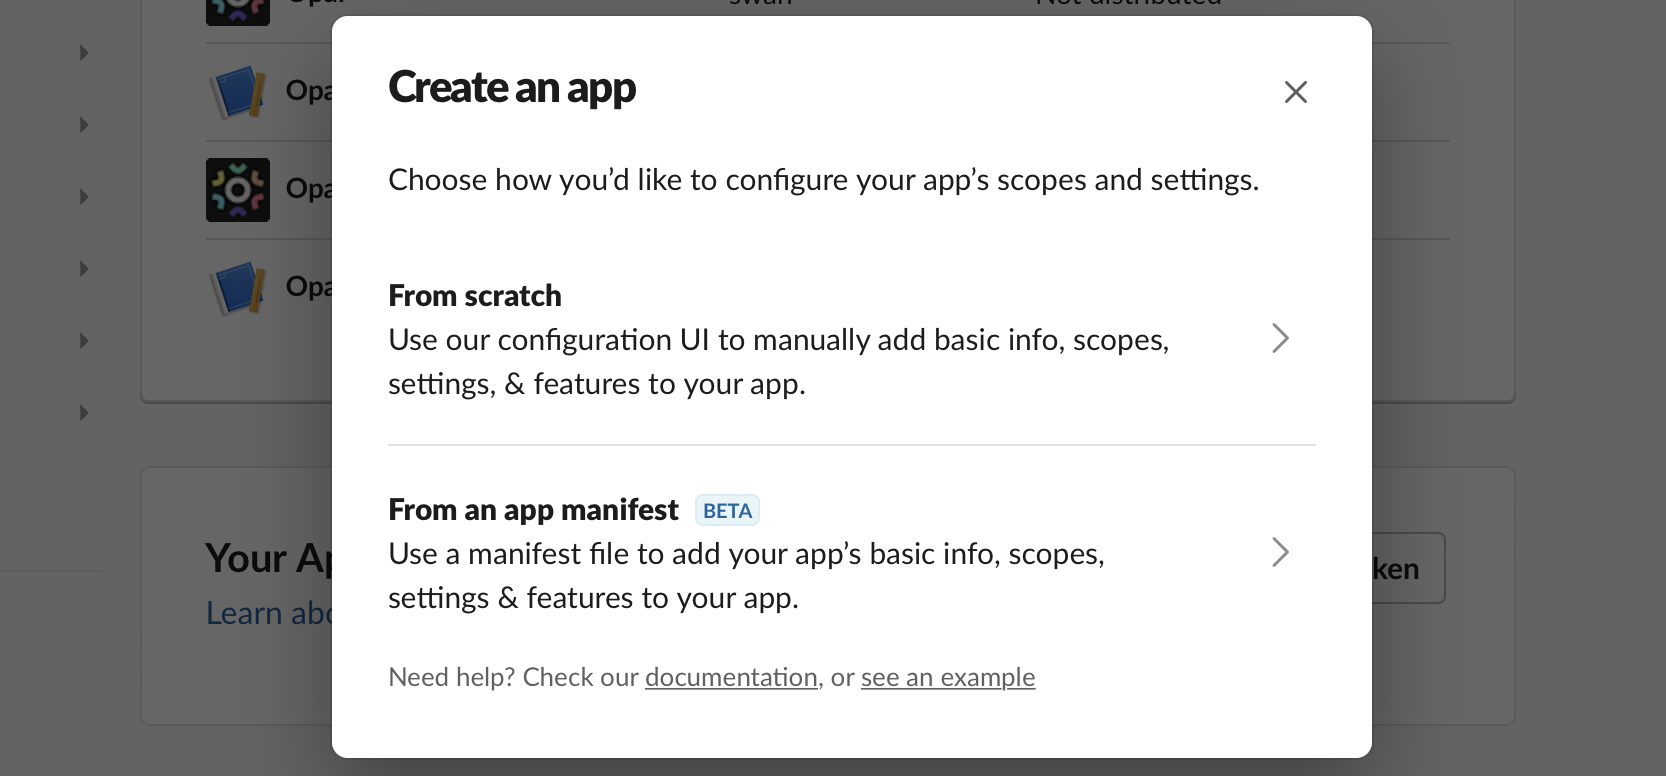
1. Go to the [Slack App Dashboard](https://api.slack.com/apps) and click on the **Create an app** button.
2. Choose to create **From an app manifest**.
If you are installing to a single workspace, enter the Slack workspace's domain in the **Workspace domain** field. For example, if your workspace is called `opal-test-workspace`, with the associated URL `opal-test-workspace.slack.com`, enter `opal-test-workspace`.
3. Next, you will be redirected to the Slack authorization page asking you to grant the Opal Slack app permissions to access your workspace or organization. See the later section for [installing to an enterprise grid](#setup-for-enterprise-grid).
## For self-hosted instances
For self-hosted Opal instances, you first must create a new Slack app representing the Opal app.
1. Go to the [Slack App Dashboard](https://api.slack.com/apps) and click on the **Create an app** button.
2. Choose to create **From an app manifest**.
 3. Select the Slack workspace associated with your self-hosted integration, and click **Next**.
4. Copy/paste the following app manifest JSON file, editing the `` field.
```json json theme={null}
{
"display_information": {
"name": "Opal",
"description": "Taking the pain out of permissions",
"background_color": "#00020d"
},
"features": {
"bot_user": {
"display_name": "Opal",
"always_online": false
},
"slash_commands": [
{
"command": "/opal",
"description": "'/opal' to open request modal • '/opal search [term]' to search",
"usage_hint": "search ",
"should_escape": false
}
]
},
"oauth_config": {
"redirect_urls": [
"https:///callback/slack"
],
"scopes": {
"user": [
"channels:read",
"groups:read"
],
"bot": [
"app_mentions:read",
"chat:write",
"chat:write.public",
"commands",
"groups:read",
"im:history",
"im:write",
"users.profile:read",
"users:read",
"users:read.email",
"groups:write",
"channels:manage",
"channels:read",
"channels:history"
]
}
},
"settings": {
"event_subscriptions": {
"user_events": [
"channel_deleted",
"group_deleted"
],
"bot_events": [
"channel_deleted",
"group_deleted",
"message.channels",
"message.im",
"team_access_granted",
"team_access_revoked"
]
},
"interactivity": {
"is_enabled": true
},
"org_deploy_enabled": true,
"socket_mode_enabled": true,
"token_rotation_enabled": false
}
}
```
5. After you create the app, [download the Opal logo](https://files.readme.io/54e771f-logo-black.png) and add it to the Slackbot **Display Information**.
6. Click on **Basic Information** on the left sidebar, and record the Client ID, Client Secret and Signing Secret fields. You'll use these values in subsequent steps.
7. Generate an app-level token.
Click on **Basic Information** on the left sidebar, and go to the **App-Level Tokens** section. Click on the **Generate Tokens and Scopes** button to create the app-level token. Give the token the `connections:write` scope, and make sure to record the token, which you'll use later.
This app-level token is needed to use Slack's socket mode, which lets your self-hosted Opal instance avoid requiring an open port on the instance to receive Slack events.
8. Click on **App Home** on the left sidebar. Make sure the **Messages Tab** and **Allow users to send Slack commands and messages from the messages tab** settings are enabled.
3. Select the Slack workspace associated with your self-hosted integration, and click **Next**.
4. Copy/paste the following app manifest JSON file, editing the `` field.
```json json theme={null}
{
"display_information": {
"name": "Opal",
"description": "Taking the pain out of permissions",
"background_color": "#00020d"
},
"features": {
"bot_user": {
"display_name": "Opal",
"always_online": false
},
"slash_commands": [
{
"command": "/opal",
"description": "'/opal' to open request modal • '/opal search [term]' to search",
"usage_hint": "search ",
"should_escape": false
}
]
},
"oauth_config": {
"redirect_urls": [
"https:///callback/slack"
],
"scopes": {
"user": [
"channels:read",
"groups:read"
],
"bot": [
"app_mentions:read",
"chat:write",
"chat:write.public",
"commands",
"groups:read",
"im:history",
"im:write",
"users.profile:read",
"users:read",
"users:read.email",
"groups:write",
"channels:manage",
"channels:read",
"channels:history"
]
}
},
"settings": {
"event_subscriptions": {
"user_events": [
"channel_deleted",
"group_deleted"
],
"bot_events": [
"channel_deleted",
"group_deleted",
"message.channels",
"message.im",
"team_access_granted",
"team_access_revoked"
]
},
"interactivity": {
"is_enabled": true
},
"org_deploy_enabled": true,
"socket_mode_enabled": true,
"token_rotation_enabled": false
}
}
```
5. After you create the app, [download the Opal logo](https://files.readme.io/54e771f-logo-black.png) and add it to the Slackbot **Display Information**.
6. Click on **Basic Information** on the left sidebar, and record the Client ID, Client Secret and Signing Secret fields. You'll use these values in subsequent steps.
7. Generate an app-level token.
Click on **Basic Information** on the left sidebar, and go to the **App-Level Tokens** section. Click on the **Generate Tokens and Scopes** button to create the app-level token. Give the token the `connections:write` scope, and make sure to record the token, which you'll use later.
This app-level token is needed to use Slack's socket mode, which lets your self-hosted Opal instance avoid requiring an open port on the instance to receive Slack events.
8. Click on **App Home** on the left sidebar. Make sure the **Messages Tab** and **Allow users to send Slack commands and messages from the messages tab** settings are enabled.
 9. Click on **Basic Information** on the left sidebar. Click on **Install your app** and **Install to Workspace**. The Slack app you just created will appear in your Slack workspace.
10. In Opal, go back to **Configuration > Settings > Productivity Integrations**. Click **Connect** on the Slack integration.
11. Choose to install to a single workspace or multiple workspaces via [Slack Enterprise Grid](https://slack.com/enterprise). Note that you can still install to a single workspace even if that workspace belongs to an Enterprise grid.
9. Click on **Basic Information** on the left sidebar. Click on **Install your app** and **Install to Workspace**. The Slack app you just created will appear in your Slack workspace.
10. In Opal, go back to **Configuration > Settings > Productivity Integrations**. Click **Connect** on the Slack integration.
11. Choose to install to a single workspace or multiple workspaces via [Slack Enterprise Grid](https://slack.com/enterprise). Note that you can still install to a single workspace even if that workspace belongs to an Enterprise grid.
 12. For the **Client ID** field, enter the Client ID from step 6.
13. For the **Client secret** field, enter the Client Secret from step 6.
14. For the **Signing secret** field, enter the Signing Secret from step 6.
15. For the **App level token** field, enter the app-level token from step 7.
16. On the last step, you will be redirected to the Slack authorization page asking you to grant the Opal Slack app permissions to access your workspace or organization. See the later section for [installing to an enterprise grid](#setup-for-enterprise-grid).
To update your existing Slack integration to use socket mode, follow step 7 to
generate the app-level-token and enable socket mode. Then, go to the Opal
Configuration page, and disconnect, then reconnect Slack.
## Setup for Enterprise Grid
Installing the integration to an Enterprise Grid has the same steps as above. However, the Slack integration authorization page can be confusing when indicating if you're installing to the Enterprise Grid or just one workspace in it.
On the authorization step, use the dropdown in the upper-right hand corner to choose an organization under **Your organizations**.
12. For the **Client ID** field, enter the Client ID from step 6.
13. For the **Client secret** field, enter the Client Secret from step 6.
14. For the **Signing secret** field, enter the Signing Secret from step 6.
15. For the **App level token** field, enter the app-level token from step 7.
16. On the last step, you will be redirected to the Slack authorization page asking you to grant the Opal Slack app permissions to access your workspace or organization. See the later section for [installing to an enterprise grid](#setup-for-enterprise-grid).
To update your existing Slack integration to use socket mode, follow step 7 to
generate the app-level-token and enable socket mode. Then, go to the Opal
Configuration page, and disconnect, then reconnect Slack.
## Setup for Enterprise Grid
Installing the integration to an Enterprise Grid has the same steps as above. However, the Slack integration authorization page can be confusing when indicating if you're installing to the Enterprise Grid or just one workspace in it.
On the authorization step, use the dropdown in the upper-right hand corner to choose an organization under **Your organizations**.
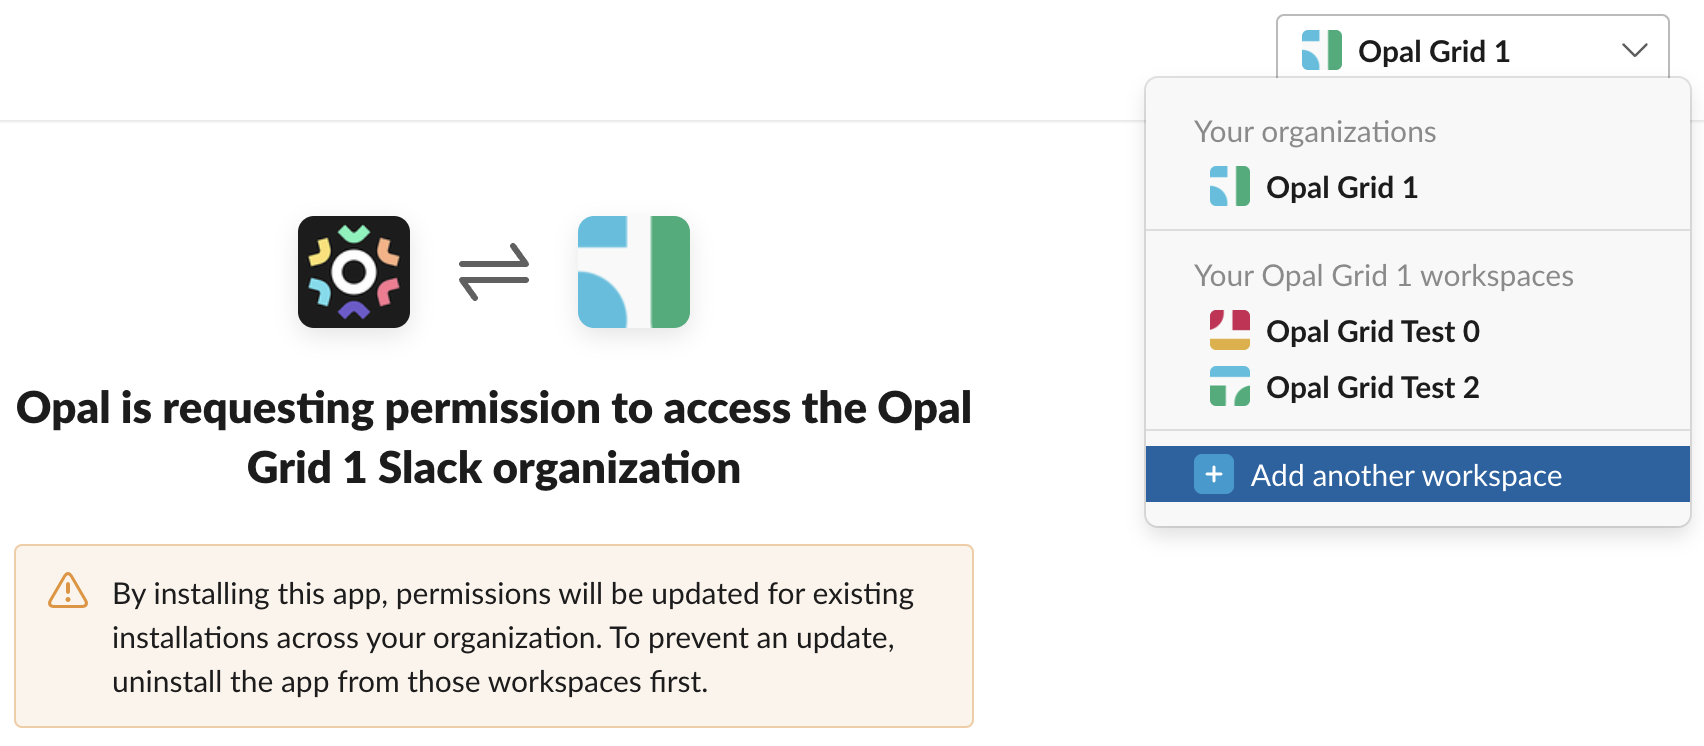 In the above example, the Slack organization *Opal Grid 1* has two workspaces: *Opal Grid Test 0* and *Opal Grid Test 2*. There are two options:
* Choosing the **organization** (in this example, *Opal Grid 1*) allow you to install Opal to multiple workspaces in the Enterprise Grid
* Choosing a **workspace** only installs Opal to that specific workspace (in this example, *Opal Grid Test 0* or *Opal Grid Test 2*)
By default, **no workspaces** in the Enterprise Grid have access to Opal after your initial installation. See the following section to add workspaces from the Enterprise Grid.
### Grant access to specific Enterprise Grid workspaces
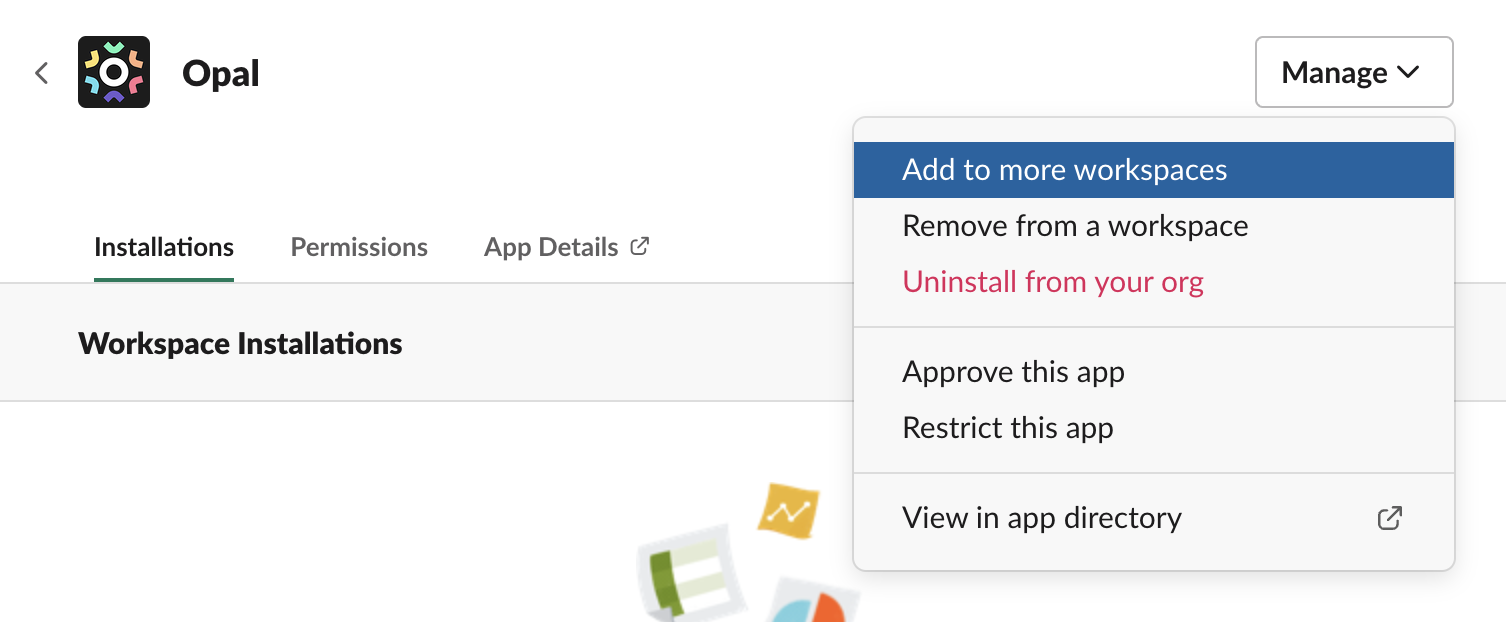
After installing the Slack integration, you can add or remove Opal from workspaces in your Slack enterprise organization using the link on the settings page.
In the above example, the Slack organization *Opal Grid 1* has two workspaces: *Opal Grid Test 0* and *Opal Grid Test 2*. There are two options:
* Choosing the **organization** (in this example, *Opal Grid 1*) allow you to install Opal to multiple workspaces in the Enterprise Grid
* Choosing a **workspace** only installs Opal to that specific workspace (in this example, *Opal Grid Test 0* or *Opal Grid Test 2*)
By default, **no workspaces** in the Enterprise Grid have access to Opal after your initial installation. See the following section to add workspaces from the Enterprise Grid.
### Grant access to specific Enterprise Grid workspaces
After installing the Slack integration, you can add or remove Opal from workspaces in your Slack enterprise organization using the link on the settings page.
 Use the **Manage** dropdown to add or remove workspaces.
 ### Installation status
If the installation succeeds, on the Configuration page, you will see a **Disconnect** button in the Slack tile. Opal is ready to send Slack messages to members of your workspace.
### Installation status
If the installation succeeds, on the Configuration page, you will see a **Disconnect** button in the Slack tile. Opal is ready to send Slack messages to members of your workspace.
 For self-hosted Opal instances, you'll see an **active** or **inactive** status beside the **Disconnect** button. This corresponds to the state of the web socket connection with Slack. If the connection is inactive, wait a few minutes to see if the connection re-establishes itself, refreshing the page to see if the status updates. If the problem does not resolve itself within 10 minutes, try disconnecting and reconnecting the Slack integration.
 Finally, you can verify that everything works by trying the `/opal` command in Slack.
## User settings
To enable your own Slack notifications, go to Opal dashboard and select your avatar in the bottom right corner. Click **Account Settings** and under **Notification Preferences**, enable the **Slack** toggle.
Finally, you can verify that everything works by trying the `/opal` command in Slack.
## User settings
To enable your own Slack notifications, go to Opal dashboard and select your avatar in the bottom right corner. Click **Account Settings** and under **Notification Preferences**, enable the **Slack** toggle.
 Note that visibility settings apply to user(s) who are attempting to create the linked channel. If the user does not have access to the channel, we will return the error `Error: you do not have access to the selected Slack workspace`.
## Linked reviewer channels
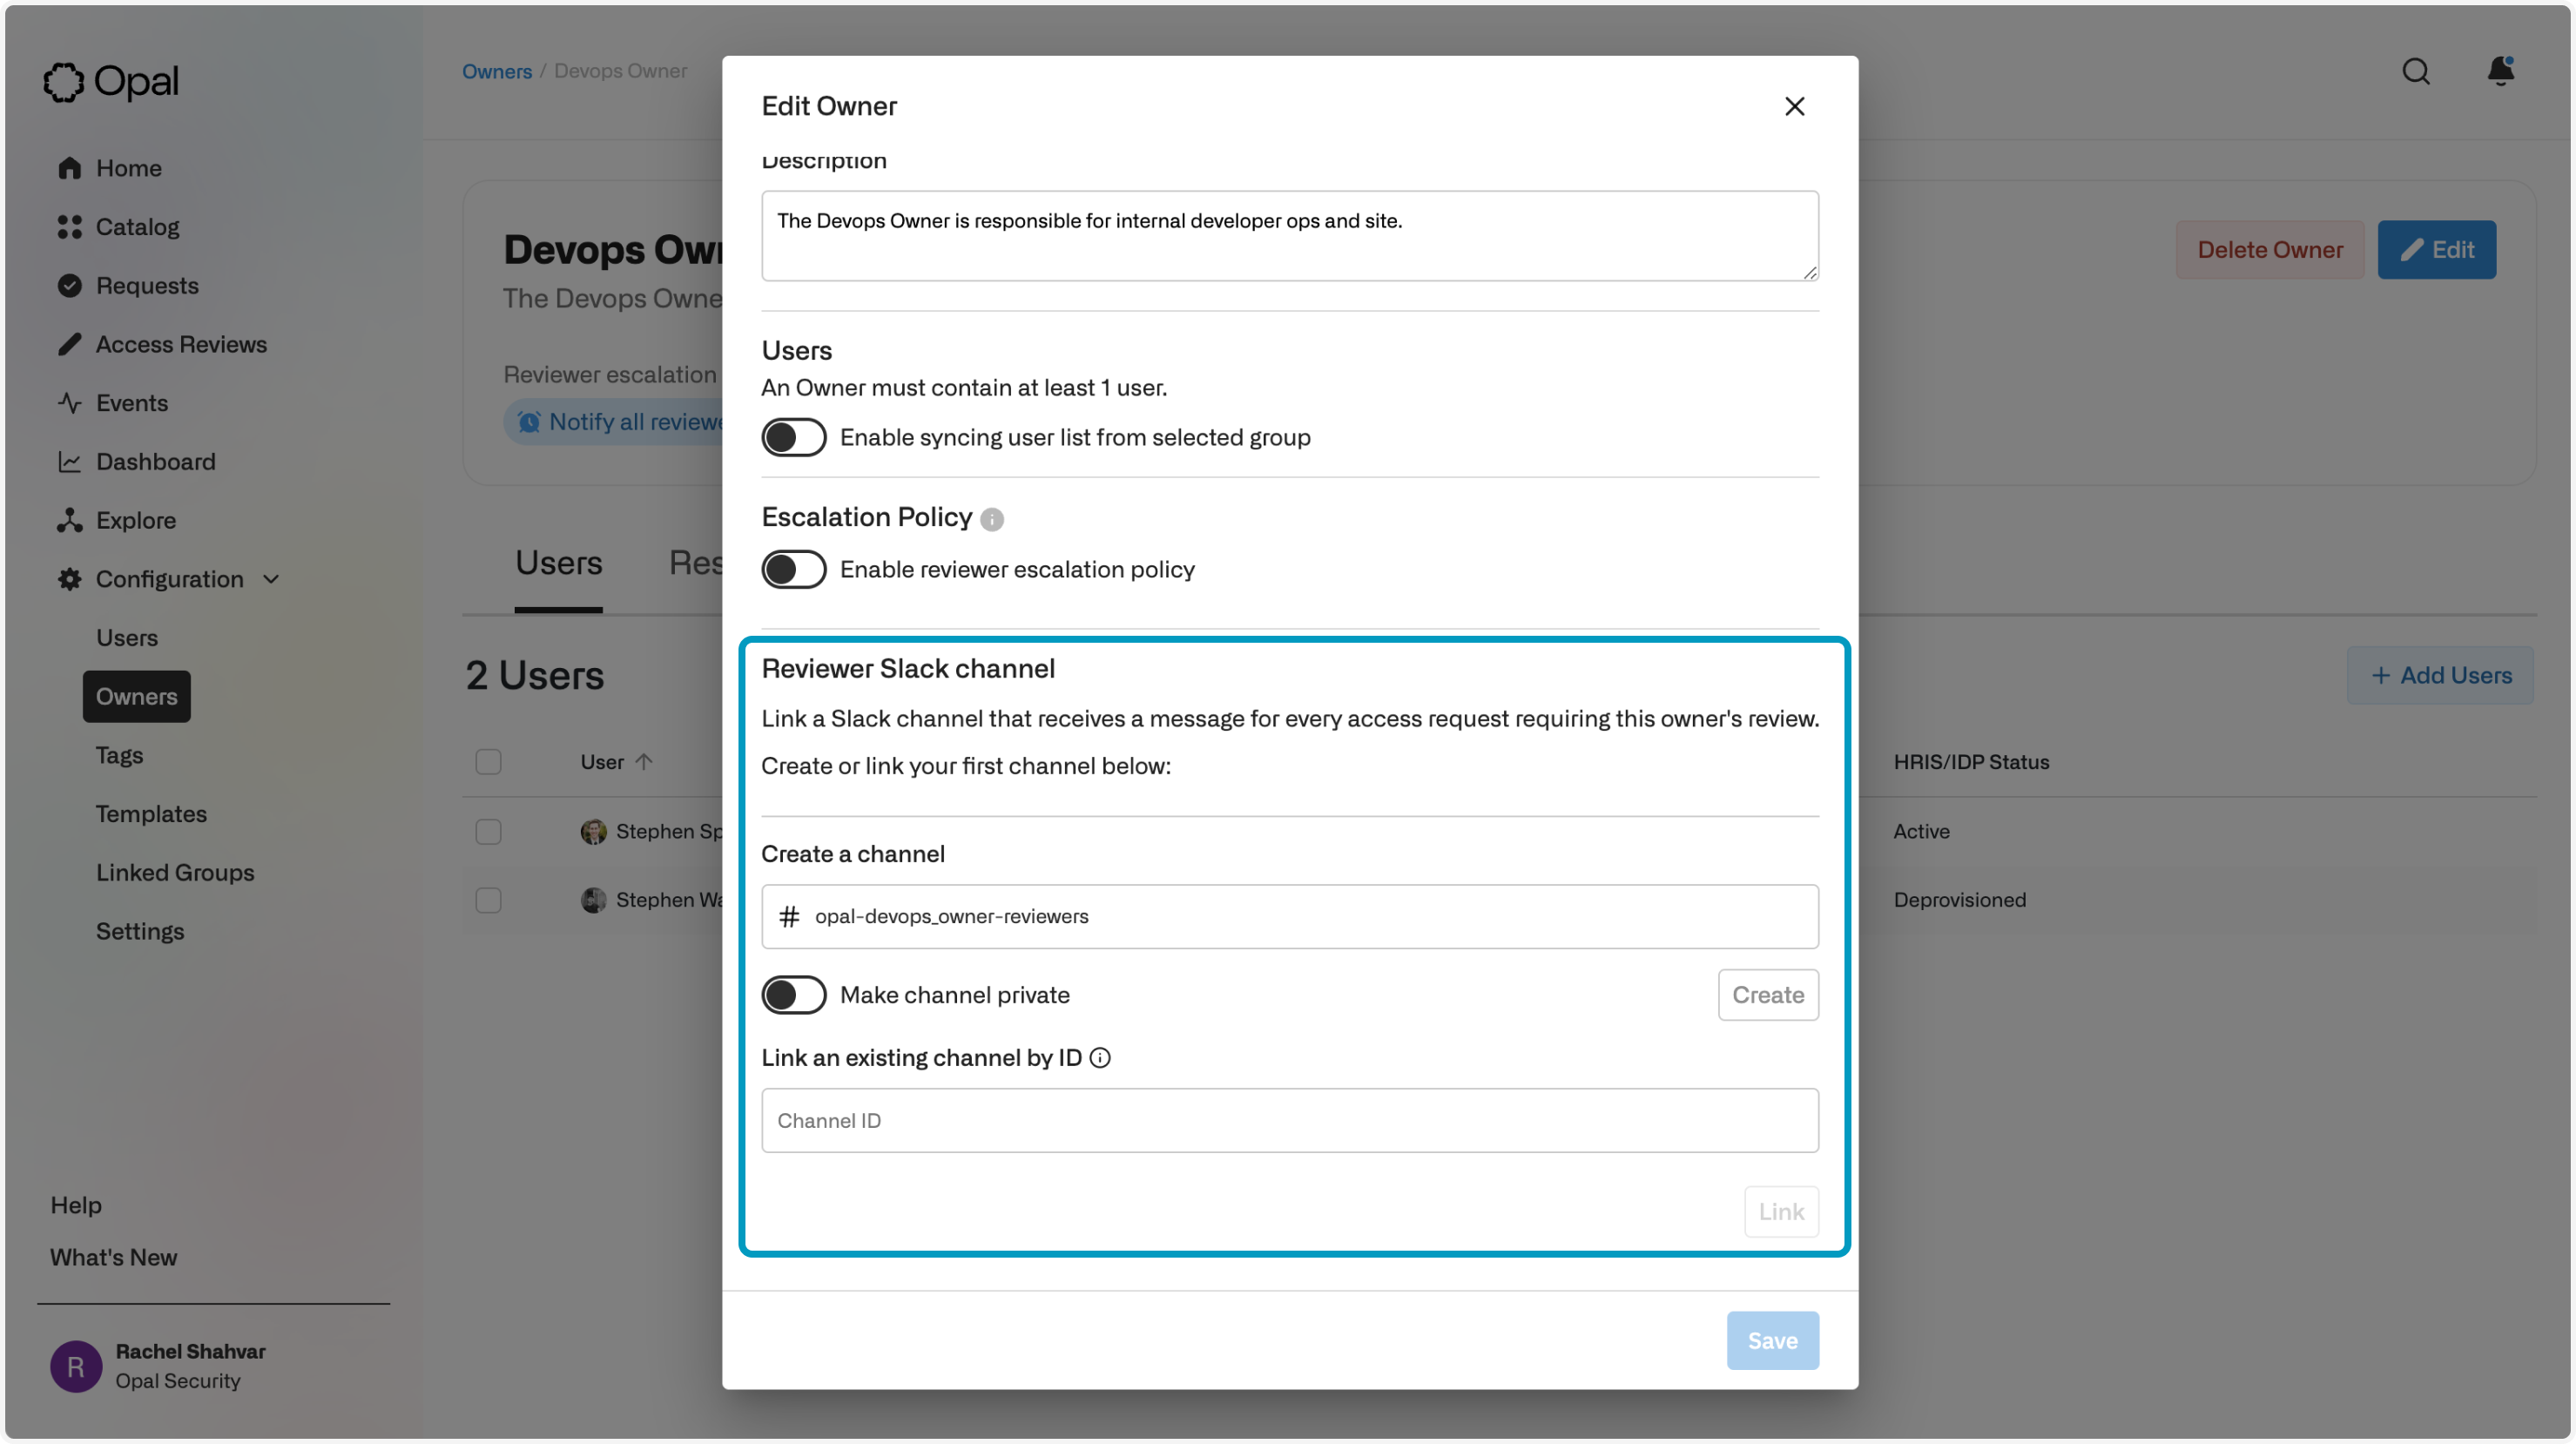
Slack channels can be linked to any owner as a reviewer channel. Opal notifies the Slack channel whenever there is an access request to review for the owner.
Note that visibility settings apply to user(s) who are attempting to create the linked channel. If the user does not have access to the channel, we will return the error `Error: you do not have access to the selected Slack workspace`.
## Linked reviewer channels
Slack channels can be linked to any owner as a reviewer channel. Opal notifies the Slack channel whenever there is an access request to review for the owner.
 ## Linked audit channels
Opal can notify Slack channels whenever there is an event related to the resource or group.
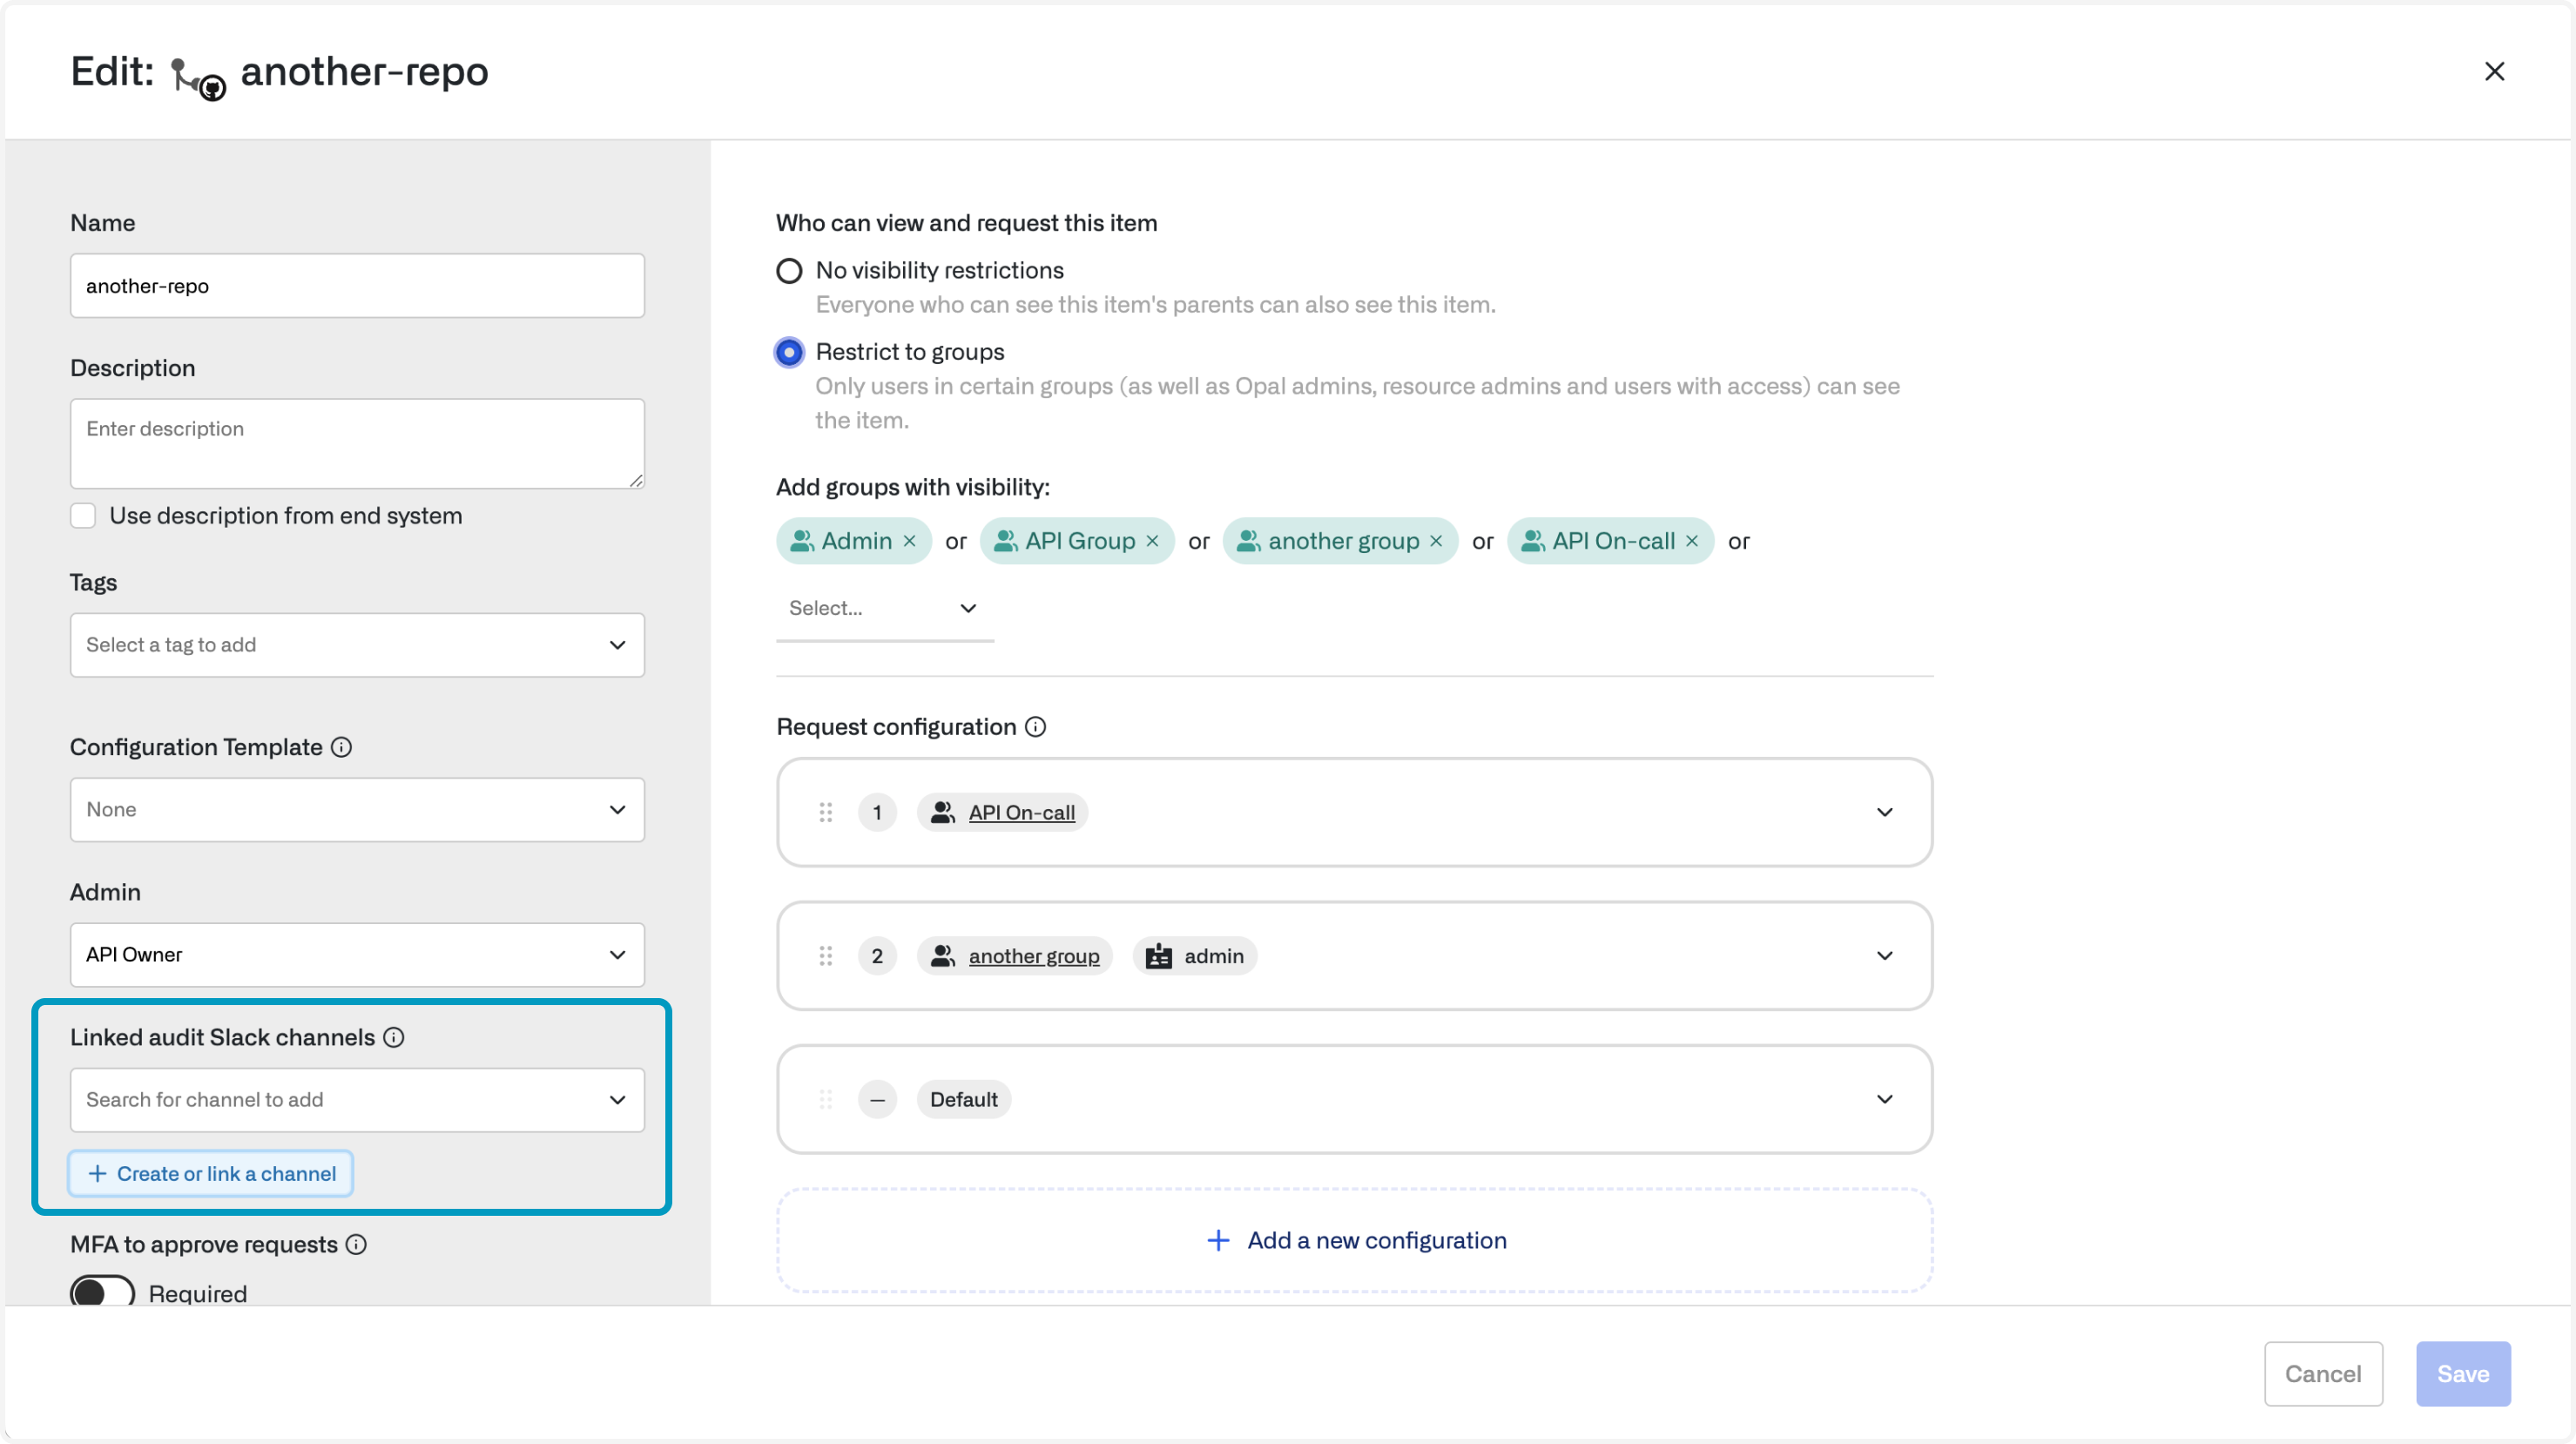
To configure this, go to the edit page for the relevant resource or group and select **Linked audit Slack channels**. To make private channels visible here, the Opal app must first be invited to them.
## Linked audit channels
Opal can notify Slack channels whenever there is an event related to the resource or group.
To configure this, go to the edit page for the relevant resource or group and select **Linked audit Slack channels**. To make private channels visible here, the Opal app must first be invited to them.