> ## Documentation Index
> Fetch the complete documentation index at: https://docs.opal.dev/llms.txt
> Use this file to discover all available pages before exploring further.
# Okta
> Connect your Okta instance to use Opal to manage and review access.
Opal's integration with Okta lets you manage access to your Okta groups, applications, users, and admin roles.
Our integration supports the following, and more:
* Users can **request time-bounded access** to your Okta groups, apps, and admin roles
* Auditors can **initiate access reviews** that assign managers or group admins to periodically review users with long-lived access to Okta groups, apps, and admin roles
* Admins can **add resources from other Opal integrations** to an Okta group so an Okta group's members can automatically gain birthright access to, for example, a GitHub repo, AWS IAM role, etc.
* All access changes are tracked in a **permanent audit log** that can notify a Slack channel or be exported to your favorite tools.
## Supported resources
| Resource | Read | Grant and revoke access | Included in [Risk Center](/docs/least-privilege-posture-management) |
| ------------------------------ | ---- | ----------------------- | ------------------------------------------------------------------- |
| Okta Users and user attributes | ✔️ | ✔️ | ✔️ |
| Okta Groups | ✔️ | ✔️ | ✔️ |
| Okta Group Rules | ✔️ | ✔️ | ✔️ |
| Okta Roles | ✔️ | ✔️ | ✔️ |
| Okta Apps | ✔️ | ✔️ | ✔️ |
Note that the Okta integration does not support creating Okta users, groups, roles, or apps. It also does not yet support syncing Okta API tokens nor Okta OAuth apps.
## Additional capabilities
The Okta integration also supports automatic **real-time sync**, which syncs groups and resources as soon as they're updated in Okta.
You can also run automatic [validation checks](/integrations/okta#run-app-validation-checks) to confirm your Okta sync is working properly.
The Okta integration also supports user account [deprovisioning](/docs/user-provisioning).
### Real-time sync
Opal automatically enables real-time sync for Okta integrations. When access changes occur in Okta, Opal automatically syncs and reflects the change. Real-time sync includes:
* New groups
* New apps
* Users added to groups or apps
* New apps added and removed to groups
## Getting Started
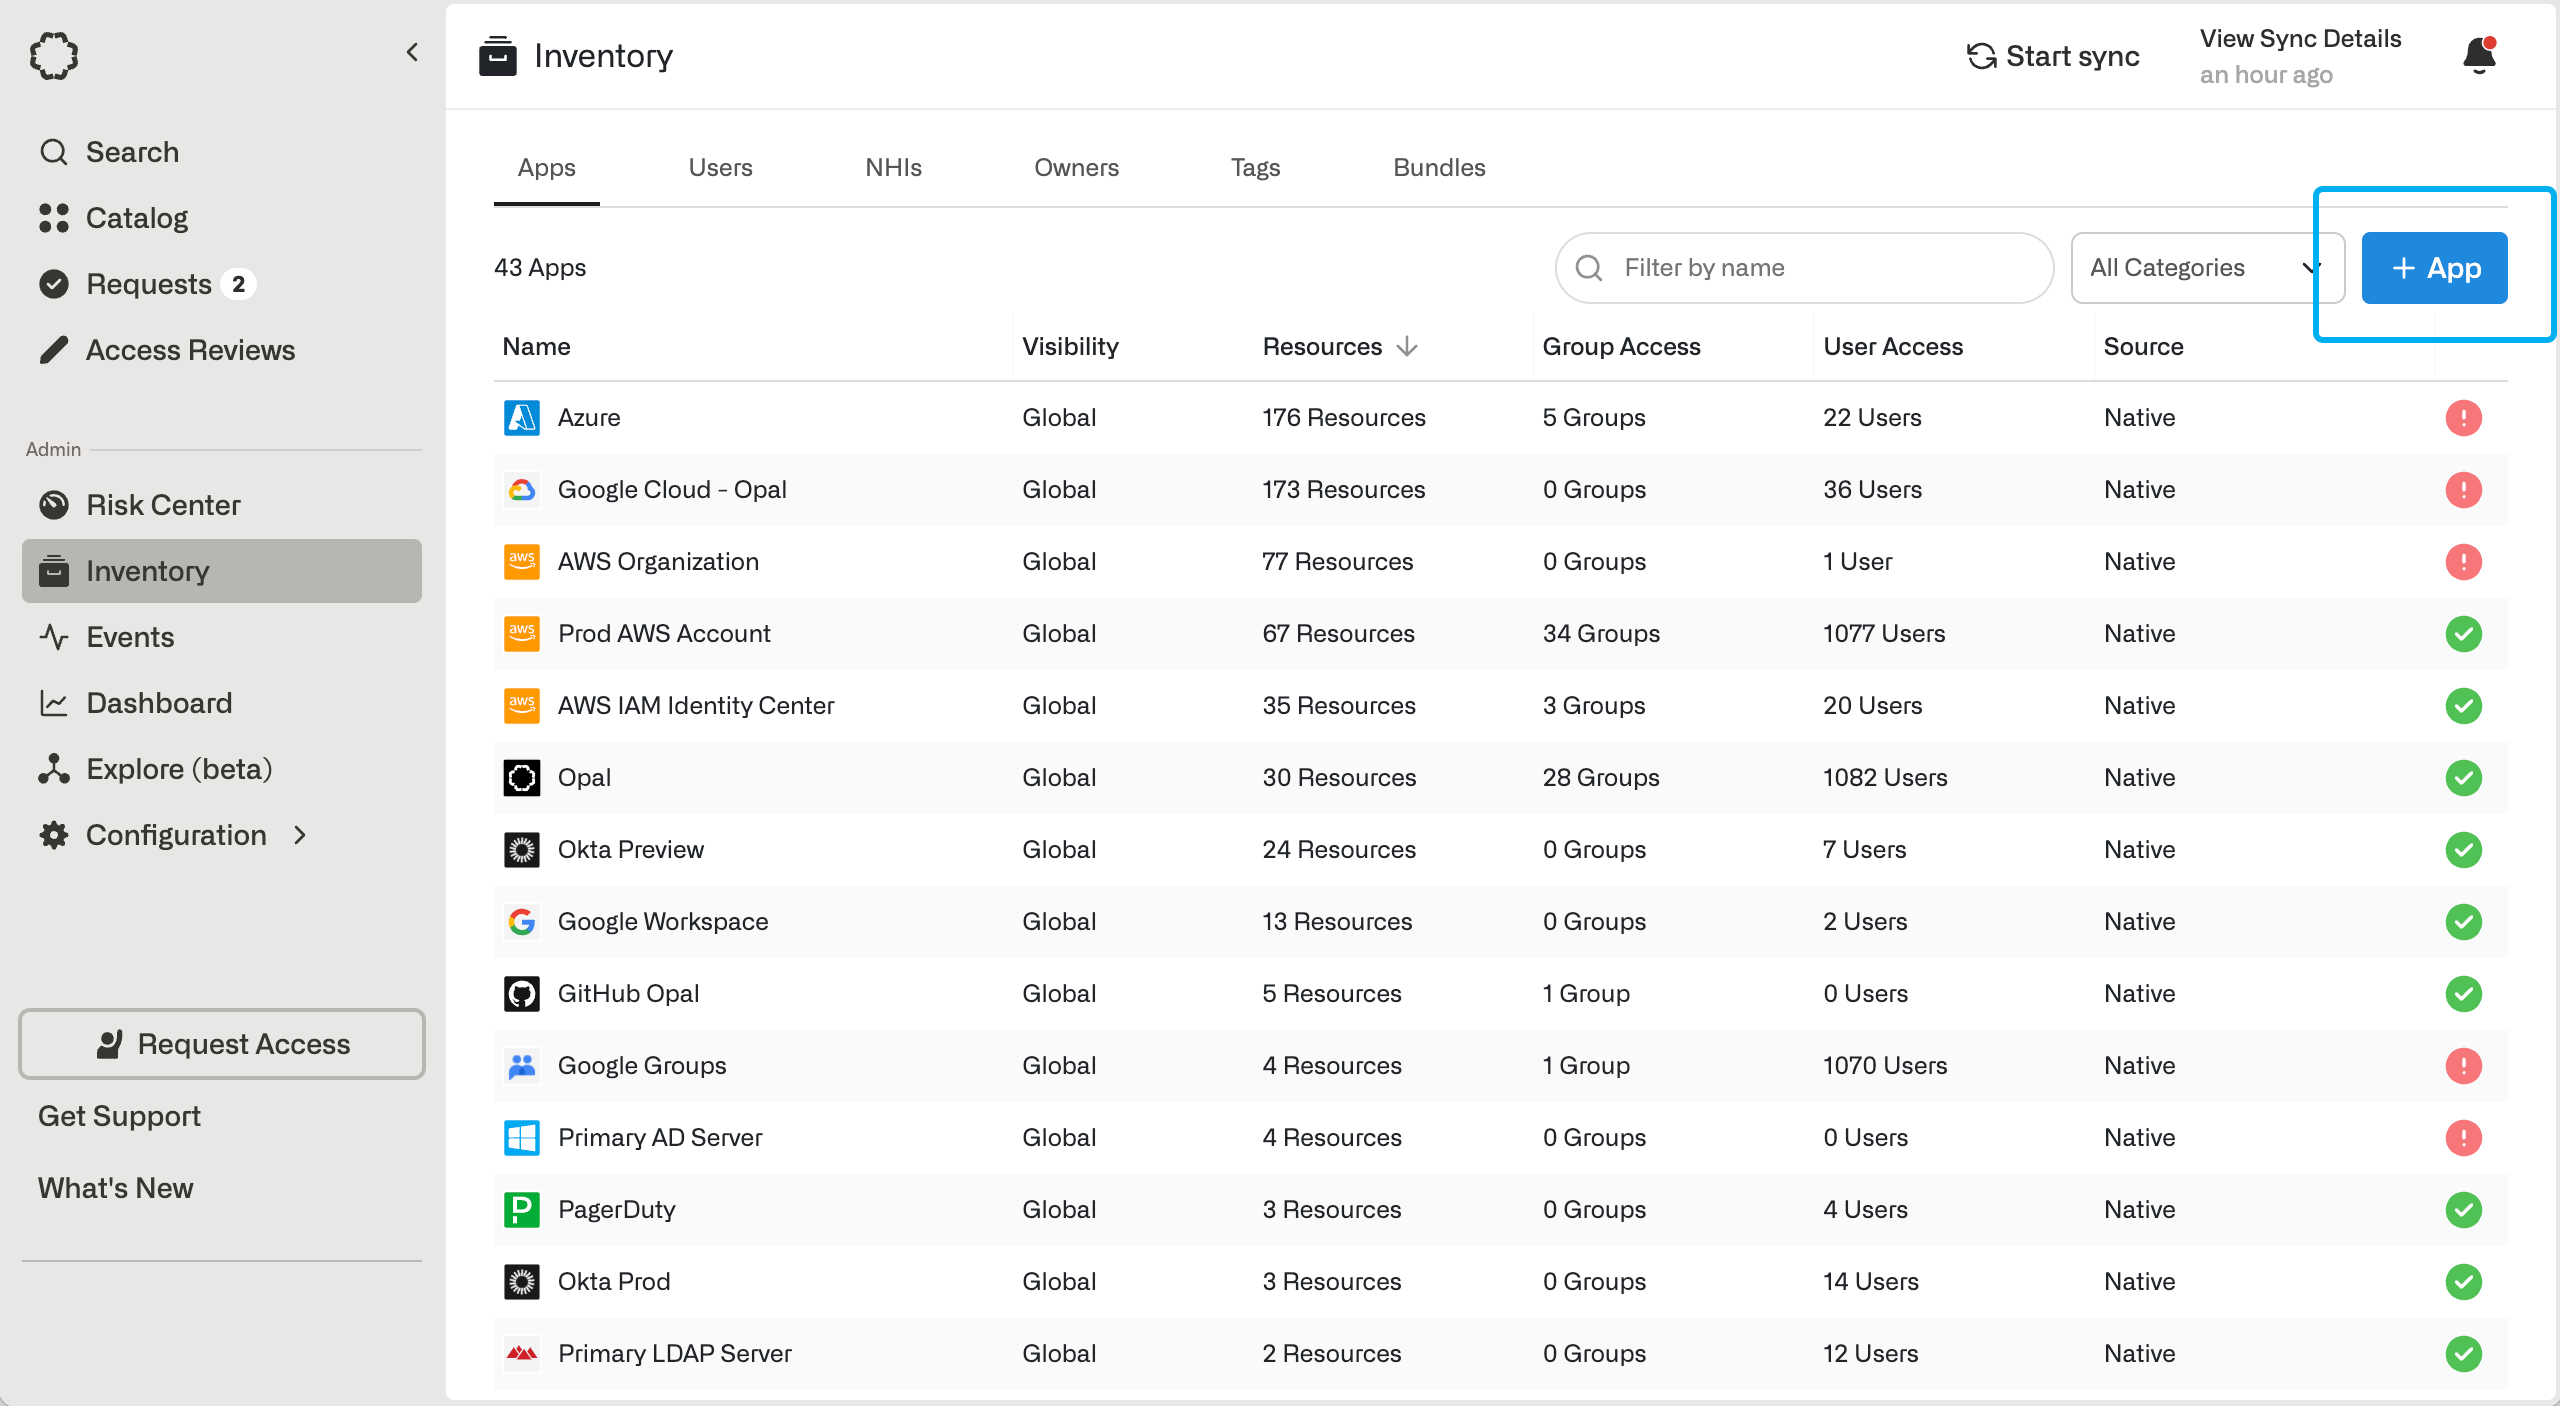
To get started, go to the **Inventory** page, click **+ App** at the top right. Then, click on the Okta Directory tile.
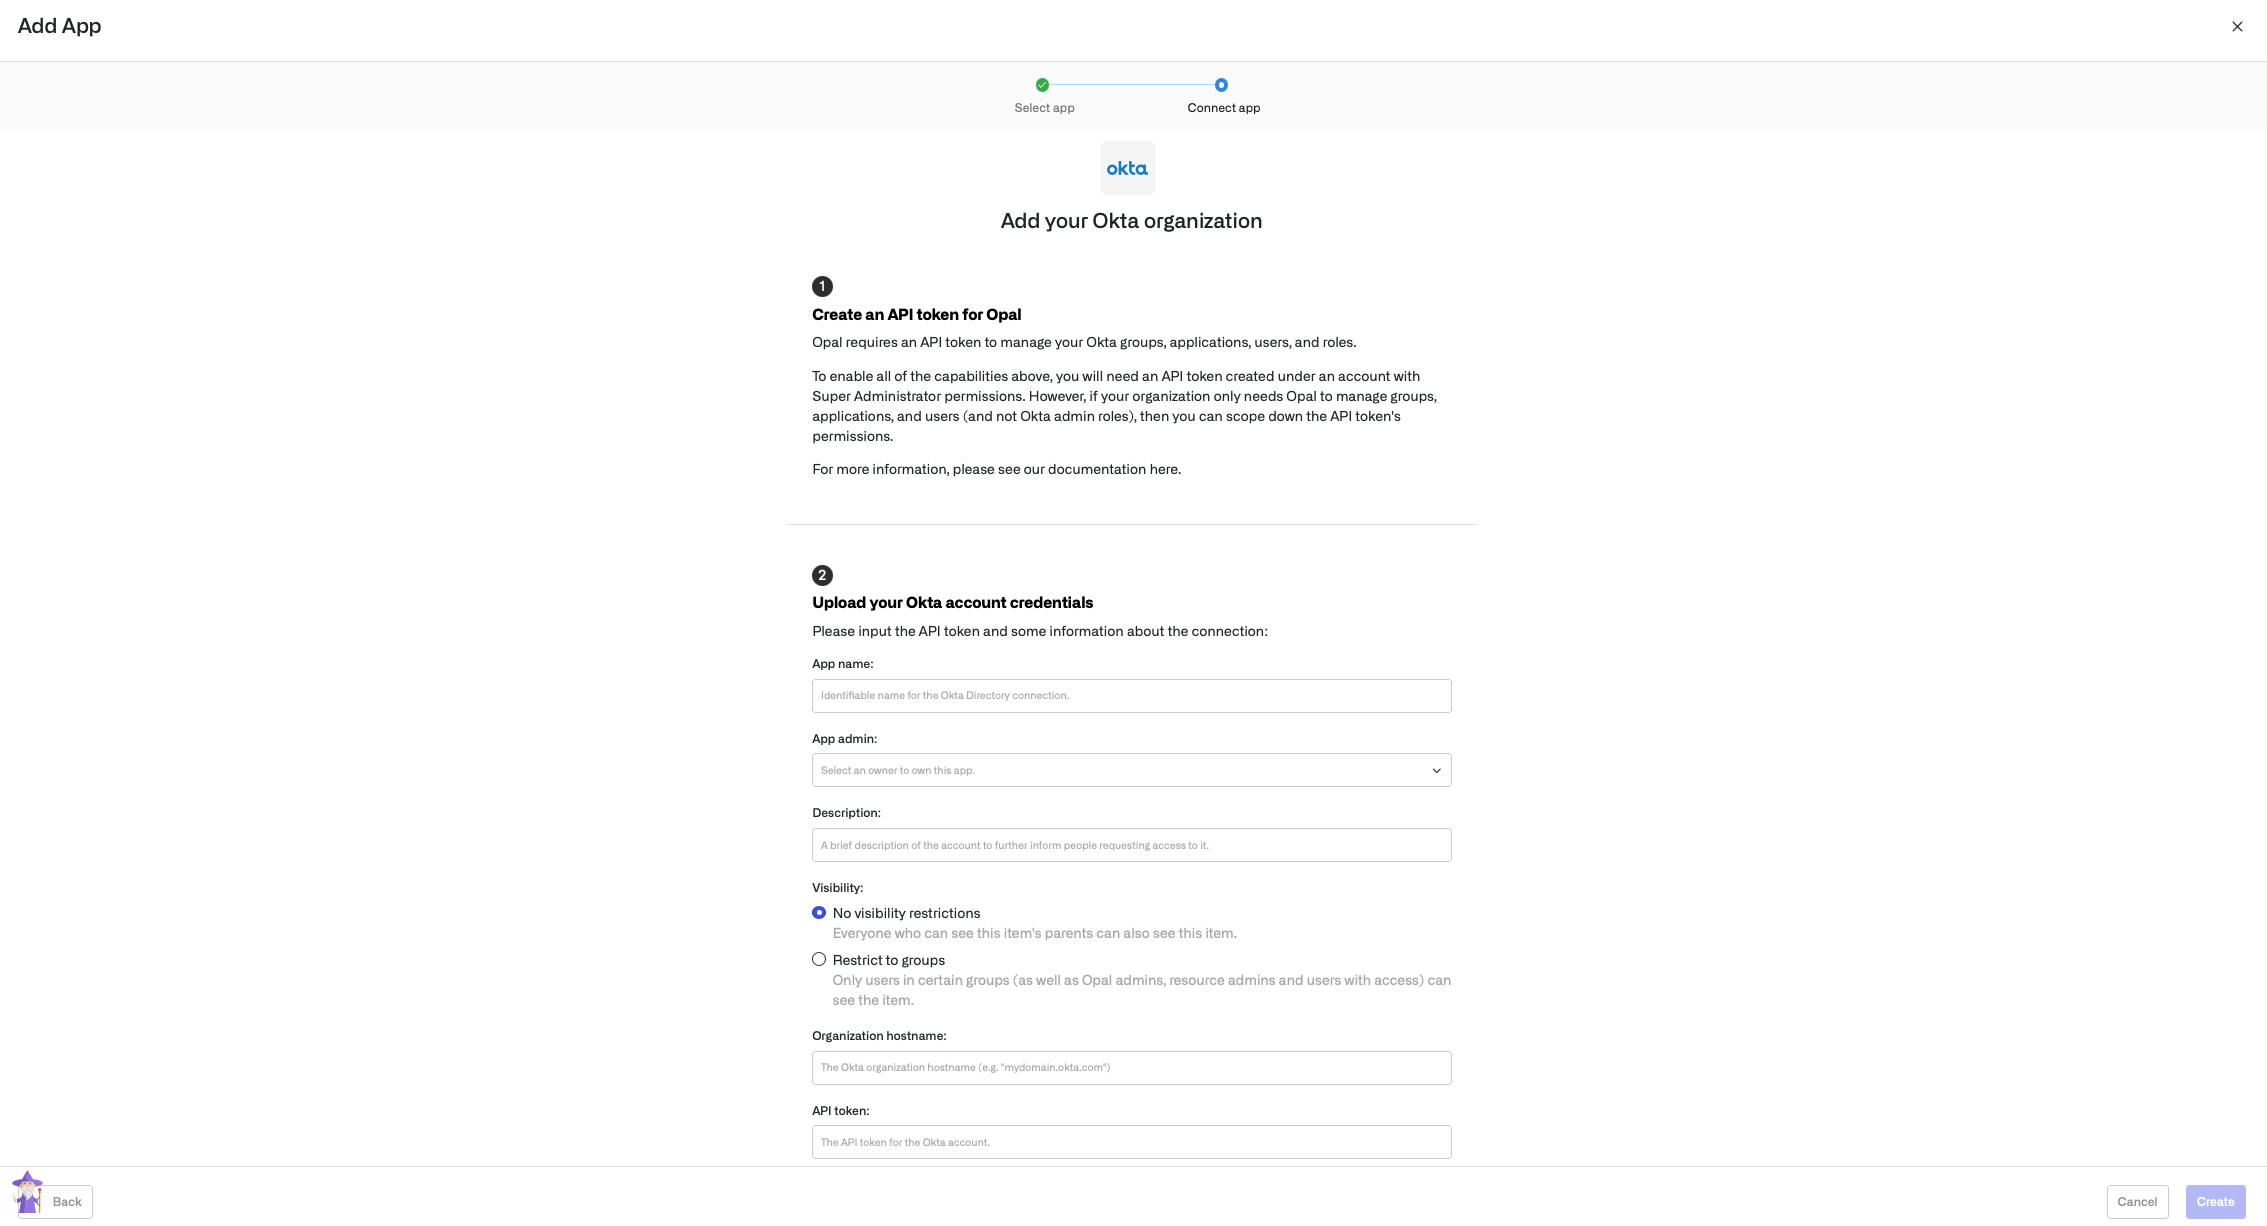
 You will see a form to be completed. Opal requires the below credentials in order to manage access to your Okta instance.
## 1. Configure an API token for Opal
Opal uses an Okta API token to connect to your Okta instance.
We suggest that you create a separate Okta user that creates and owns the API token. This lets you customize the permission scopes available to Opal and ensure that these scopes don't change. Additionally, Okta will log any access changes that Opal pushes to Okta under the separate account's name.
To create an account, [follow these steps](https://help.okta.com/en-us/Content/Topics/users-groups-profiles/usgp-add-users.htm) for adding a new user on Okta.
Next, grant the appropriate permissions to your new account based on what you'd like Opal to manage. To do this, navigate to **Security** -> **Administrators**, and add the desired Okta Admin Roles from the following table:
| Required Okta admin roles | What Opal can manage |
| -------------------------------------------------- | ----------------------------------------- |
| Super Admin | Okta groups, apps, users, and admin roles |
| Organization Admin, Application Admin, Group Admin | Okta groups, apps, and users |
| Group Membership Admin, Read-Only Admin | Okta groups and users |
Finally, generate an API token as the new account:
* Log in to the new account on Okta.
* Navigate to **Security** -> **API**.
* Click on the **Tokens** tab.
* Click **Create Token** on the top left.
* Record the generated token.
## 2. Upload your Okta credentials
Back in the Opal New App form, fill in details about your Okta organization:
* **Organization hostname**: enter the URL hostname of your Okta organization (e.g. "mydomain.okta.com")
* **API token**: enter the API token you just created
If this step is successful, you've completed setting up the Okta App.
You will see a form to be completed. Opal requires the below credentials in order to manage access to your Okta instance.
## 1. Configure an API token for Opal
Opal uses an Okta API token to connect to your Okta instance.
We suggest that you create a separate Okta user that creates and owns the API token. This lets you customize the permission scopes available to Opal and ensure that these scopes don't change. Additionally, Okta will log any access changes that Opal pushes to Okta under the separate account's name.
To create an account, [follow these steps](https://help.okta.com/en-us/Content/Topics/users-groups-profiles/usgp-add-users.htm) for adding a new user on Okta.
Next, grant the appropriate permissions to your new account based on what you'd like Opal to manage. To do this, navigate to **Security** -> **Administrators**, and add the desired Okta Admin Roles from the following table:
| Required Okta admin roles | What Opal can manage |
| -------------------------------------------------- | ----------------------------------------- |
| Super Admin | Okta groups, apps, users, and admin roles |
| Organization Admin, Application Admin, Group Admin | Okta groups, apps, and users |
| Group Membership Admin, Read-Only Admin | Okta groups and users |
Finally, generate an API token as the new account:
* Log in to the new account on Okta.
* Navigate to **Security** -> **API**.
* Click on the **Tokens** tab.
* Click **Create Token** on the top left.
* Record the generated token.
## 2. Upload your Okta credentials
Back in the Opal New App form, fill in details about your Okta organization:
* **Organization hostname**: enter the URL hostname of your Okta organization (e.g. "mydomain.okta.com")
* **API token**: enter the API token you just created
If this step is successful, you've completed setting up the Okta App.
 ### Run app validation checks
After you save your app, you can view existing sync issues from the **Setup** tab on the app detail page. Missing permissions and sync issues show in the **App Validations** section. Select the refresh icon to rerun validation checks.
### Run app validation checks
After you save your app, you can view existing sync issues from the **Setup** tab on the app detail page. Missing permissions and sync issues show in the **App Validations** section. Select the refresh icon to rerun validation checks.
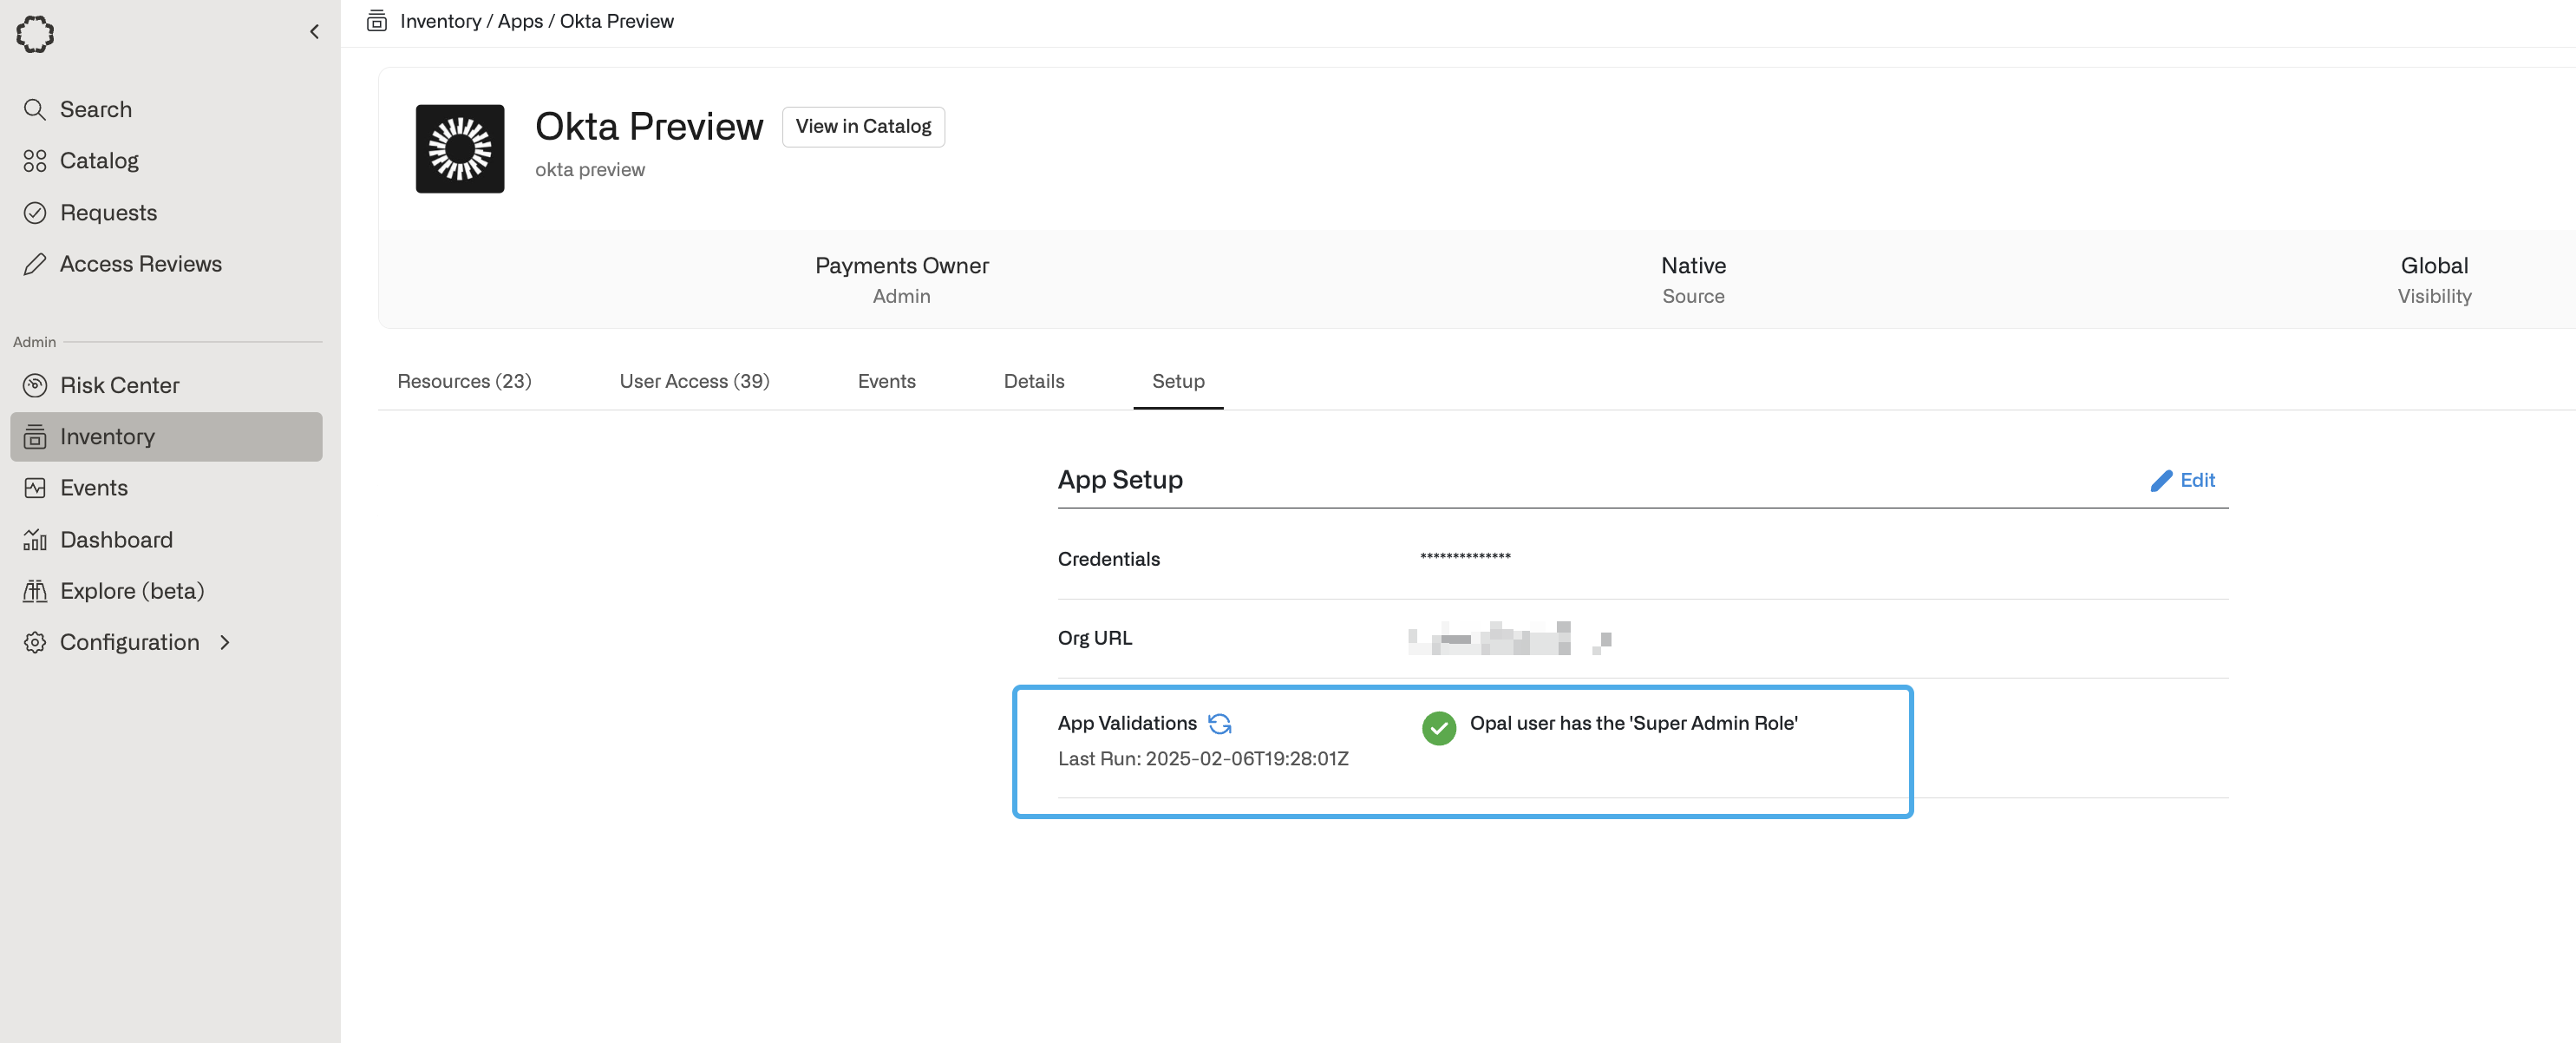 You can hover over the validation icons to learn why Opal needs a given permission. To correctly sync your app to Opal, ensure you address any sync errors, marked with the red ! icon. Inspect warnings on a case-by-case basis: warnings might impact features you’re not using and may be safely ignored, but this depends on your use case.
### Automatic import (Okta groups only)
You can configure your Okta groups to be auto-imported into Opal each time the Okta app is synced. Sync happens throughout the day, approximately once an hour. Sync can also be manually triggered by an admin by clicking the Sync button in the top-right of the app.
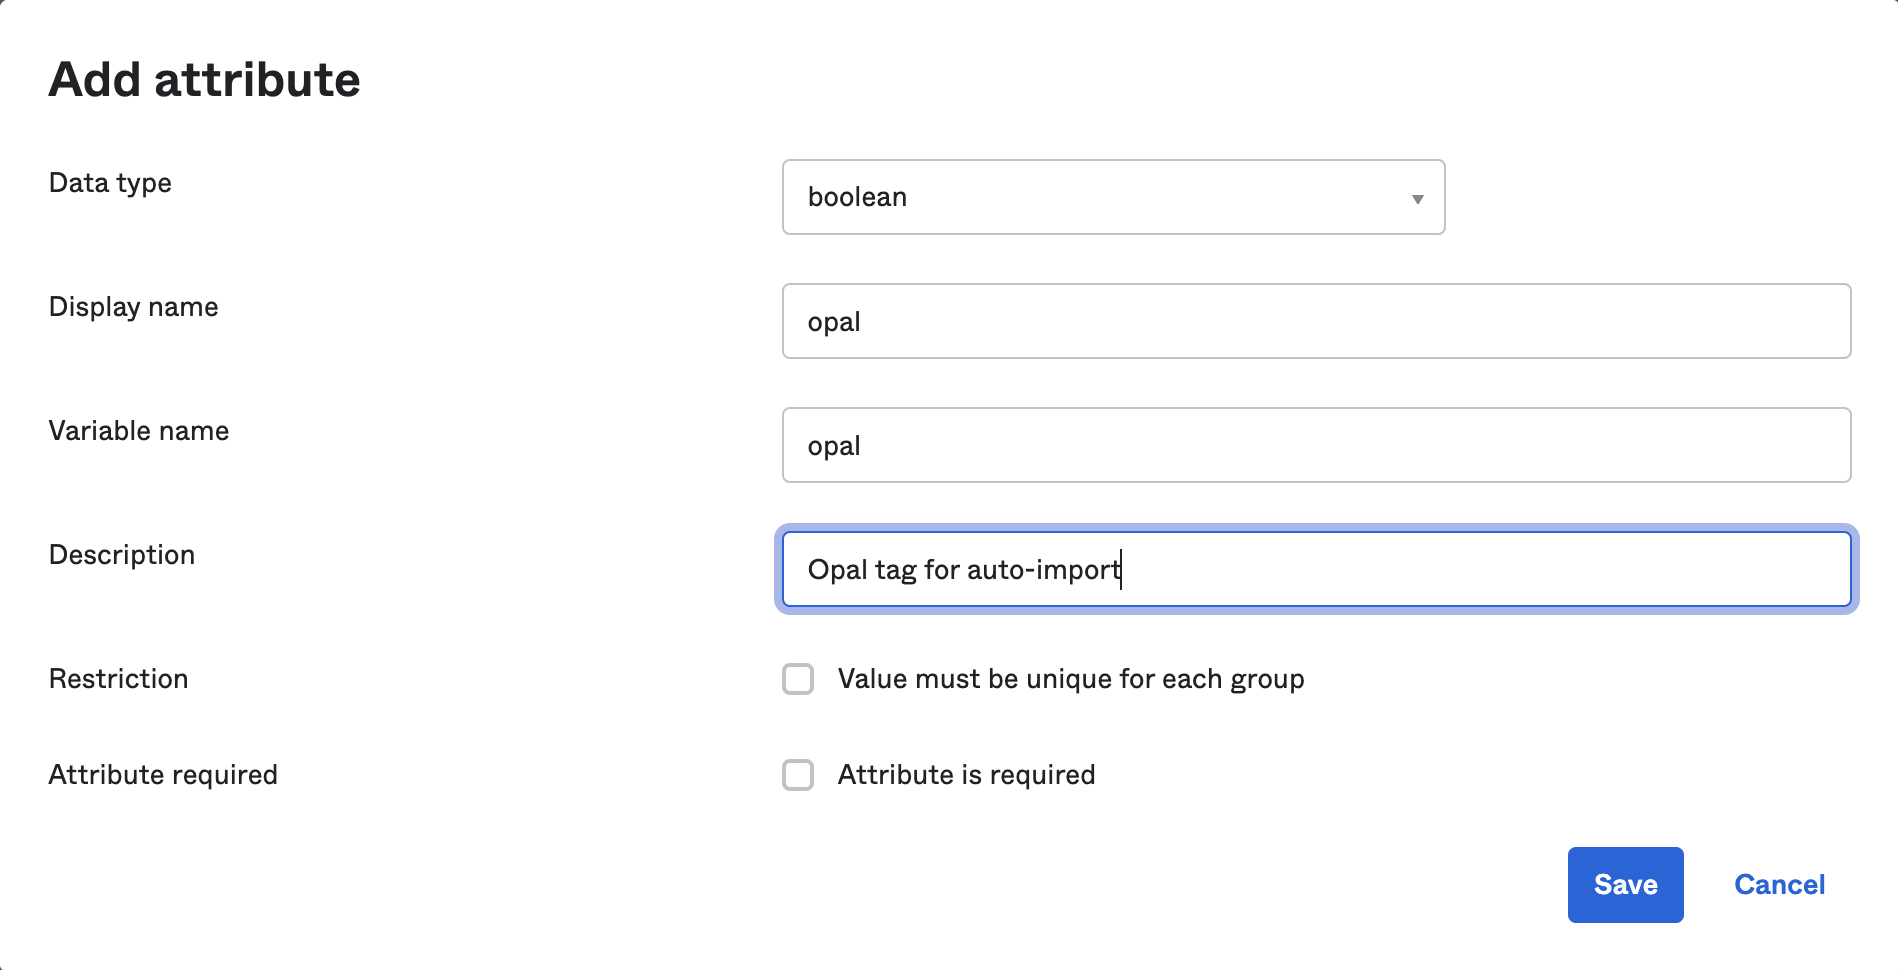
1. In Okta, create a custom group profile attribute `opal`
* Navigate to Directory > Profile Editor, then select the desired group profile and click **Add attribute**.
* Fill out the form as follows, and click Save:
You can hover over the validation icons to learn why Opal needs a given permission. To correctly sync your app to Opal, ensure you address any sync errors, marked with the red ! icon. Inspect warnings on a case-by-case basis: warnings might impact features you’re not using and may be safely ignored, but this depends on your use case.
### Automatic import (Okta groups only)
You can configure your Okta groups to be auto-imported into Opal each time the Okta app is synced. Sync happens throughout the day, approximately once an hour. Sync can also be manually triggered by an admin by clicking the Sync button in the top-right of the app.
1. In Okta, create a custom group profile attribute `opal`
* Navigate to Directory > Profile Editor, then select the desired group profile and click **Add attribute**.
* Fill out the form as follows, and click Save:
 2. Set the `opal` attribute to `true` for all Okta groups you want to auto-import.
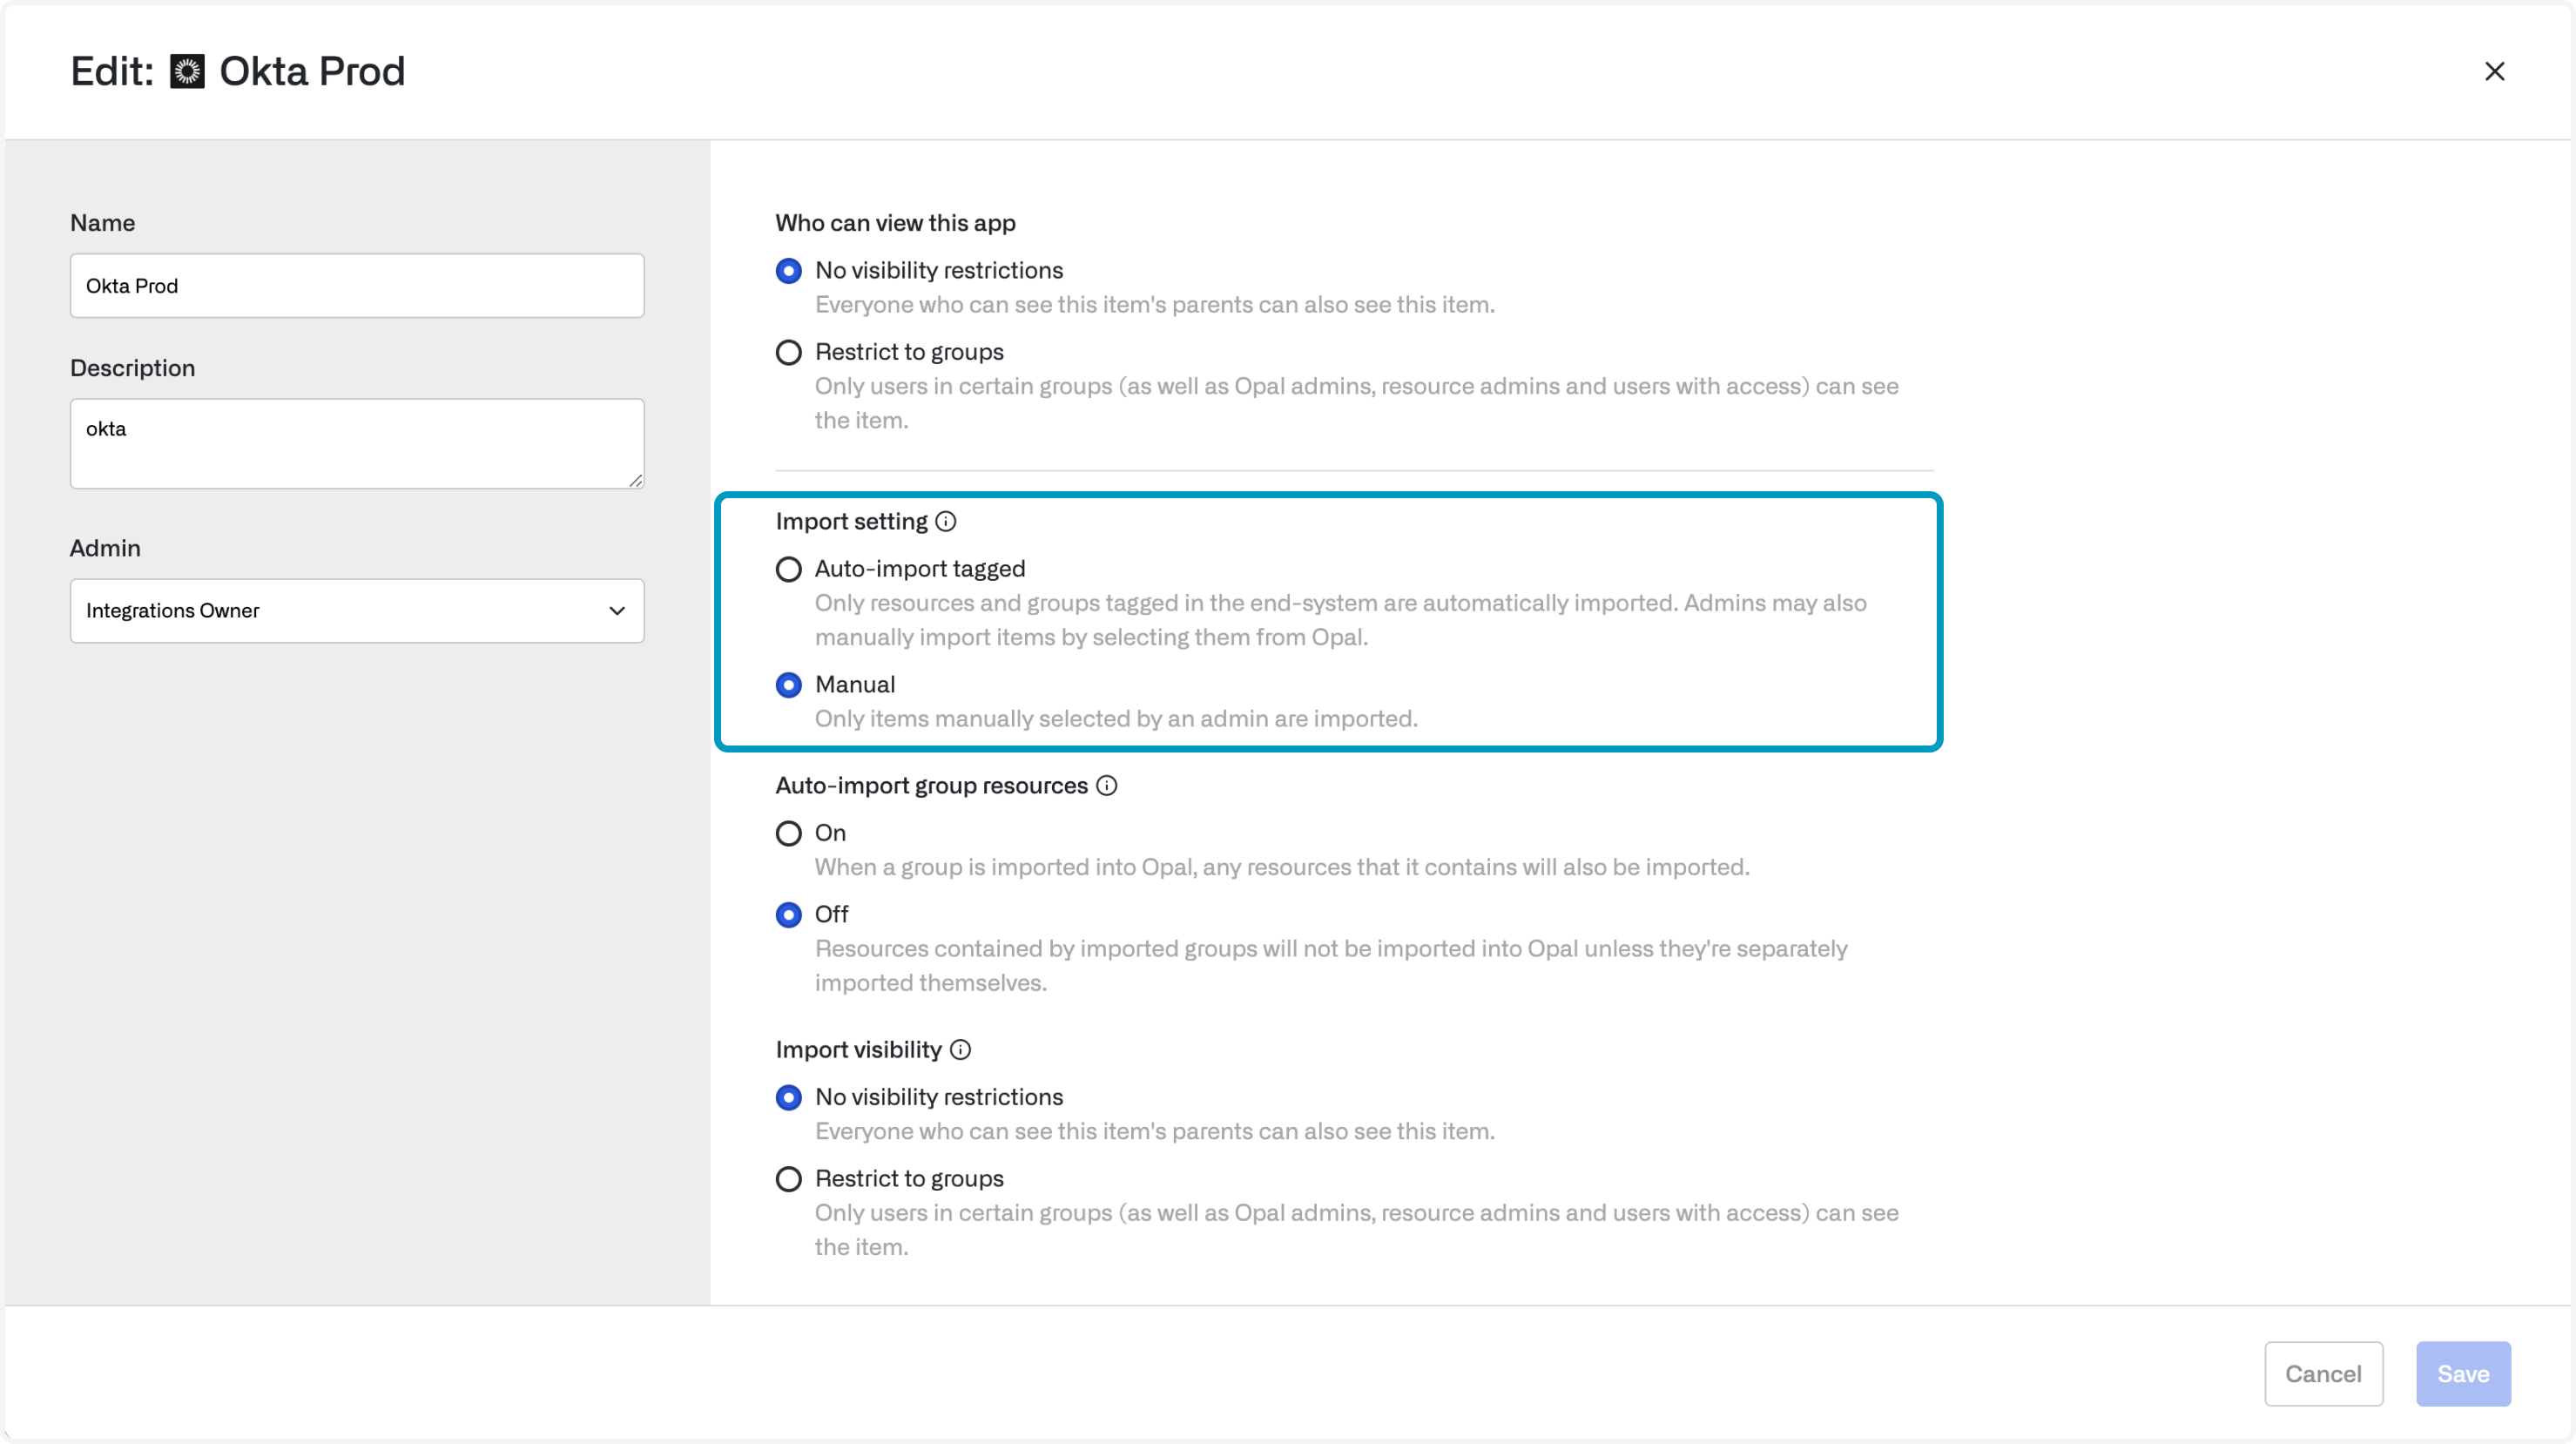
3. Enable auto-import in Opal
* Click into your newly-created Okta app by going to **Apps** on the left sidebar.
* Click the Edit button
* Next to **Import Settings > Import setting**. Toggle the setting to **Auto-import tagged**.
2. Set the `opal` attribute to `true` for all Okta groups you want to auto-import.
3. Enable auto-import in Opal
* Click into your newly-created Okta app by going to **Apps** on the left sidebar.
* Click the Edit button
* Next to **Import Settings > Import setting**. Toggle the setting to **Auto-import tagged**.
 ***
***