> ## Documentation Index
> Fetch the complete documentation index at: https://docs.opal.dev/llms.txt
> Use this file to discover all available pages before exploring further.
# GitLab
> Connect Opal to your GitLab instance or group to manage and review access.
Opal supports GitLab for all tiers (free, premium, and ultimate) for [GitLab Self-Managed](https://docs.gitlab.com/ee/subscriptions/self_managed/) and [GitLab.com](https://docs.gitlab.com/ee/subscriptions/gitlab_com/) (formerly GitLab SaaS).
If you use GitLab Self-Managed, admins can import both group and personal repositories.
If you use GitLab.com, admins can **only** import group repositories.
## Supported resources
| Resource | Available with GitLab Self-Managed | Available with GitLab.com | Read | Grant and revoke access | Available in Risk Center |
| ------------------------ | ---------------------------------- | ------------------------- | ---- | ----------------------- | ------------------------ |
| GitLab groups | ✔️ | ✔️ | ✔️ | ✔️ | ✔️ |
| GitLab personal projects | ✔️ | | ✔️ | ✔️ | ✔️ |
| GitLab projects | ✔️ | ✔️ | ✔️ | ✔️ | ✔️ |
## 1. Create a GitLab service account for Opal
### GitLab.com
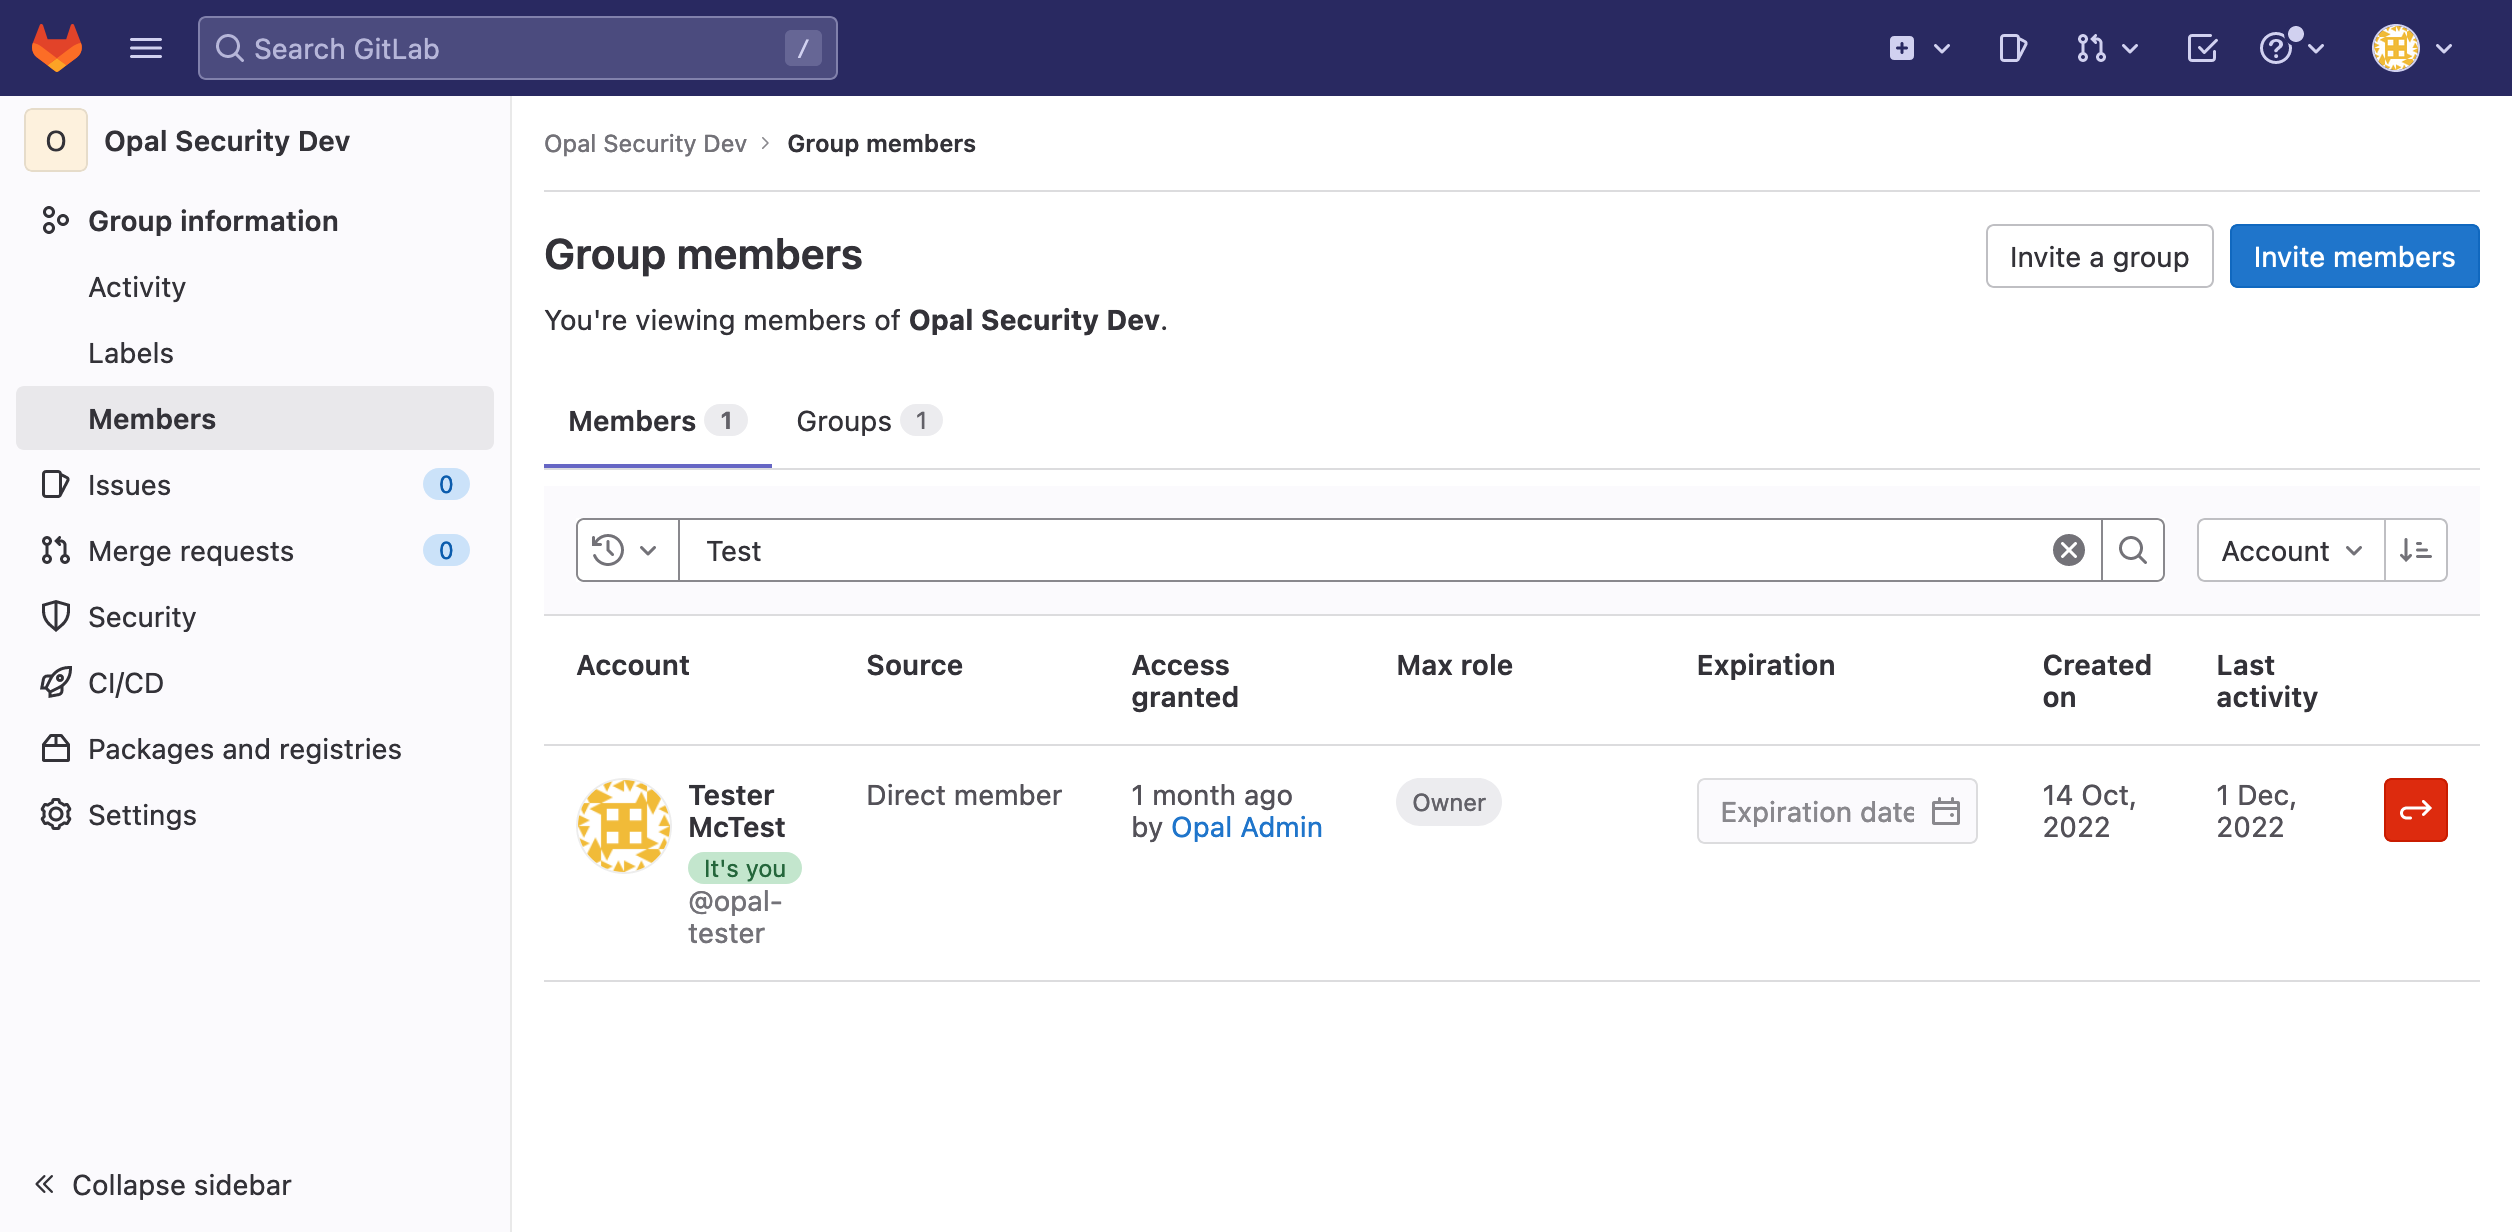
Under your top-level group that represents your organization on GitLab.com, create a new user with an **Owner** **role**. Refer to GitLab [instructions](https://docs.gitlab.com/ee/user/profile/account/create_accounts.html) for this step. A new account is preferred because we will be using the personal OAuth access token corresponding to this account.
 ### GitLab Self-Managed
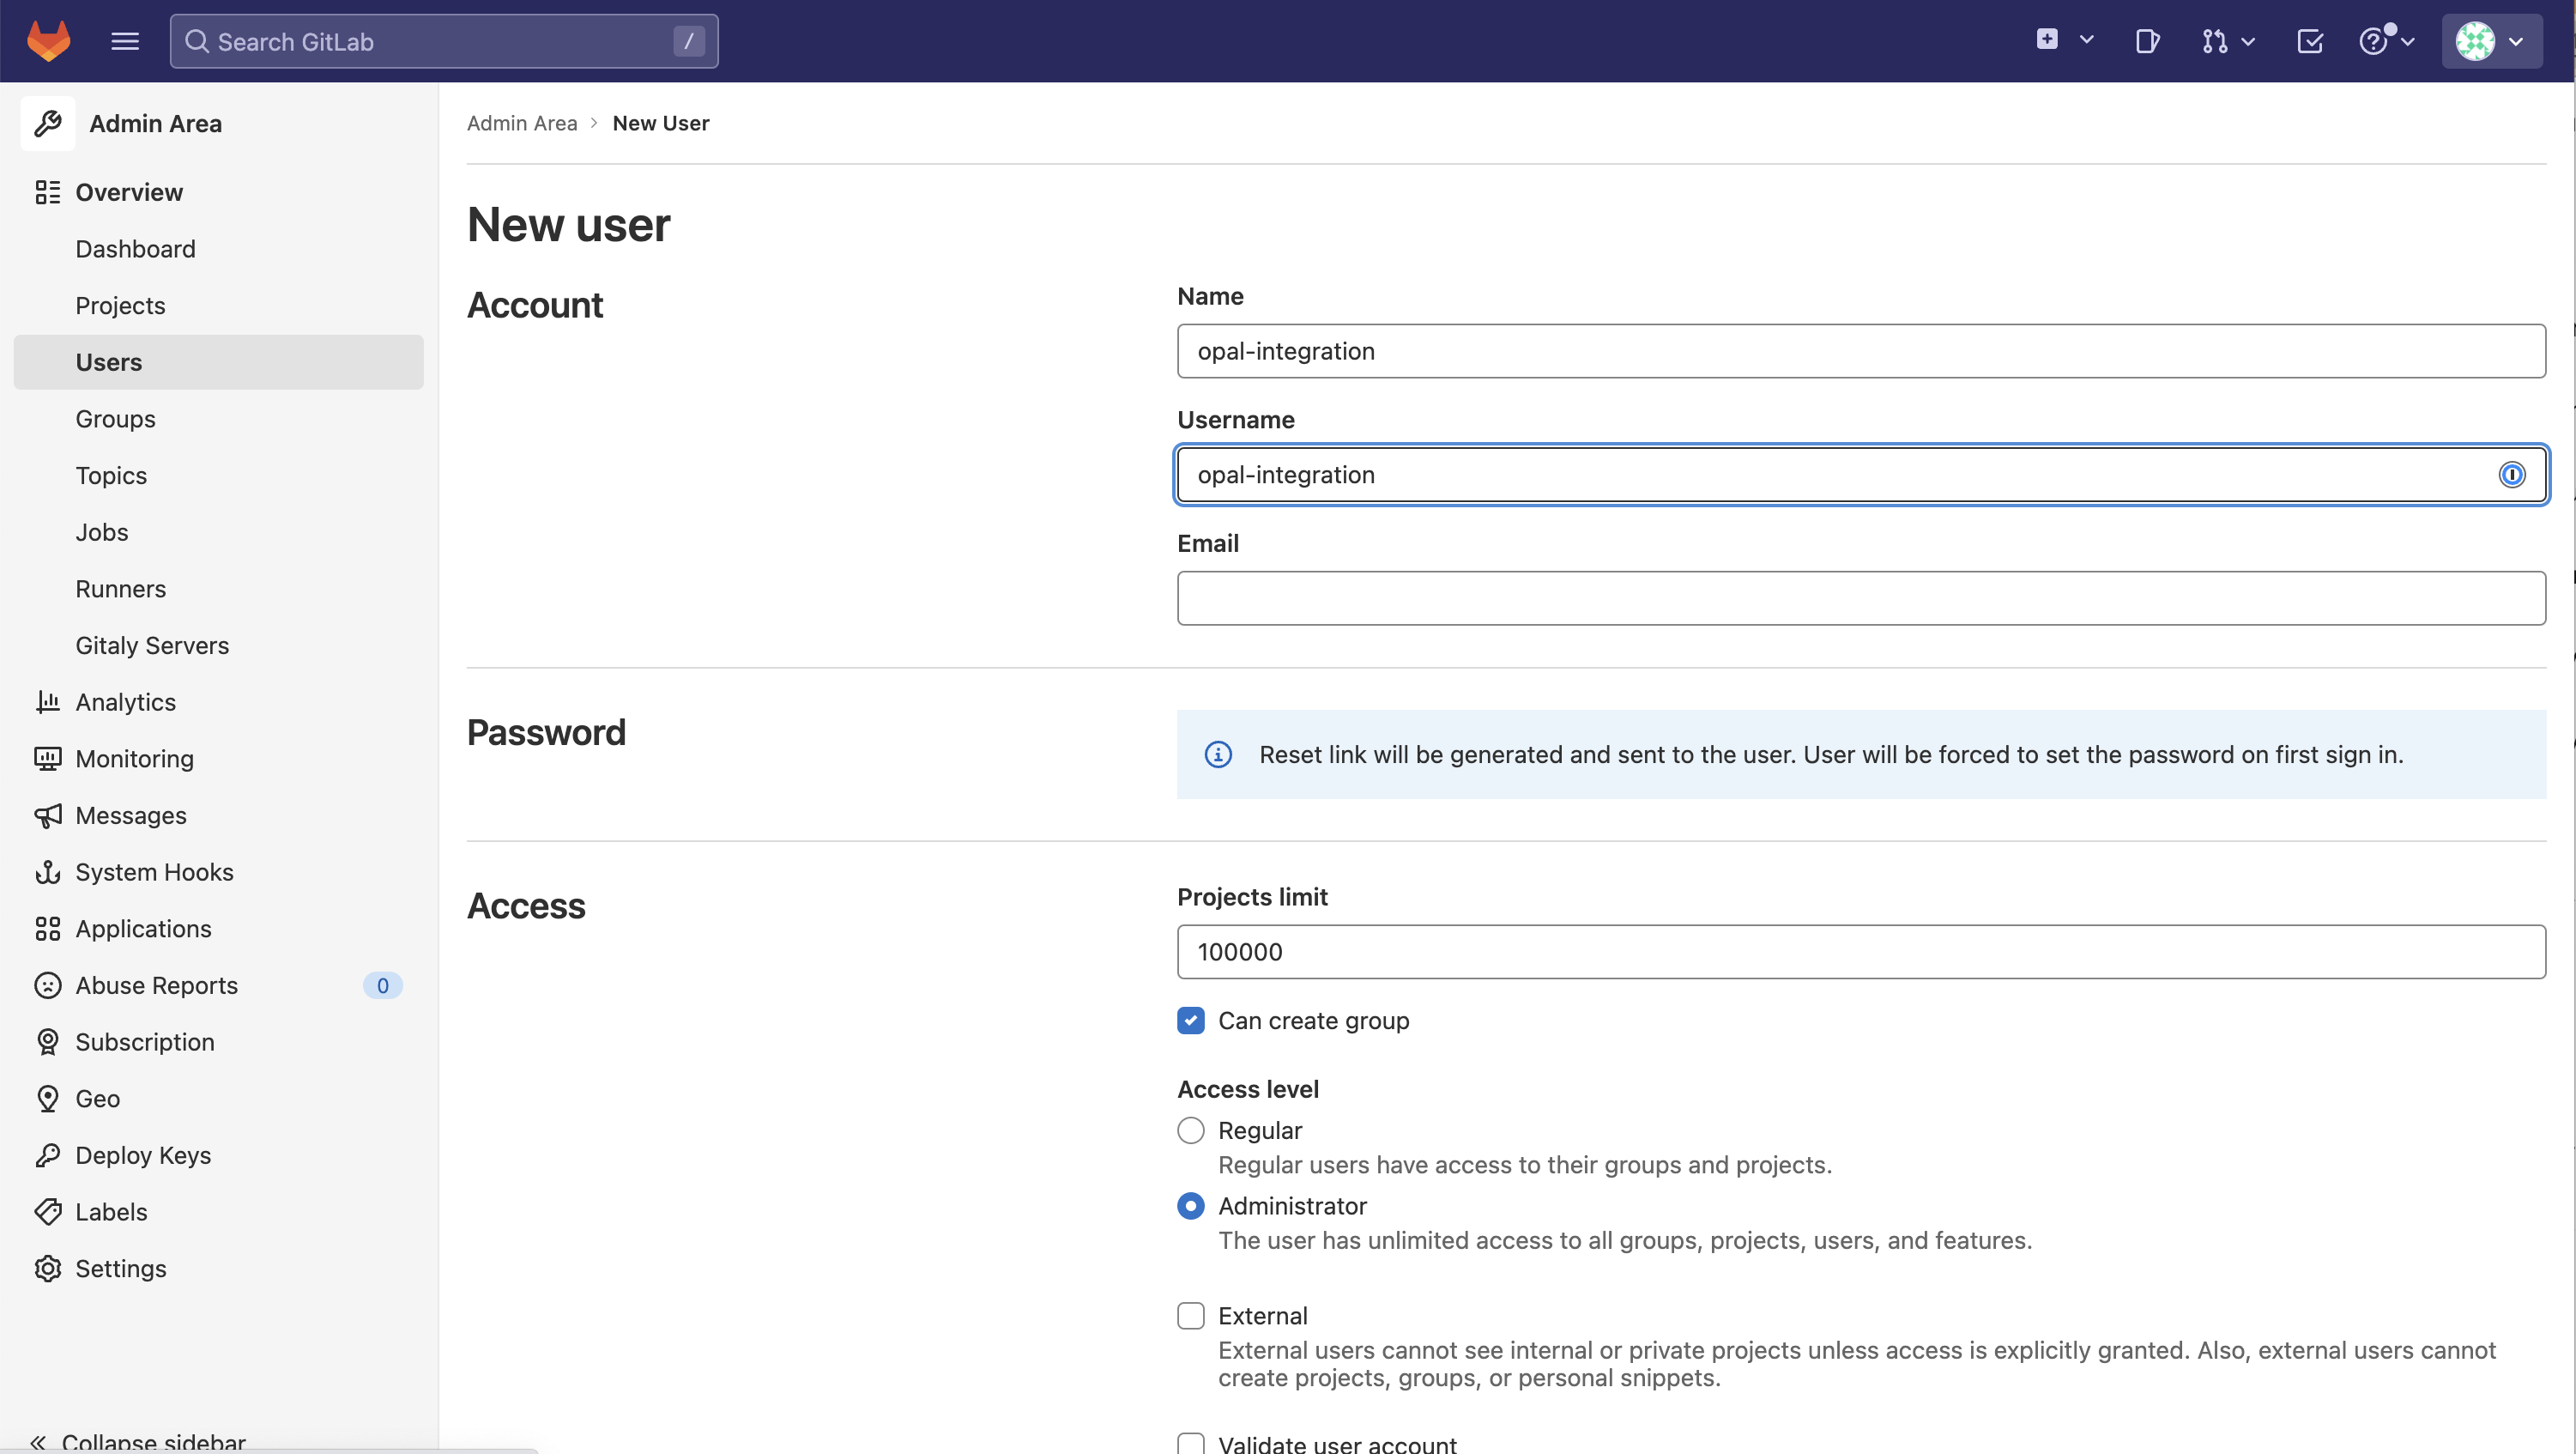
Log into your self-managed GitLab instance as an admin, and go to the **Admin Area** section by from the **Main menu > Admin Area > Users**.
Create a new user and appoint the new user with the access level **Administrator**.
### GitLab Self-Managed
Log into your self-managed GitLab instance as an admin, and go to the **Admin Area** section by from the **Main menu > Admin Area > Users**.
Create a new user and appoint the new user with the access level **Administrator**.
 ## 2. Create a GitLab OAuth app
Opal requires an Application to be set up on GitLab to handle projects and groups synchronization, as well as user pairing.
### GitLab.com
Follow the [instructions in GitLab](https://docs.gitlab.com/ee/integration/oauth_provider.html#group-owned-applications) to create a new OAuth App in your top-level GitLab group.
## 2. Create a GitLab OAuth app
Opal requires an Application to be set up on GitLab to handle projects and groups synchronization, as well as user pairing.
### GitLab.com
Follow the [instructions in GitLab](https://docs.gitlab.com/ee/integration/oauth_provider.html#group-owned-applications) to create a new OAuth App in your top-level GitLab group.
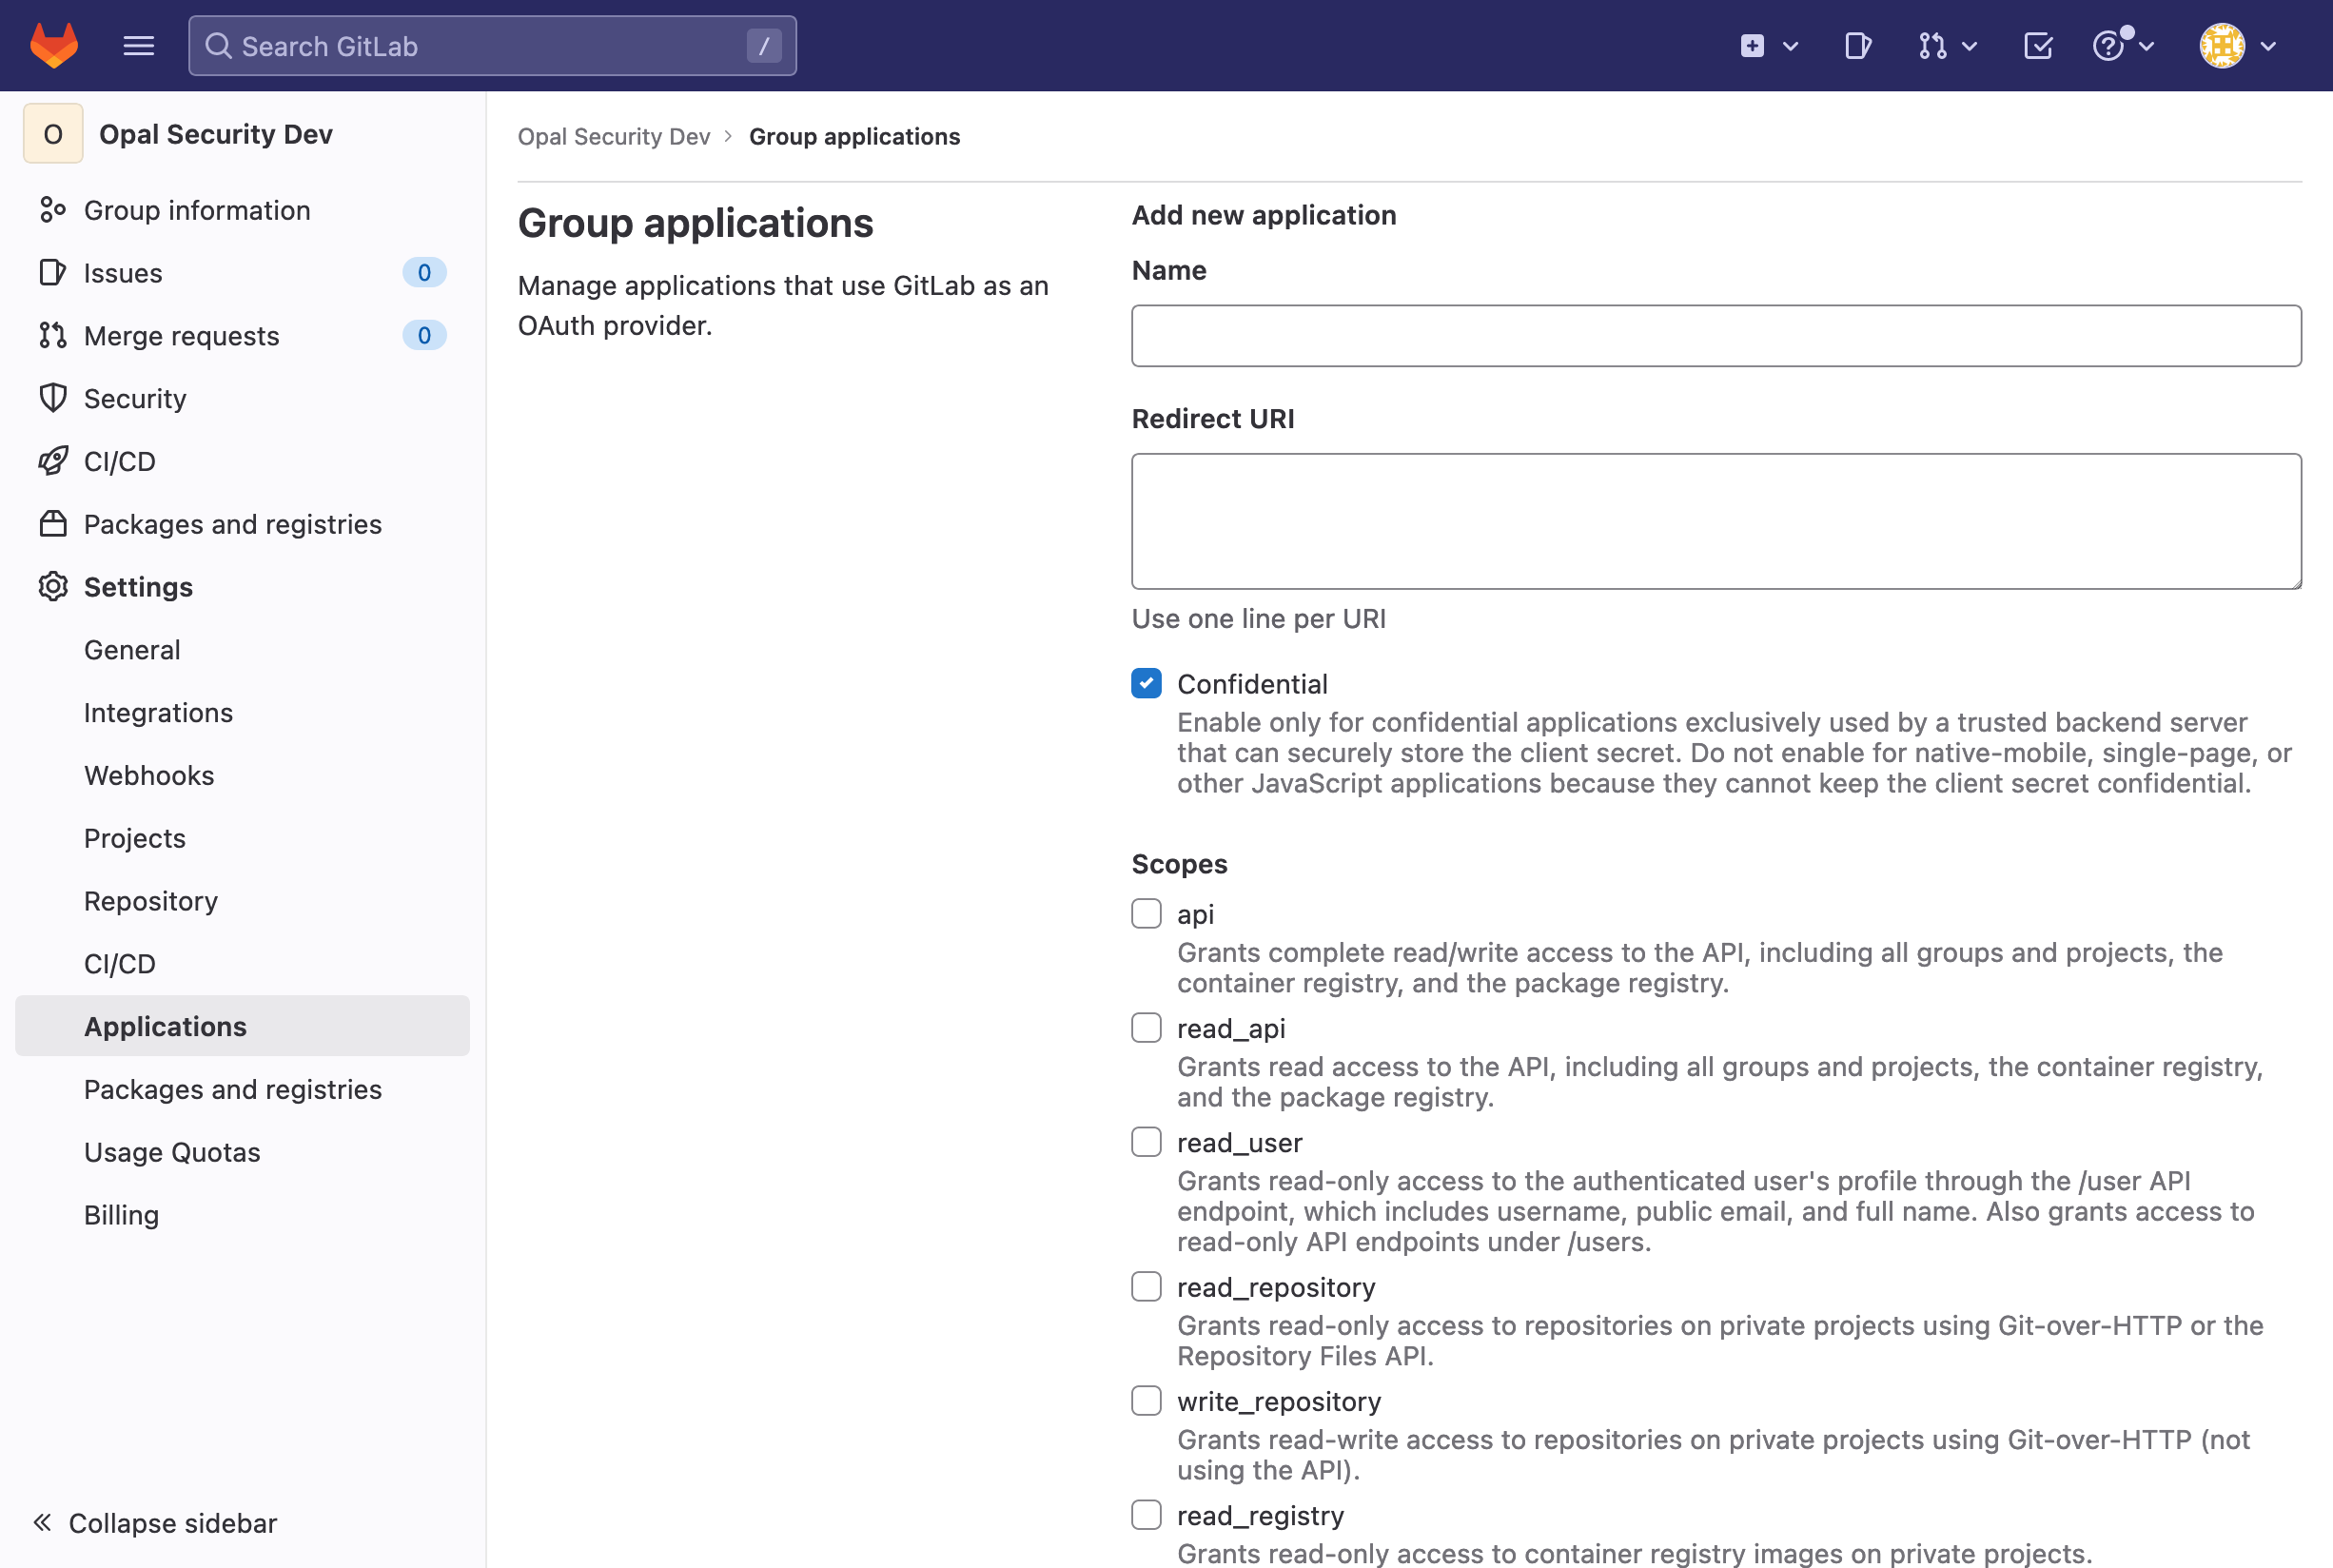 During the OAuth app creation process, for **Name**, you can enter **Opal** or any name you prefer.
For **Redirect** **URL**, enter your domain name, followed by`/callback/gitlab/` e.g., `https://app.opal.dev/callback/gitlab/`. On a new line, enter your domain name, followed by `/callback/gitlab-connection/`, e.g., `https://app.opal.dev/callback/gitlab-connection/`.
The backlashes at the end of these two *Redirect URLs* are very important to
GitLab, so ensure you include them.
Set the app as **Trusted** and **Confidential**. Under **Scopes**, select **api**, **profile**, and **email**.
After creating your app, record the Application ID and copy the **secret**. These are used in the **Application ID** and **Application Secret** fields in Step 3.
### GitLab Self-Managed
Follow the [instructions in GitLab](https://docs.gitlab.com/ee/integration/oauth_provider.html#instance-wide-applications) to create a new OAuth App in your GitLab Self-Managed instance.
During the OAuth app creation process, for **Name**, you can enter **Opal** or any name you prefer.
For **Redirect** **URL**, enter your domain name, followed by`/callback/gitlab/` e.g., `https://app.opal.dev/callback/gitlab/`. On a new line, enter your domain name, followed by `/callback/gitlab-connection/`, e.g., `https://app.opal.dev/callback/gitlab-connection/`.
The backlashes at the end of these two *Redirect URLs* are very important to
GitLab, so ensure you include them.
Set the app as **Trusted** and **Confidential**. Under **Scopes**, select **api**, **profile**, and **email**.
After creating your app, record the Application ID and copy the **secret**. These are used in the **Application ID** and **Application Secret** fields in Step 3.
### GitLab Self-Managed
Follow the [instructions in GitLab](https://docs.gitlab.com/ee/integration/oauth_provider.html#instance-wide-applications) to create a new OAuth App in your GitLab Self-Managed instance.
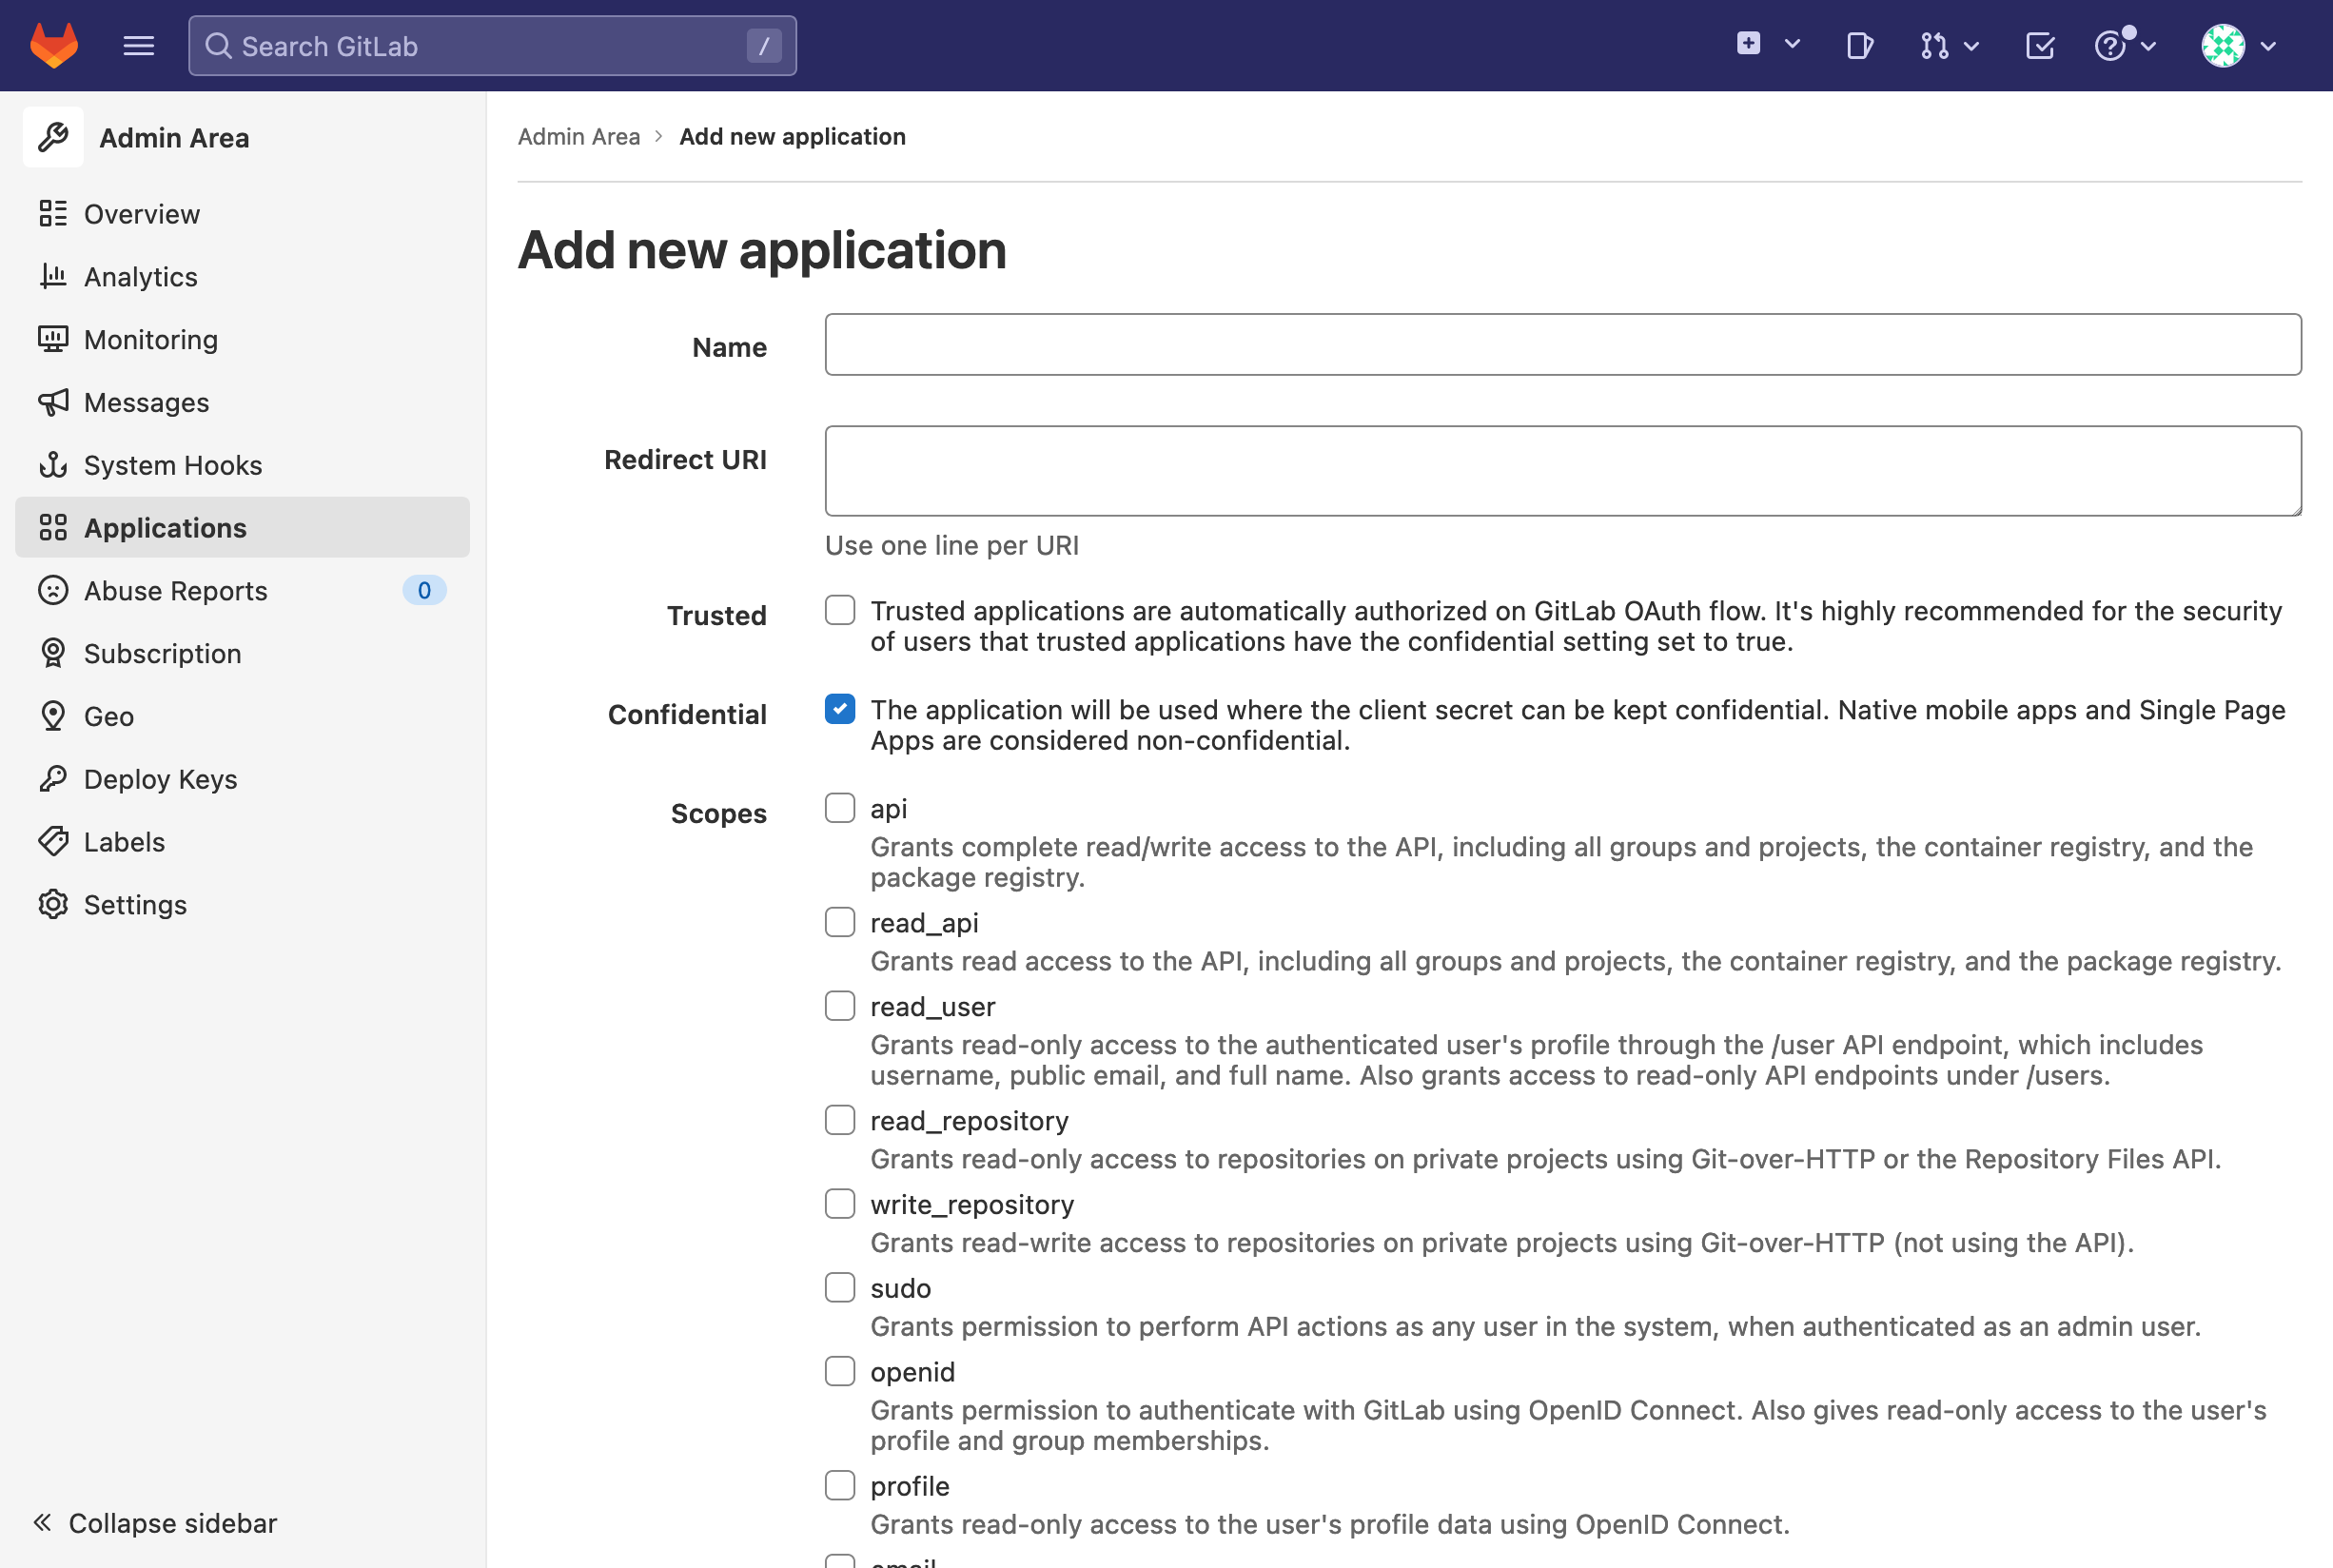 For **Redirect** **URL**, enter your domain name, followed by`/callback/gitlab/` e.g., `https://app.opal.dev/callback/gitlab/`. On a new line, enter your domain name, followed by `/callback/gitlab-connection/`, e.g., `https://app.opal.dev/callback/gitlab-connection/`.
Set the app as **Trusted** and **Confidential**. Under **Scopes**, select **api**, **profile**, and **email**.
The backlashes at the end of these two *Redirect URLs* are very important to
GitLab, so ensure you include them.
After your app is created, record the Application ID and copy the secret. These are used in the **Application ID** and **Application Secret** fields in Step 3.
## 3. Create an Opal app
Go to the **Inventory** page and select **+ App**. Then select the **GitLab** tile.
For **Redirect** **URL**, enter your domain name, followed by`/callback/gitlab/` e.g., `https://app.opal.dev/callback/gitlab/`. On a new line, enter your domain name, followed by `/callback/gitlab-connection/`, e.g., `https://app.opal.dev/callback/gitlab-connection/`.
Set the app as **Trusted** and **Confidential**. Under **Scopes**, select **api**, **profile**, and **email**.
The backlashes at the end of these two *Redirect URLs* are very important to
GitLab, so ensure you include them.
After your app is created, record the Application ID and copy the secret. These are used in the **Application ID** and **Application Secret** fields in Step 3.
## 3. Create an Opal app
Go to the **Inventory** page and select **+ App**. Then select the **GitLab** tile.
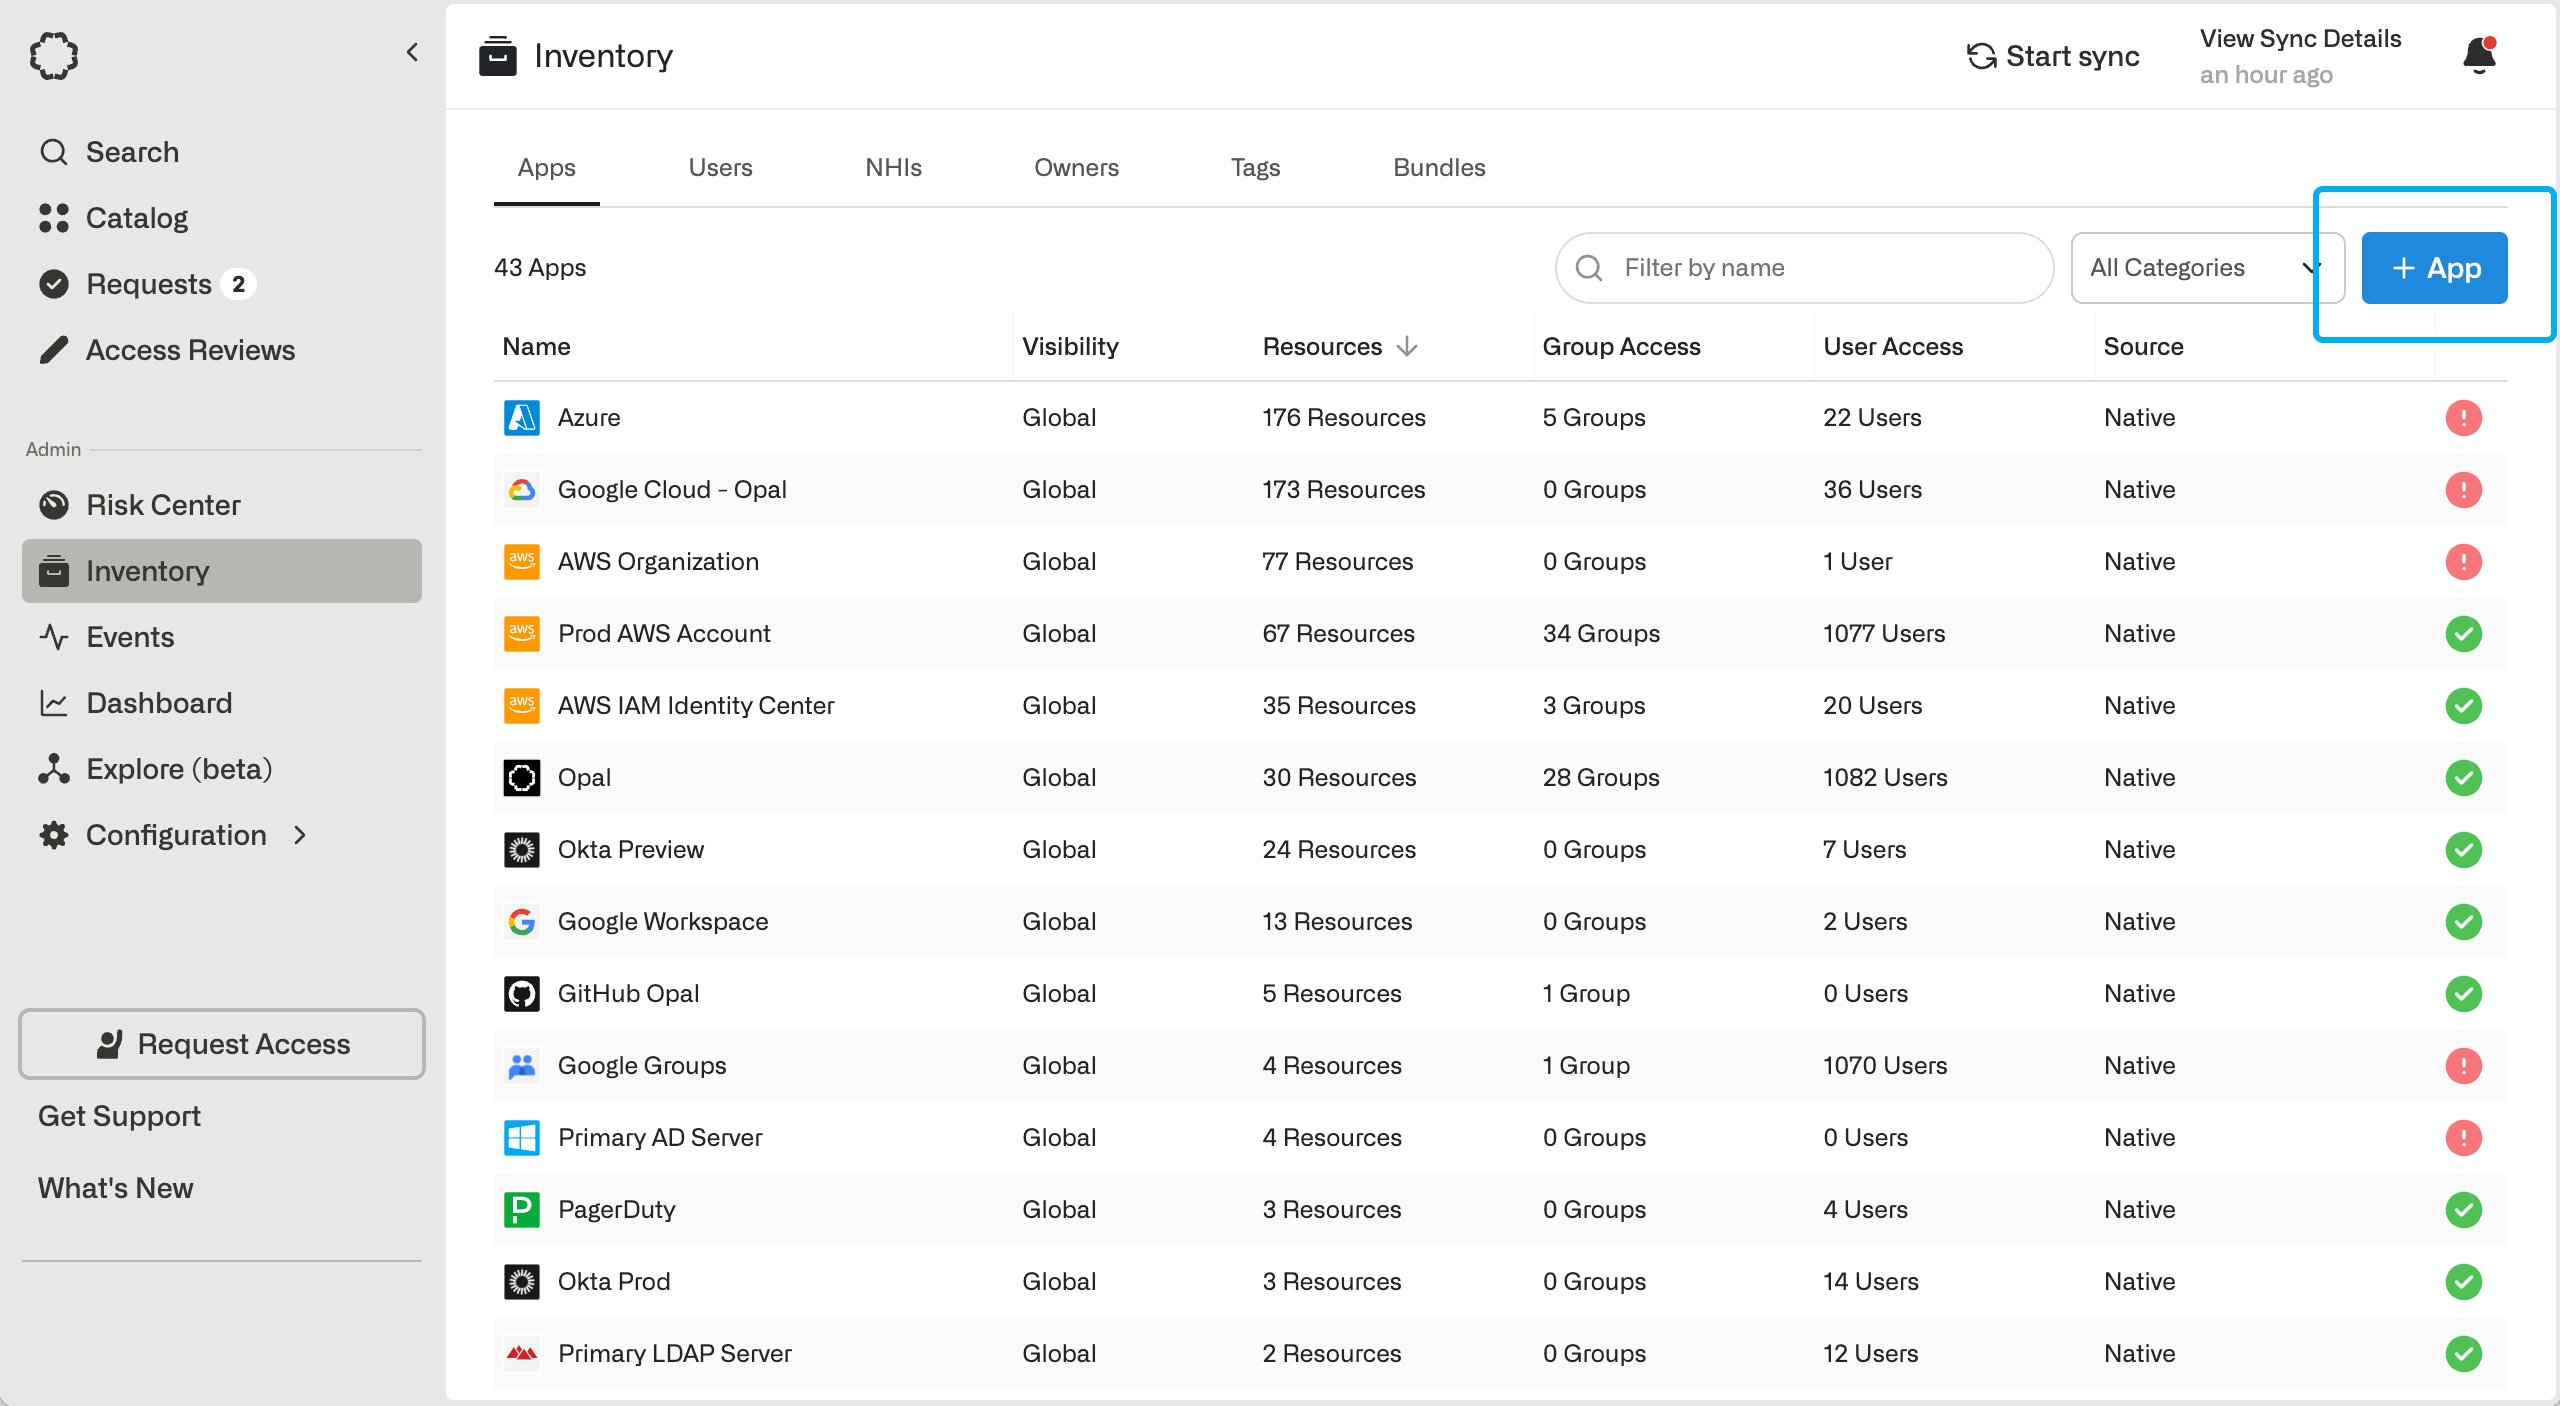 If you use **GitLab Self-Managed**, click on **Custom Domain** and enter the domain of your instance.
For **App ID** and **App Secret**, use the generated credentials from Step 2.
If this step is successful, you then need to create a sync token.
Click on the **Setup** tab in the App overview page, and click on **Connect OAuth Admin Token**. This will redirect you to your Gitlab instance and you should use the GitLab account created in Step 1 to complete the OAuth flow.
For **GitLab Self-Managed**, sync should start working automatically.
For **GitLab.com**, every Opal user in your organization must complete the following step to permit access management to your repositories in Opal.
## 4. Link GitLab identities to Opal accounts (GitLab.com only)
To enable Opal to manage access to GitLab.com, each user must link their GitLab account to their Opal account.
Opal requires this step because GitLab only makes the email address of a GitLab account available via its API if a user has elected to publicly display their email address. Thus, Opal needs another way to match GitLab identities with Opal accounts. For security reasons, users must log in to both Opal and GitLab to link their accounts.
The following steps require that the GitLab account you want to integrate has
a verified email address corresponding to your Opal email address.
1. In the bottom left, click your **User** > **Account Settings**.
If you use **GitLab Self-Managed**, click on **Custom Domain** and enter the domain of your instance.
For **App ID** and **App Secret**, use the generated credentials from Step 2.
If this step is successful, you then need to create a sync token.
Click on the **Setup** tab in the App overview page, and click on **Connect OAuth Admin Token**. This will redirect you to your Gitlab instance and you should use the GitLab account created in Step 1 to complete the OAuth flow.
For **GitLab Self-Managed**, sync should start working automatically.
For **GitLab.com**, every Opal user in your organization must complete the following step to permit access management to your repositories in Opal.
## 4. Link GitLab identities to Opal accounts (GitLab.com only)
To enable Opal to manage access to GitLab.com, each user must link their GitLab account to their Opal account.
Opal requires this step because GitLab only makes the email address of a GitLab account available via its API if a user has elected to publicly display their email address. Thus, Opal needs another way to match GitLab identities with Opal accounts. For security reasons, users must log in to both Opal and GitLab to link their accounts.
The following steps require that the GitLab account you want to integrate has
a verified email address corresponding to your Opal email address.
1. In the bottom left, click your **User** > **Account Settings**.
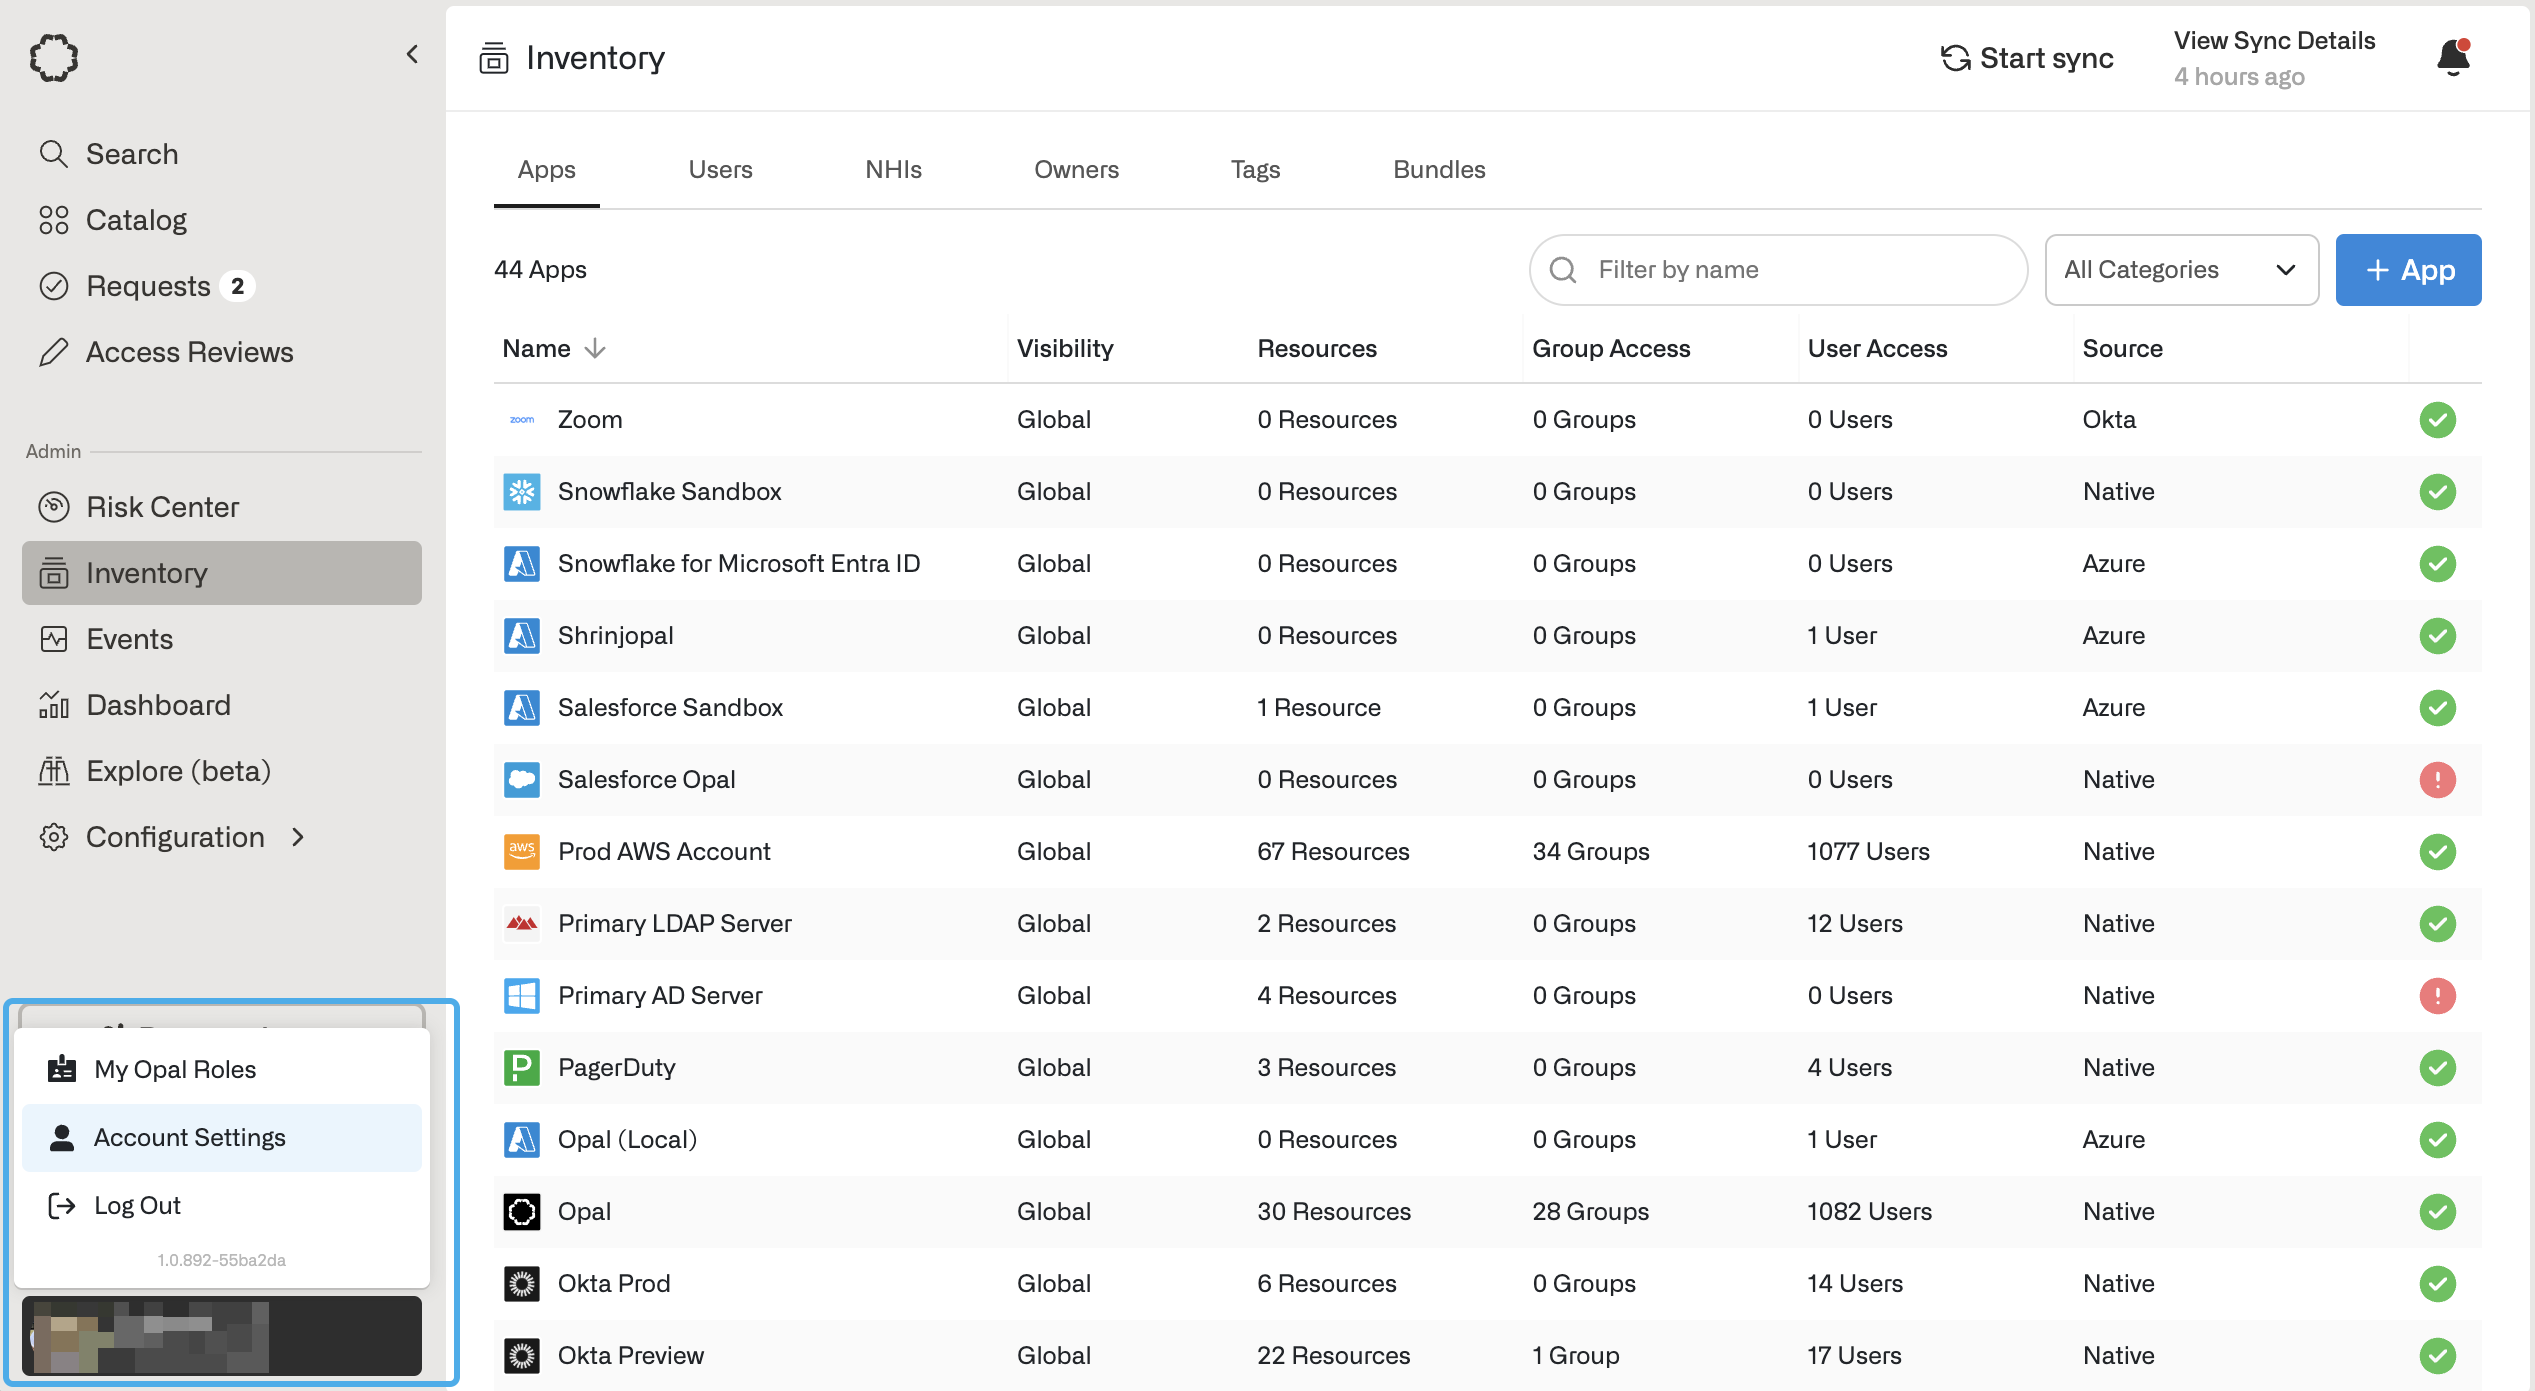 2. Click **Connect** next to the GitLab integration.
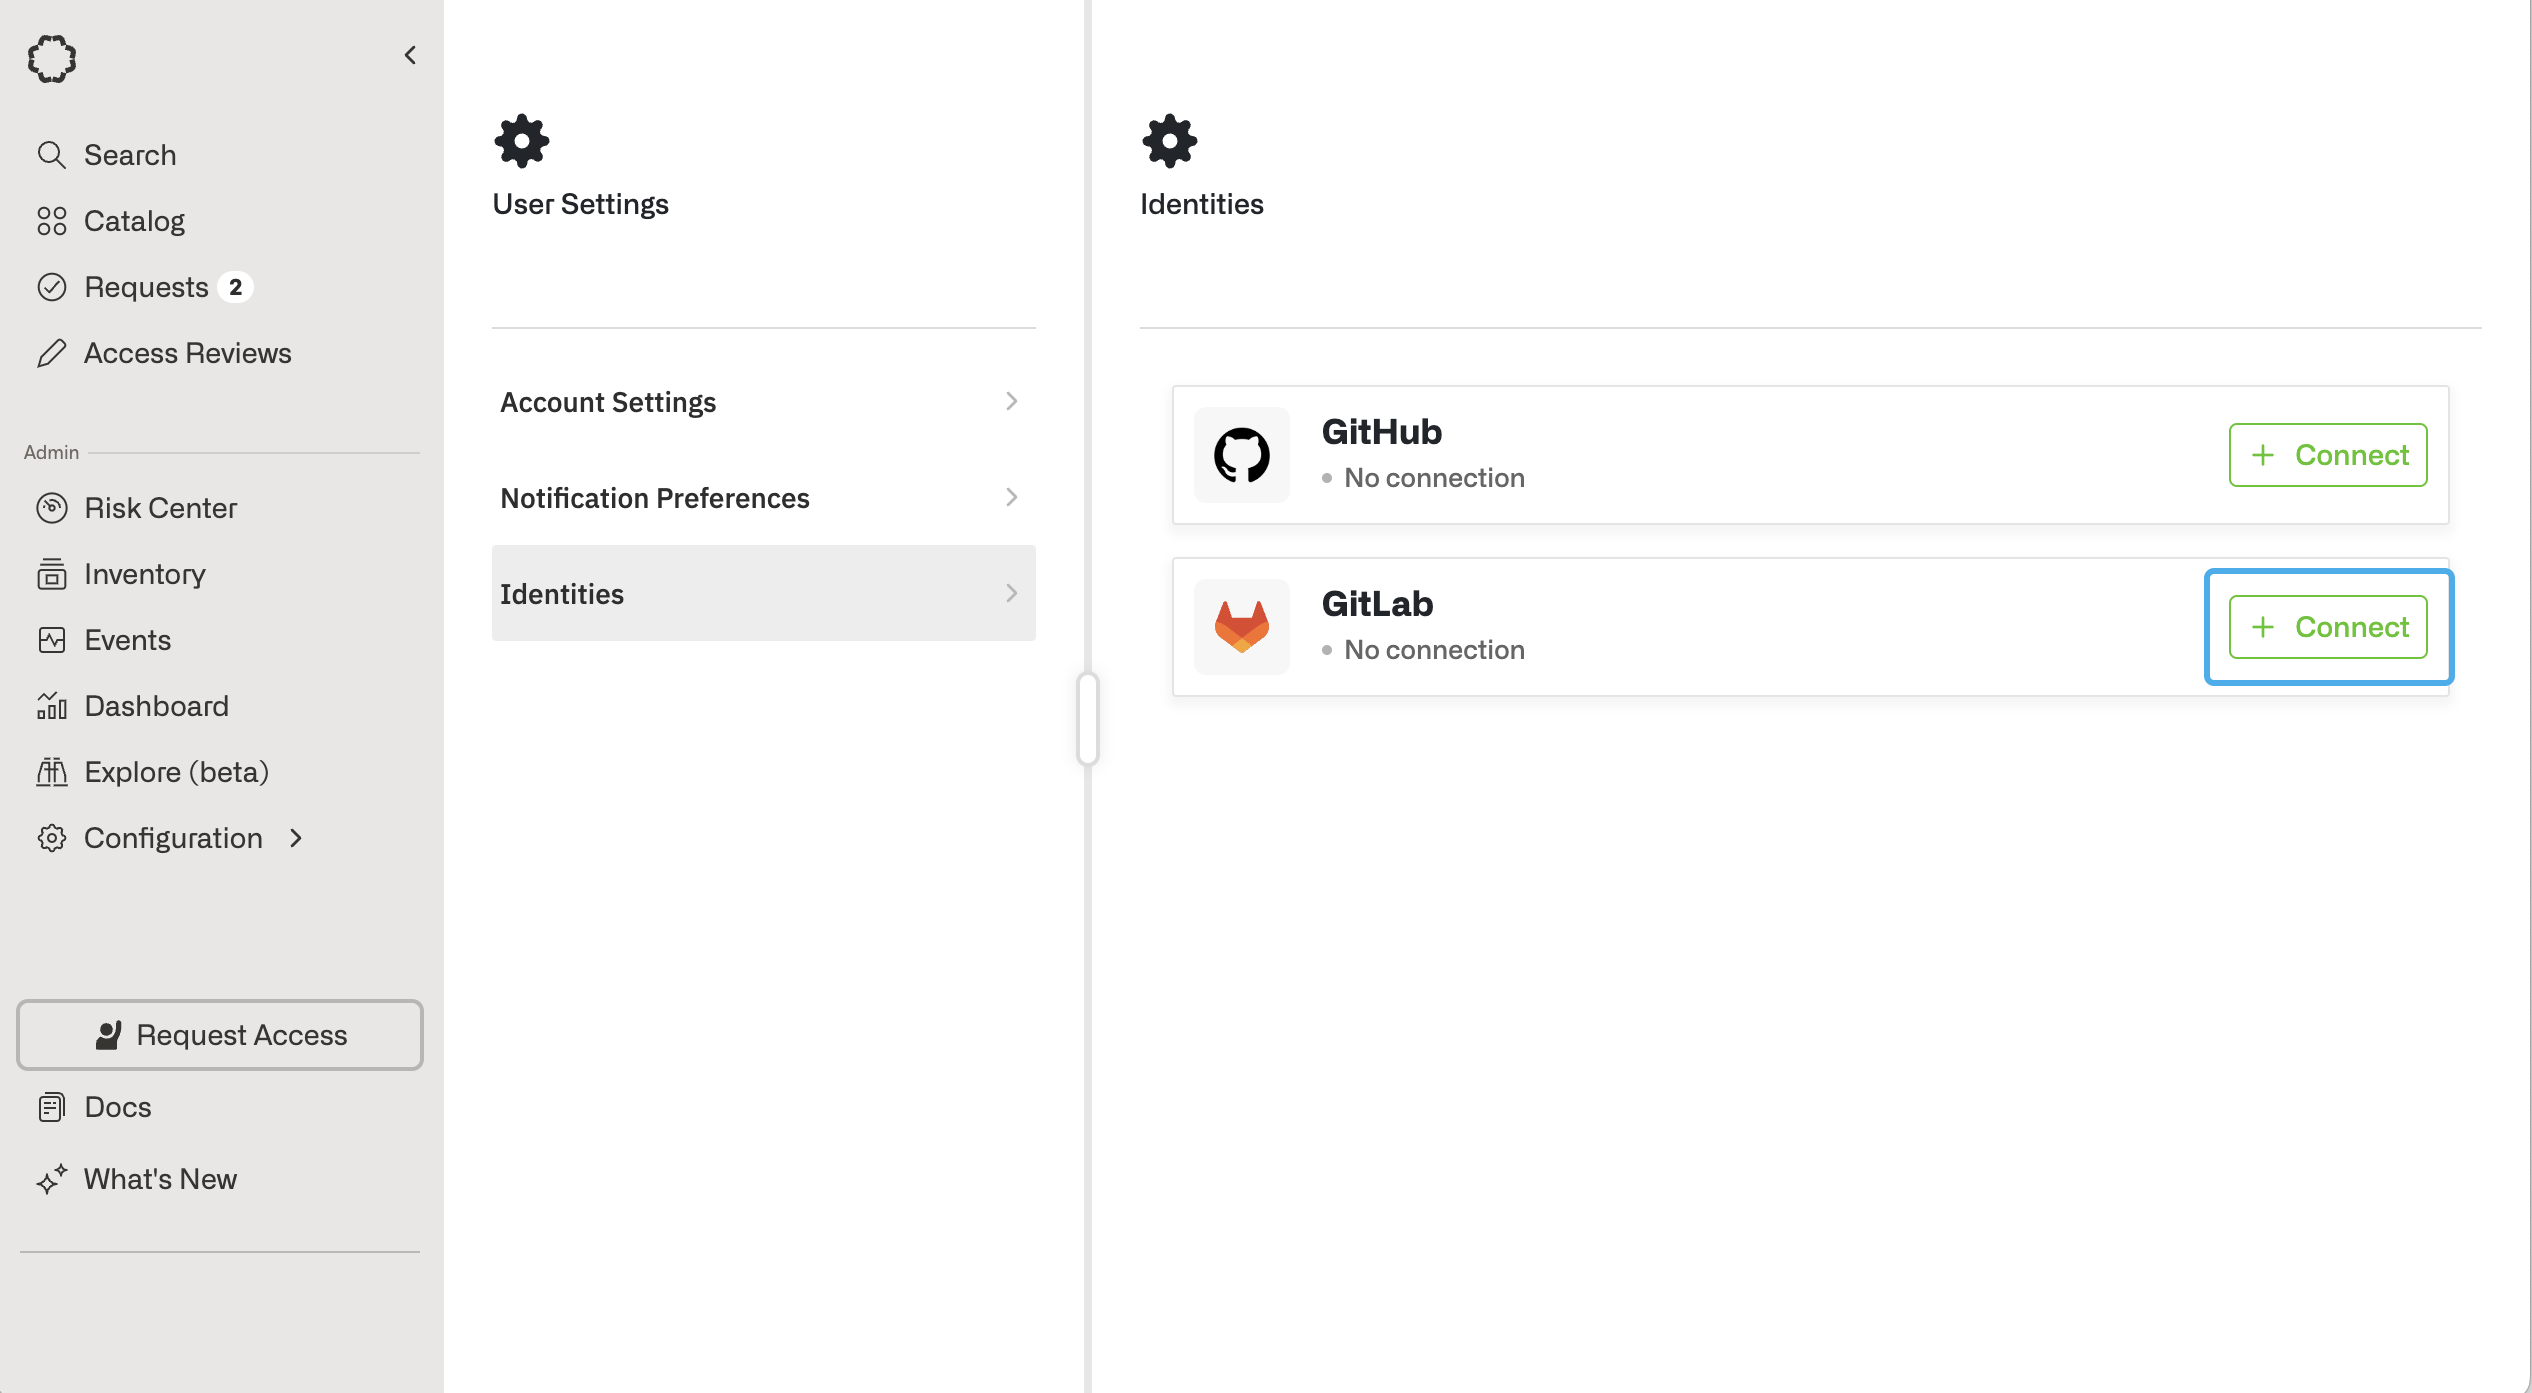 3. You will be redirected to a GitLab.com page, which will ask you to log into your GitLab account.