> ## Documentation Index
> Fetch the complete documentation index at: https://docs.opal.dev/llms.txt
> Use this file to discover all available pages before exploring further.
# Okta SCIM: Provision Opal Users
For most use cases, you probably don't need to use Okta SCIM provisioning. Opal will automatically sync new users and profile updates from Okta.
SCIM provisioning is useful if you cannot wait for the [hourly or a manual sync](/docs/sync-schedules-and-triggers) to retrieve new users.
This guide provides the steps required to configure User Provisioning from Okta to Opal.
The following provisioning features are supported:
* **Push new users**. New users created through Okta will also be created in Opal.
## Configuration steps in Opal
You must first connect [Okta as an IDP](/integrations/okta-idphris-integration) to use Okta SCIM provisioning.
Next, generate an Opal API token with admin level privileges.
As an admin, go to **Configuration > Settings > API Access Tokens**. Select the **+API Access Tokens** button. Generate a token with the **Full-access** role:
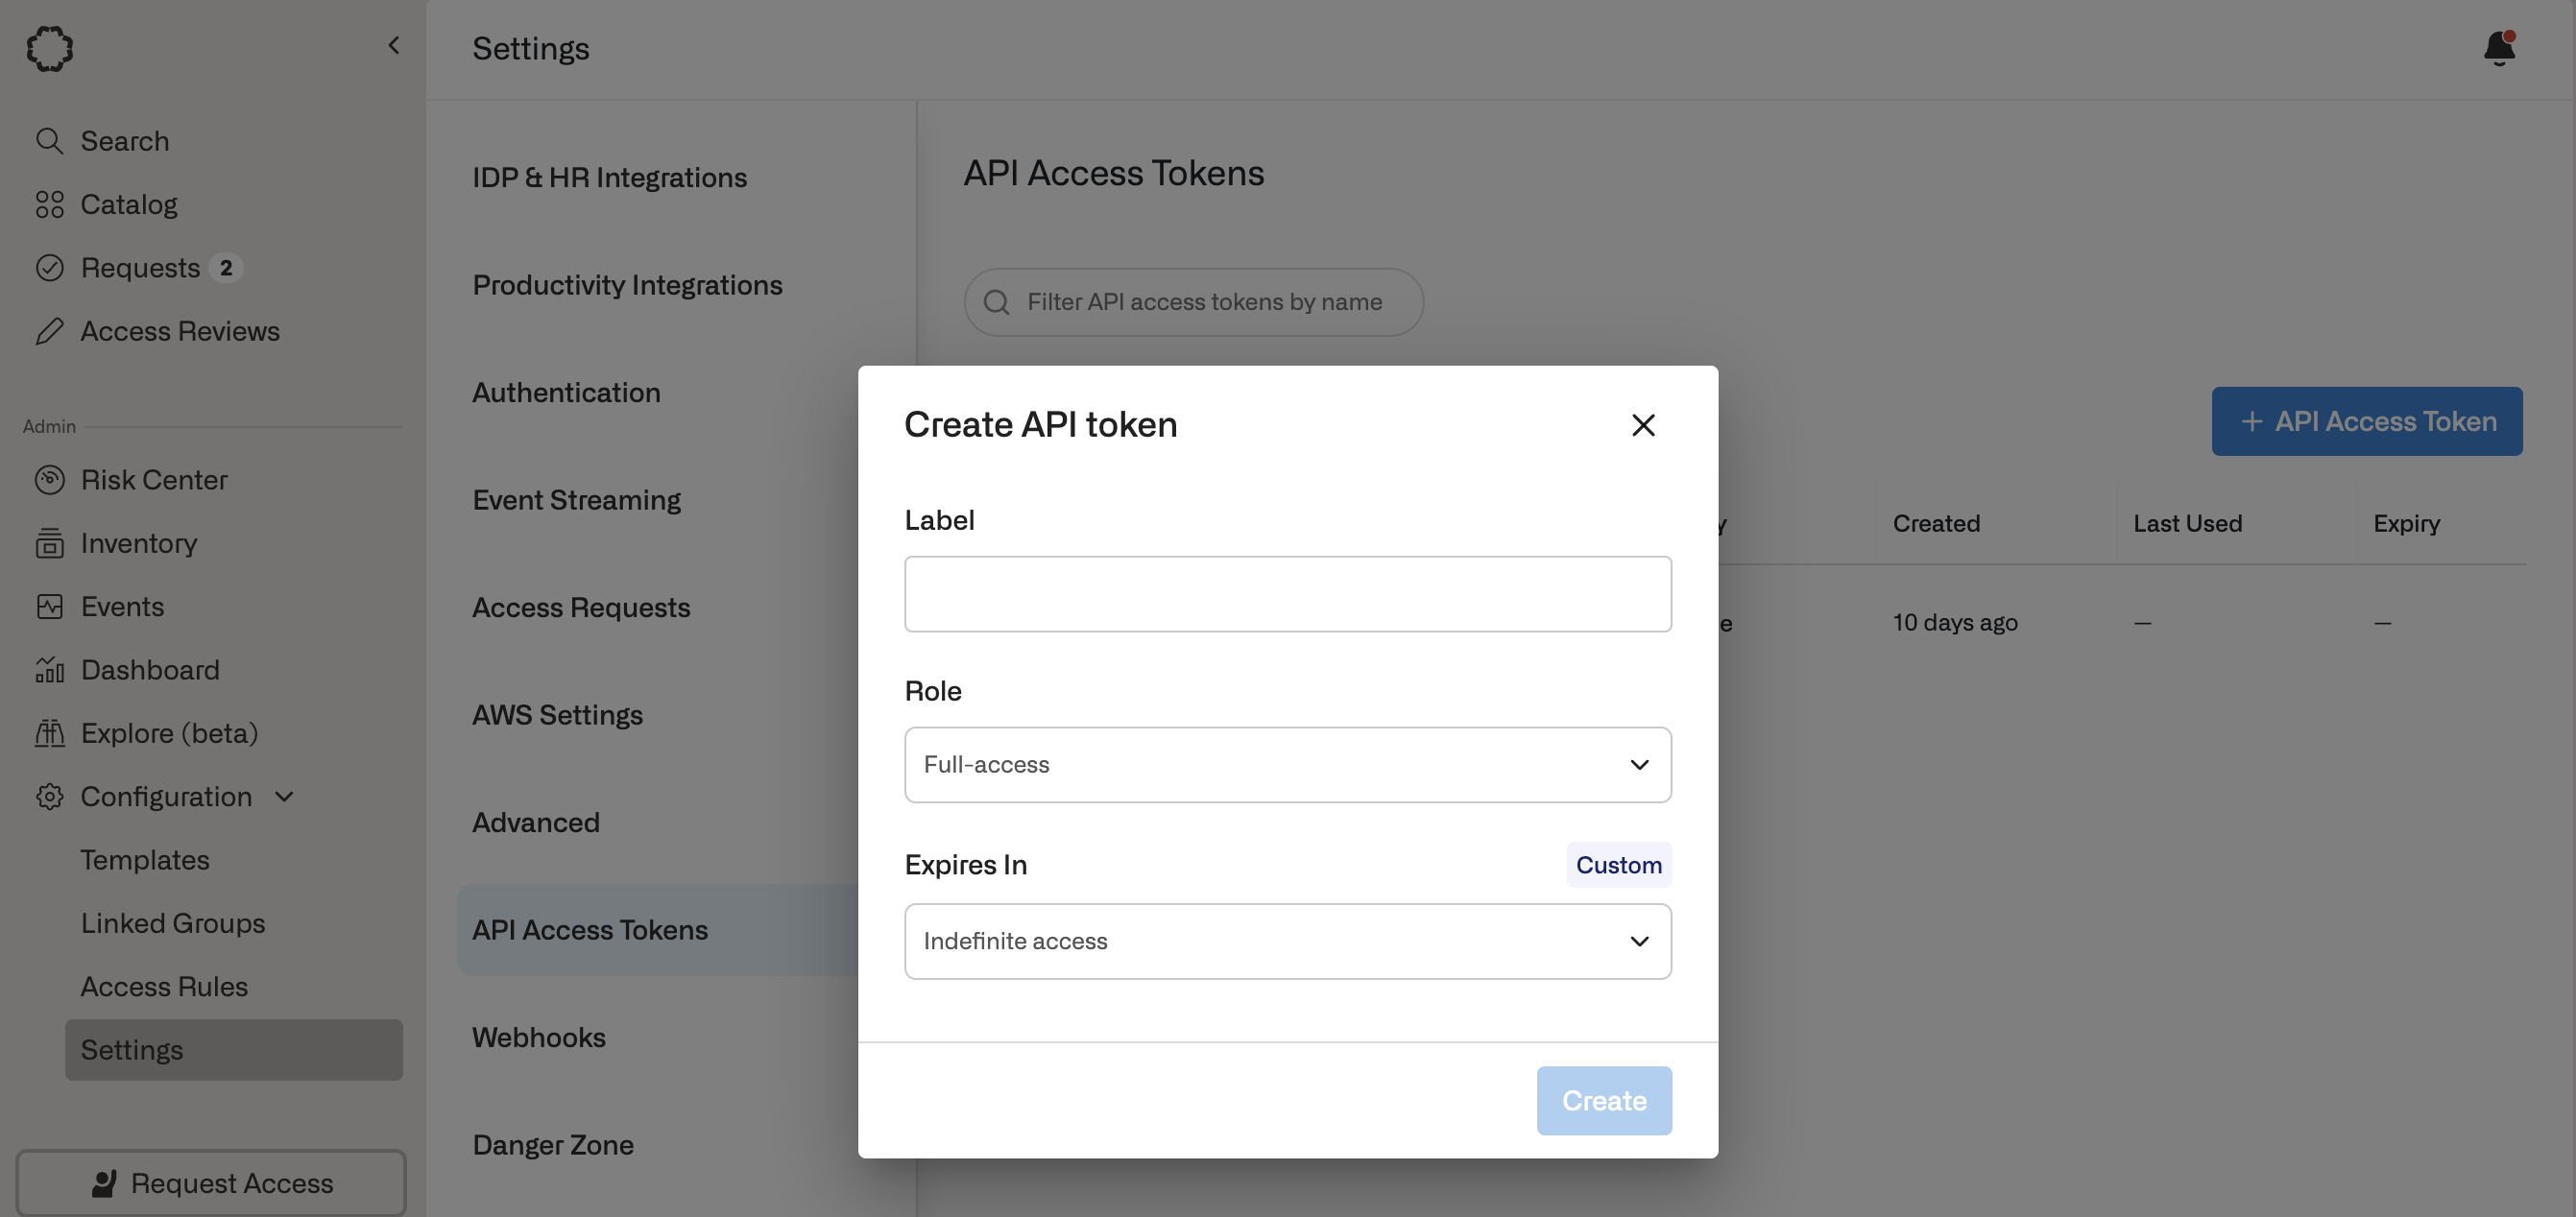 Save the generated token.
## Configuration steps in Okta
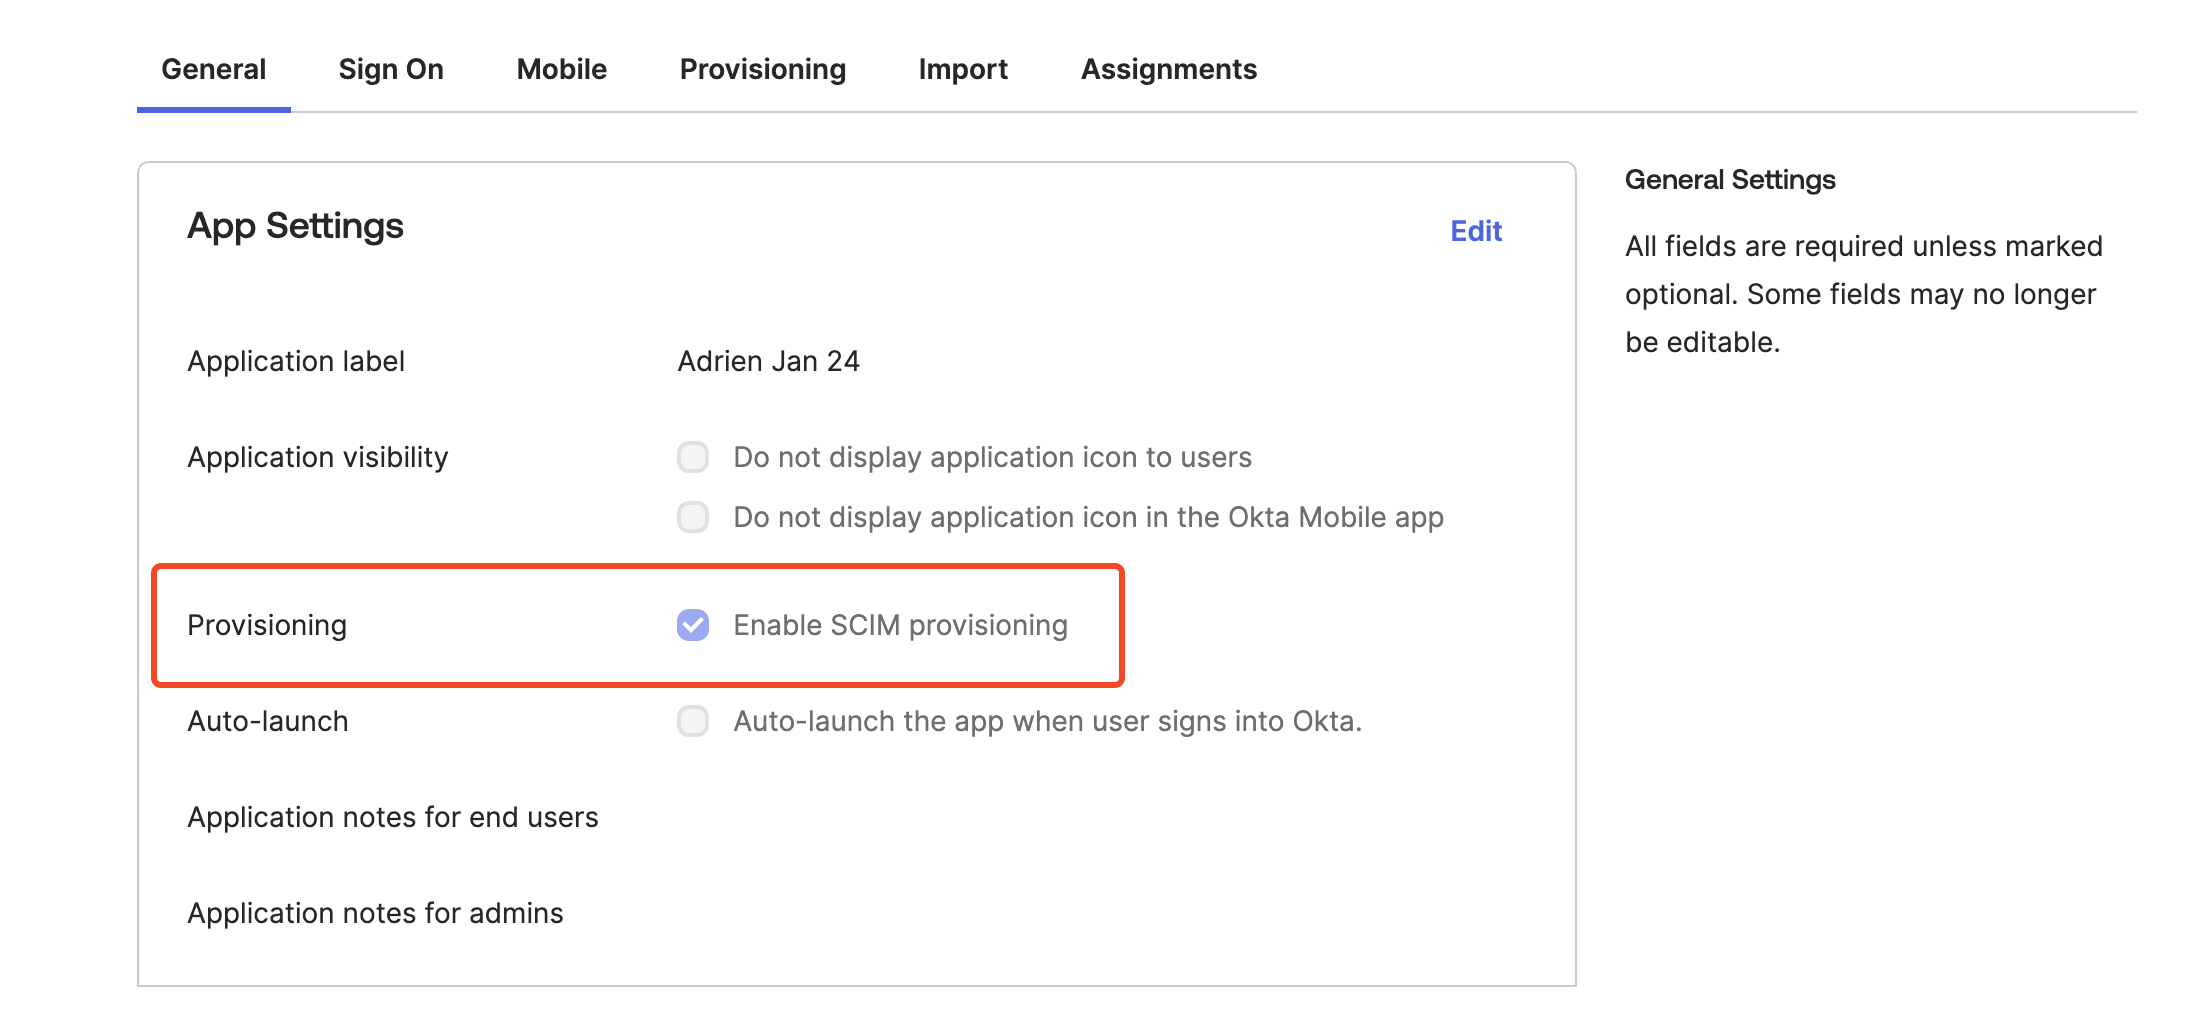
1. In Okta, go to **Applications** and select the Opal application. Under **General**, ensure **Enable SCIM provisioning** is selected.
Save the generated token.
## Configuration steps in Okta
1. In Okta, go to **Applications** and select the Opal application. Under **General**, ensure **Enable SCIM provisioning** is selected.
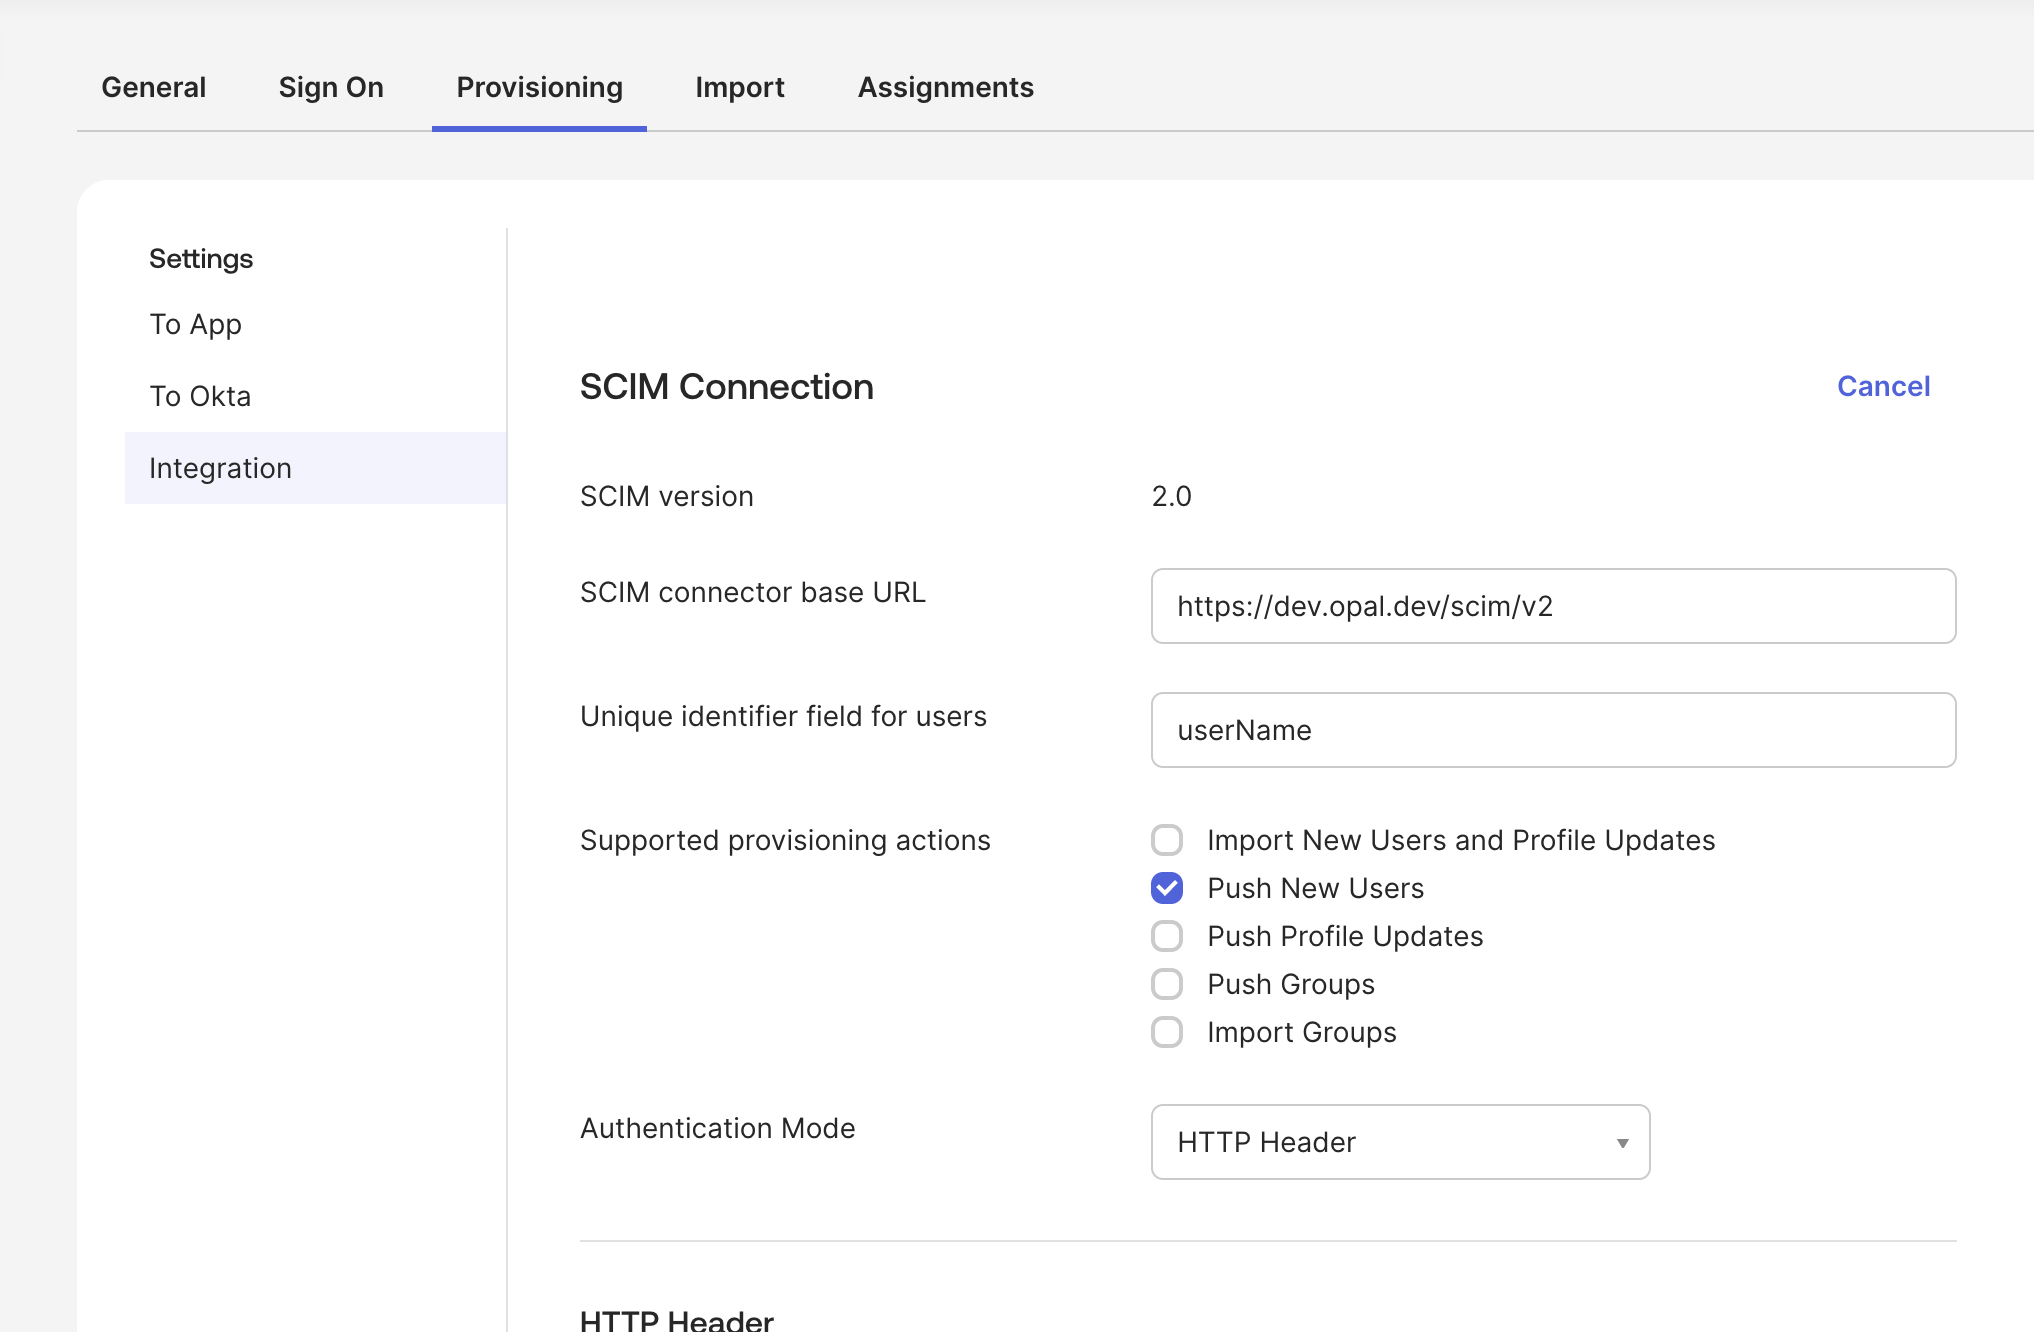
 2. Go to the **Provisioning** tab, then **Integration** on the left sidebar.
3. In the **SCIM connector base URL** field, enter the base URL of your Opal instance. For example, the Base URL field for the Opal Cloud instance is [https://app.opal.dev/scim/v2](https://app.opal.dev/scim/v2). Be sure to append `/scim/v2` to the base domain name.
4. Enter a unique identifier field for users, e.g., `userName`.
5. Under **Supported provisioning actions**, enable your preferred features.
6. Choose **HTTP Header** in the **Authentication Mode** section. In the **Token** field, enter the API token generated from Opal from the previous step.
7. Click **Save**.
2. Go to the **Provisioning** tab, then **Integration** on the left sidebar.
3. In the **SCIM connector base URL** field, enter the base URL of your Opal instance. For example, the Base URL field for the Opal Cloud instance is [https://app.opal.dev/scim/v2](https://app.opal.dev/scim/v2). Be sure to append `/scim/v2` to the base domain name.
4. Enter a unique identifier field for users, e.g., `userName`.
5. Under **Supported provisioning actions**, enable your preferred features.
6. Choose **HTTP Header** in the **Authentication Mode** section. In the **Token** field, enter the API token generated from Opal from the previous step.
7. Click **Save**.
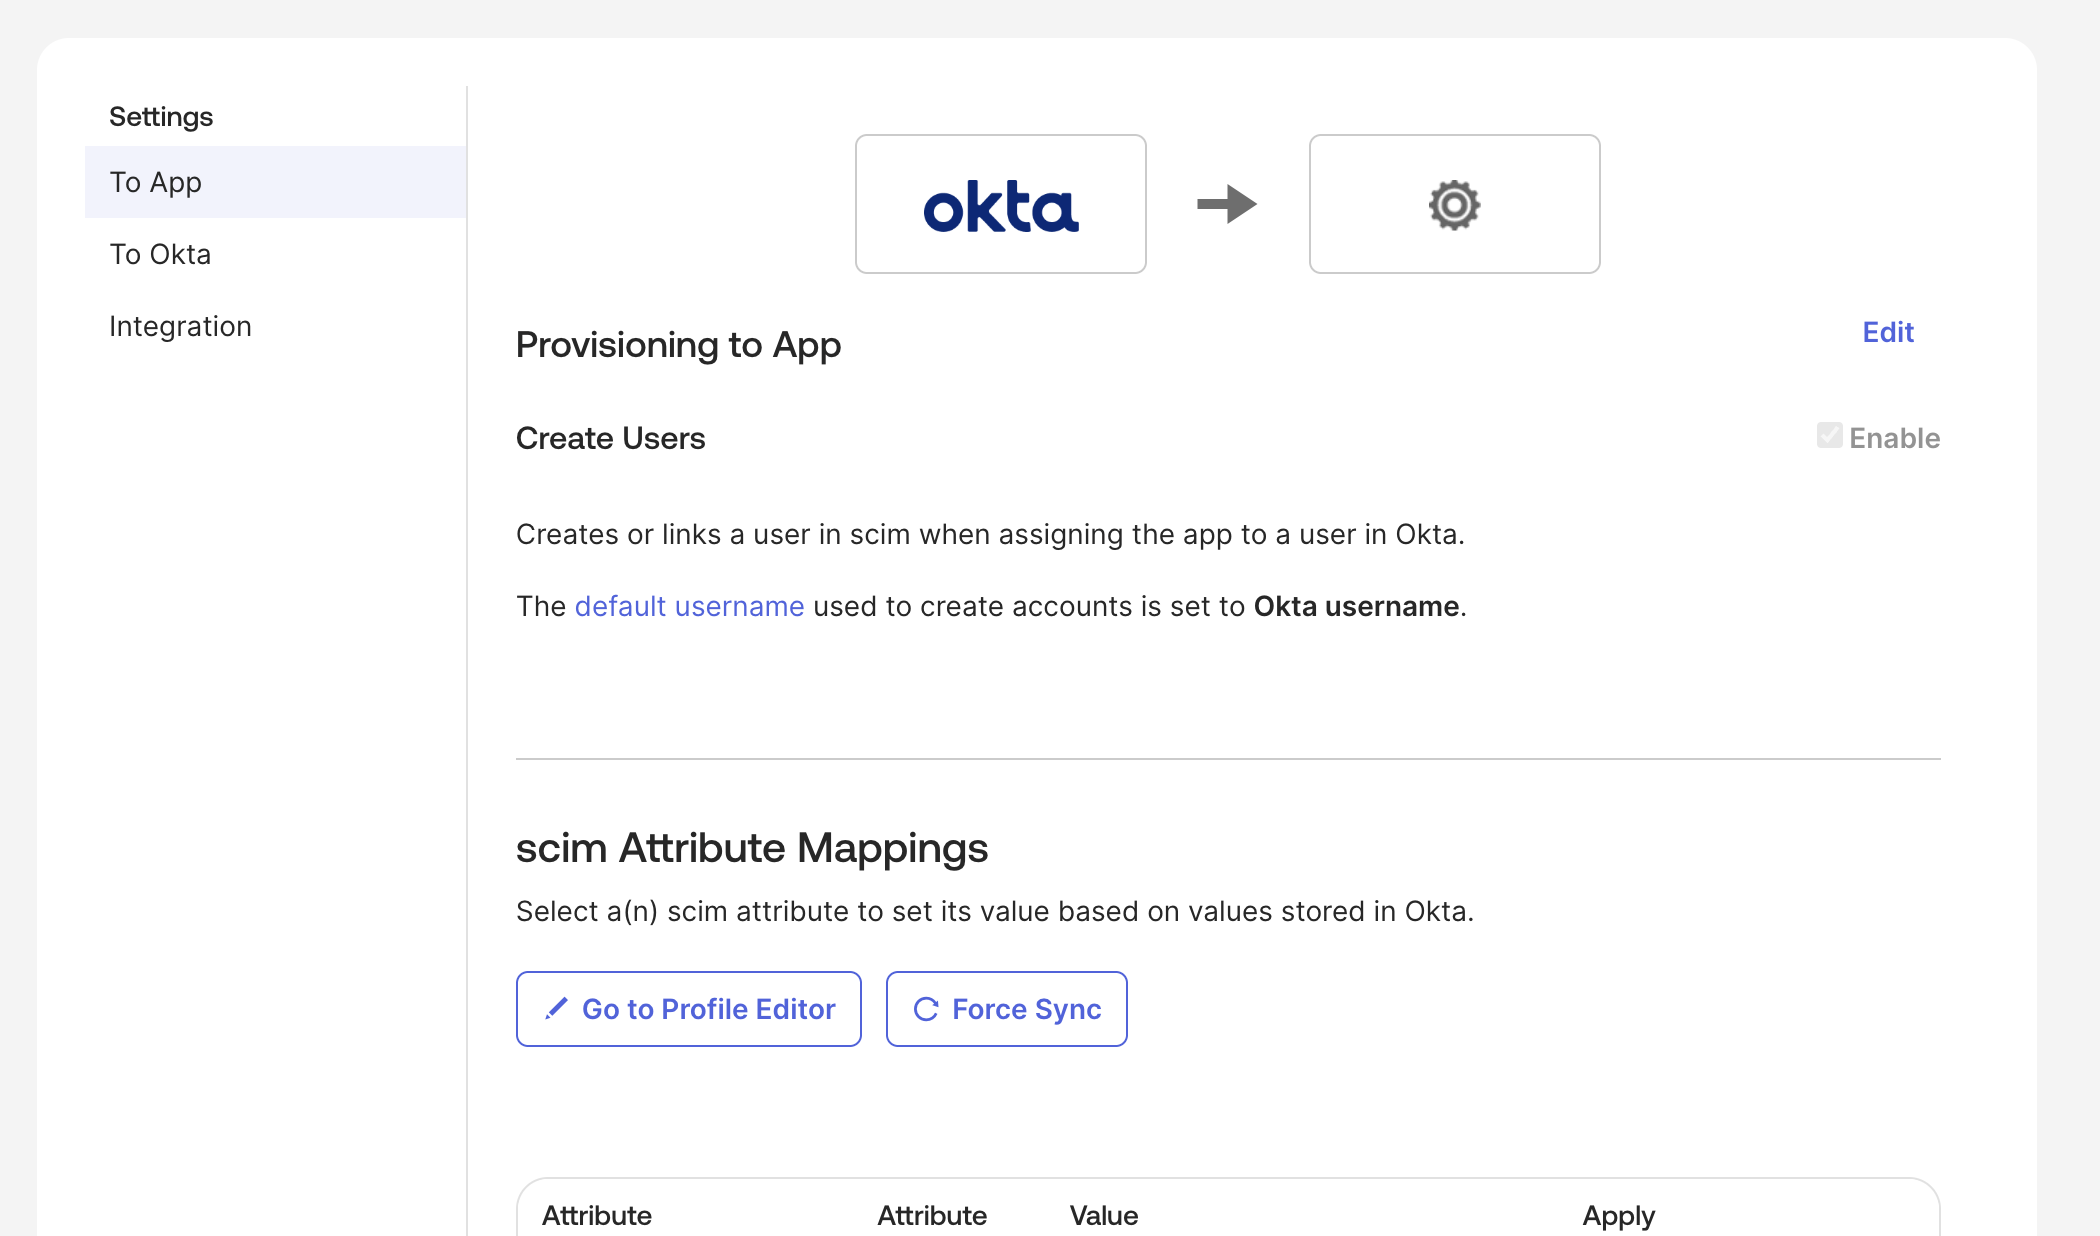
 8. In the **To App** tab, make sure Create New Users is enabled
 ## Troubleshooting
We do not support propagation of updates of the username/email of an Okta user to Opal.
***
## Troubleshooting
We do not support propagation of updates of the username/email of an Okta user to Opal.
***